Discord server setup
Discord server template
Here you can see how to configure a Discord server from scratch, by using one of our examples. Here you can find our Discord template, however it is not ready to use and there are some additional steps to take care of in order to have it properly set up for the public use. The bots described in the setup are ones proposed by us to use on the Discord server. You may use different bots for the same purpose or just use different purpose bots.
The Discord consists with the following channels:
- public channels:
#welcome- join channel, AltDentifier verification warnings gets dropped there,#rules- users can read the server rules here,#tf2news- a feed for the latest Discord updates from the most important places in the TF2 competitive world,#twitch- streaming feed from players residing on the server to others,#general- general purpose discussion channels,#memes- self-explanatory channel,#feedback- self-explanatory channel,#flex-time- a good place to post logs/clips/movies on which players has great scores,#mix-merc- a channel for looking for gamers for a mix/merc,
- private channels:
#carlbot-logs- all server related logs gets sent there,#altdentifier-logs- all AltDentifier logs are sent here, mostly related with the verifications of the Discord users,#moderation-notifications- all moderations such us (un)mutes/kicks/(un)bans gets logged there,#bot-notifications- moderation notification sent by the Discord due to a community setup are sent there along with the all Discord bot notifications such us updates or outages,#moderation-spam- a separate channel for the Discord administration letting them execute commands privately without having to spam an admin discussion channel,#pickup-notifications- all skill changes, force-closed games, (un)bans, role changes get logged there,#ticket-history- all Ticket Tool logs and ticket logs are sent there,#admins- private admin discussion channel,Admin(voice channel) - private admin discussion voice channel.
Additionally there is an empty tf2pickup.org support category for admin requests from the Ticket Tool. The server also contains the following roles in the final:
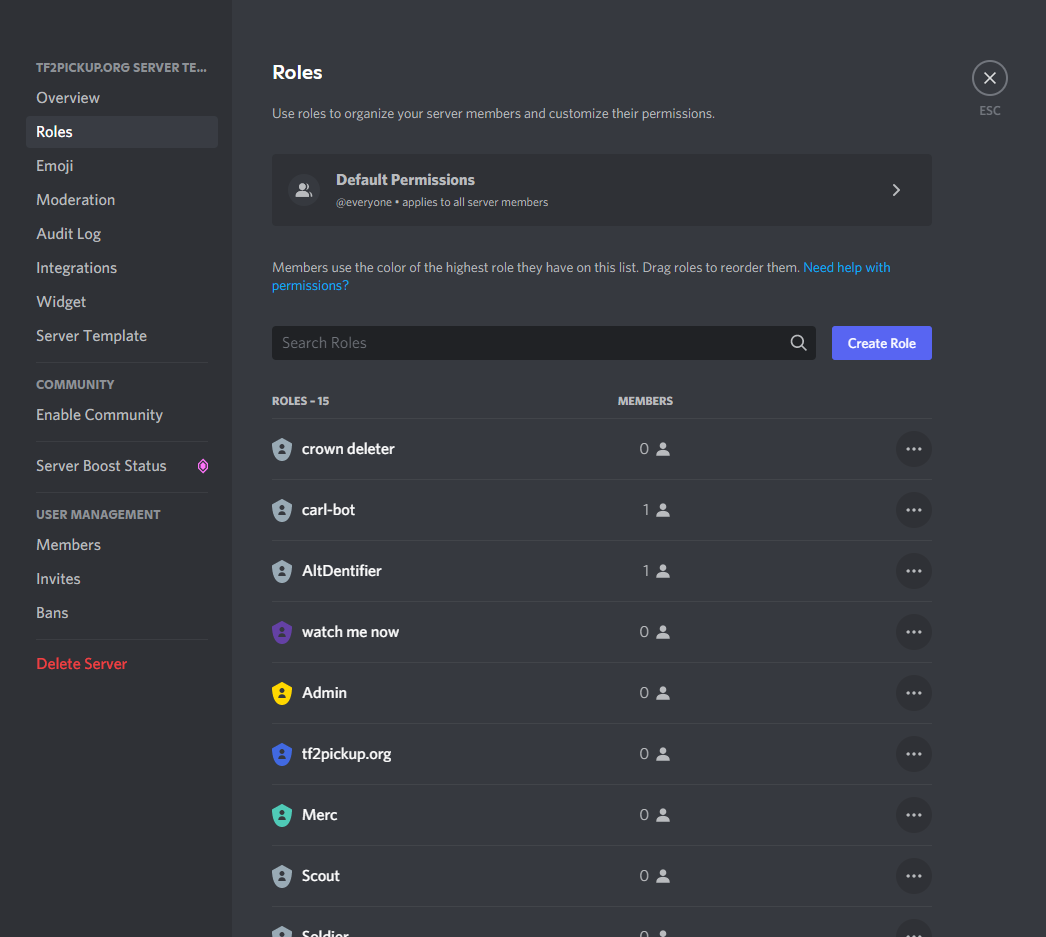
crown remover- this rule has anAdministratorpermission and it's not assigned to anybody in order to hide a server owner's crown next to the nickname,carl-bot- Carl-bot's role, it has to be under user roles in order to be able to manage them,AltDentifier- AltDentifier's role, works in the same way as Carl-bot's one,Streamcord- Streamcord's role, it has to be above the live role in order to let it work,watch me now- a Streamcord's live role, it's being assigned to players who are streaming on Twitch at the moment,Admin- a pickup admin role, in the same time it's a Discord server moderator role,ping me when sub needed- a ping role used for the tf2pickup.org site used for pinging players when a substitute is needed,Merc- a ping role for mercs, people can assign it through a reaction role and then, if someone needs a merc, they can just ping it in order to find somebody to play,Muted- mute role for naughty gamers,verification- verification role used against people being verified through a AltDentifier,payload-neo- payload-neo's role, not used in any certain way specifically, but it's created on bot join on the server.
Bot setup
Crucial part of the server configuration are bots. These cannot be bundled with the server template and their settings and permissions have to be set separately by the Discord server owner.
The bots described in this guide are:
- AltDentifier - used for checking potential alt accounts and user verification,
- Carl-bot - general purpose bot, used mostly for reaction roles and moderation,
- Streamcord - creates a stream feed of Discord users streaming at the moment, it also adds a live role,
- Statbot - gathers statistics about the server usage,
- payload-neo - generates a lot of cool stuff TF2 related such us Steam connect strings into Steam URI (clickable connects) and more,
- Ticket Tool - lets you talk about the incidents happening on the pickups in a private and professional manner,
- MEE6 - general purpose bot, we only use auto-mod functionality from this bot since it works way better than Carl-bot auto-moderation options,
- MonitoRSS - RSS forwarders, lets you send notifications from popular sites such as etf2l.org or teamfortress.tv,
- PatchBot - sends game update notifications for various games, Team Fortress 2 is one of them.
AltDentifier
This bot lets you control what people join on the server and check some Discord account against the Steam account verification. A player who would undergo a verification process (which can be automatic or manually enforced by a Discord moderator) has to log in through a AltDentifier website by using their Steam account and then the SteamID is checked if it was used by a different Discord user. If yes, the verification process is failed and the bot executed an action selected in the configuration (in our cases, bans user from the server). Otherwise it lets user through and leaves an information about the SteamID in the logs.
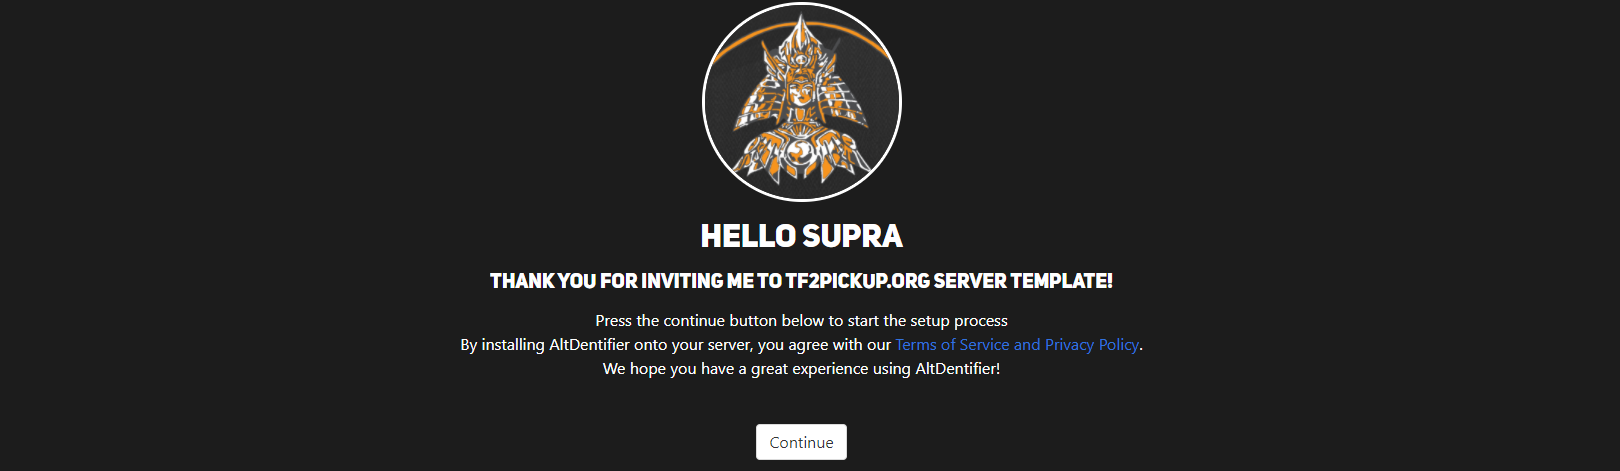
Invite the bot
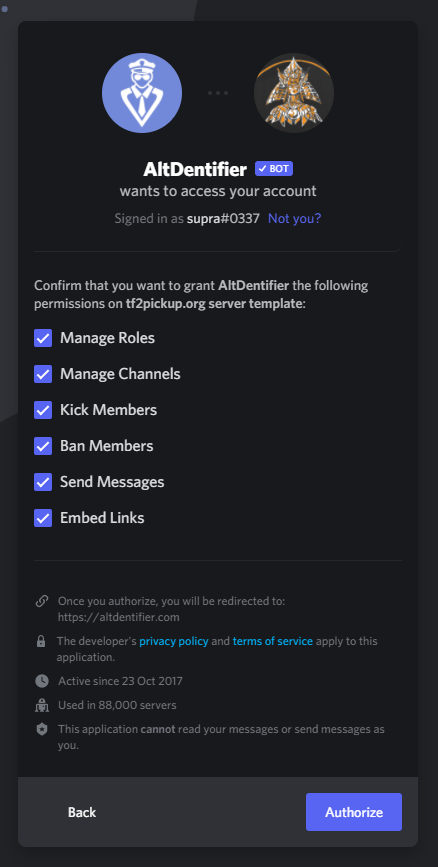
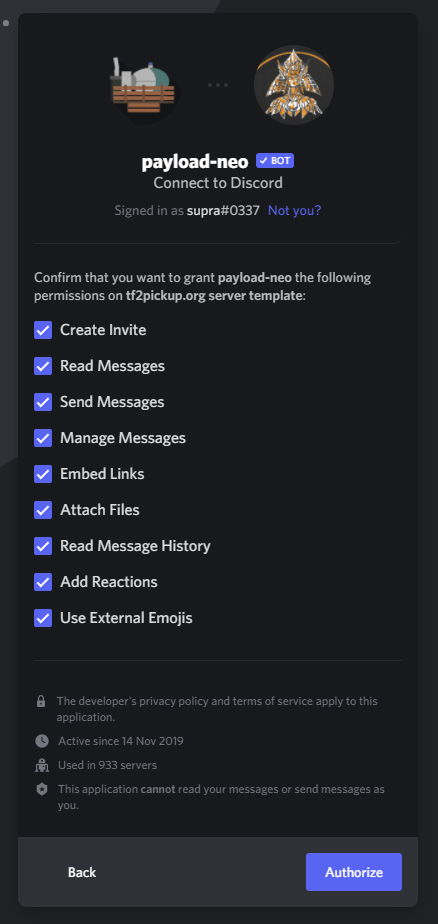
In order to invite the bot, open this link, choose the server and click Continue and later Authorize to proceed.

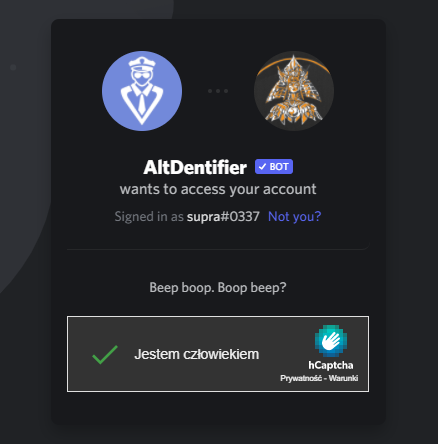
Verify yourself in an anti-bot protection tool.
Initial AltDentifier setup
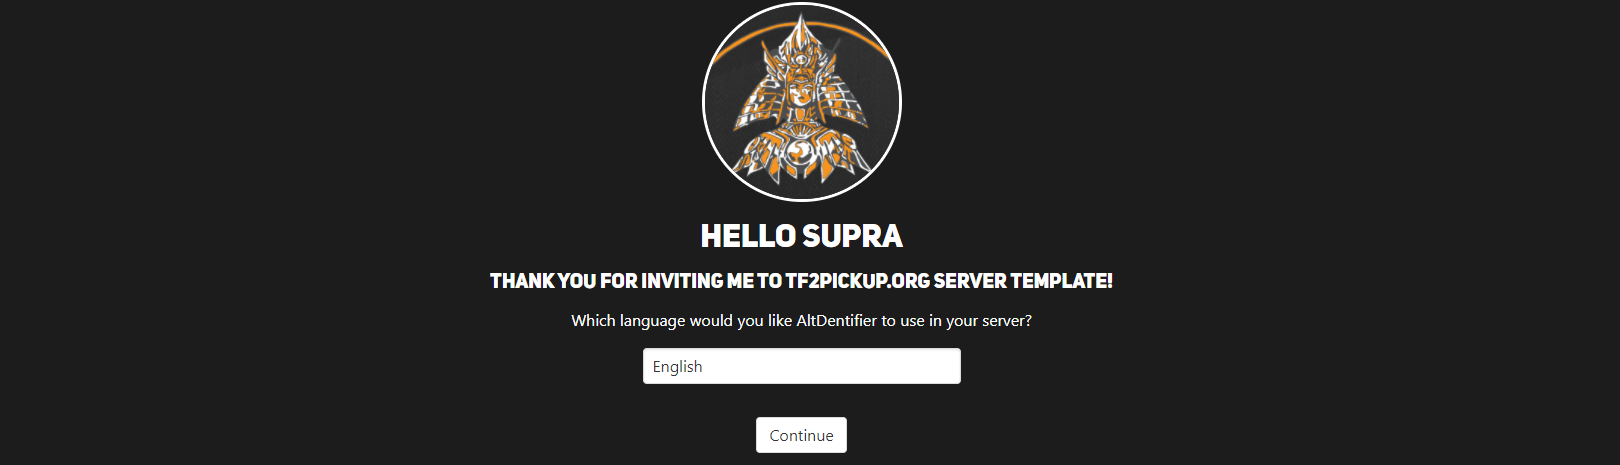
In this step you will have to define initial bot settings.
Select the language you want to use for the moderation.
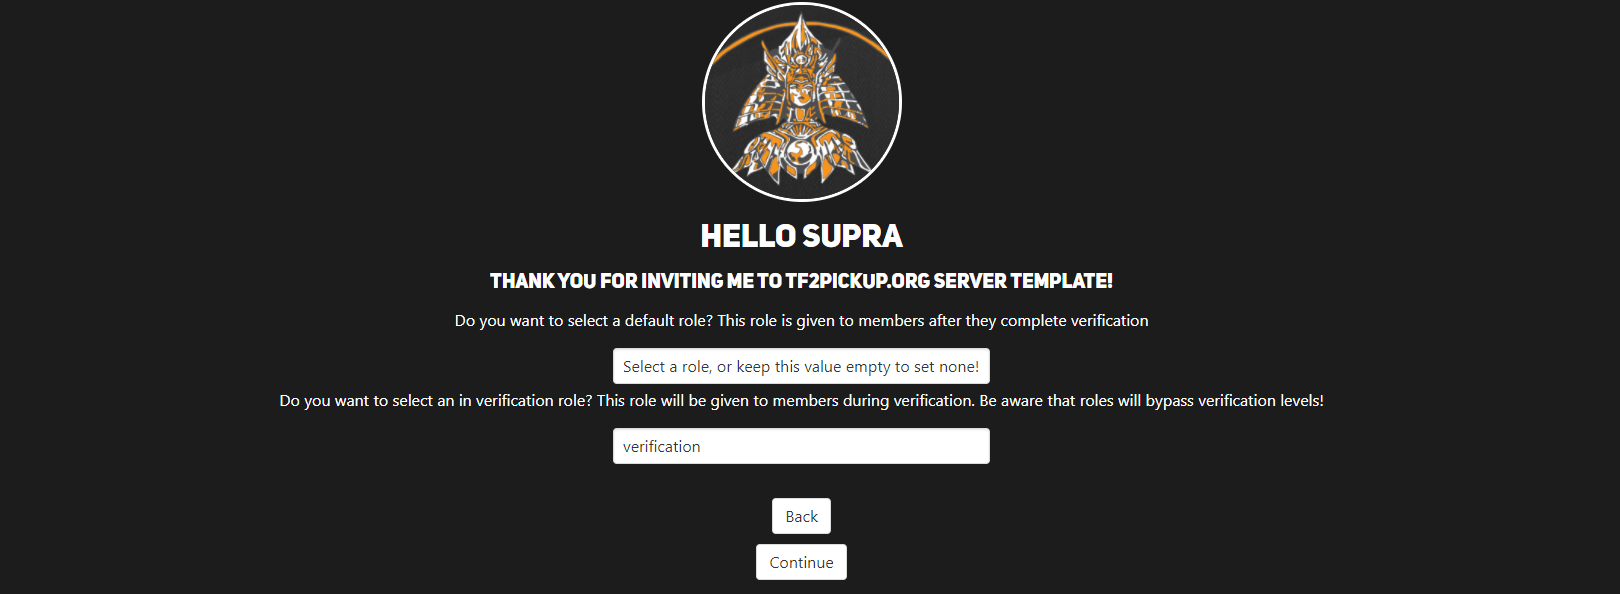
Choose verification role, so people who will get this role during the verification process will not see the contents of the server.
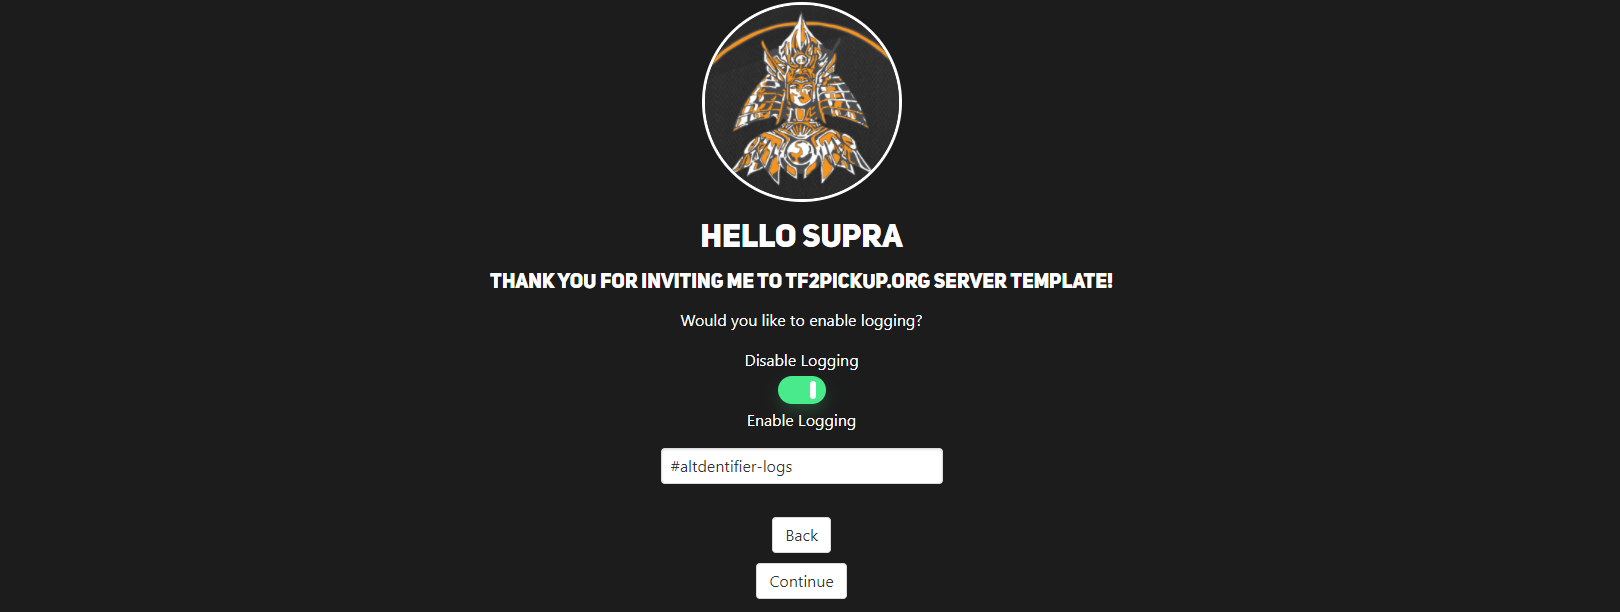
Enable logging and choose #altdentifier-logs as the log channel. Later you will select certain things to log on the channel.
Choose #altdentifier-logs as the bot channel. This settings will let all verification details to be sent in the one common place for this bot.
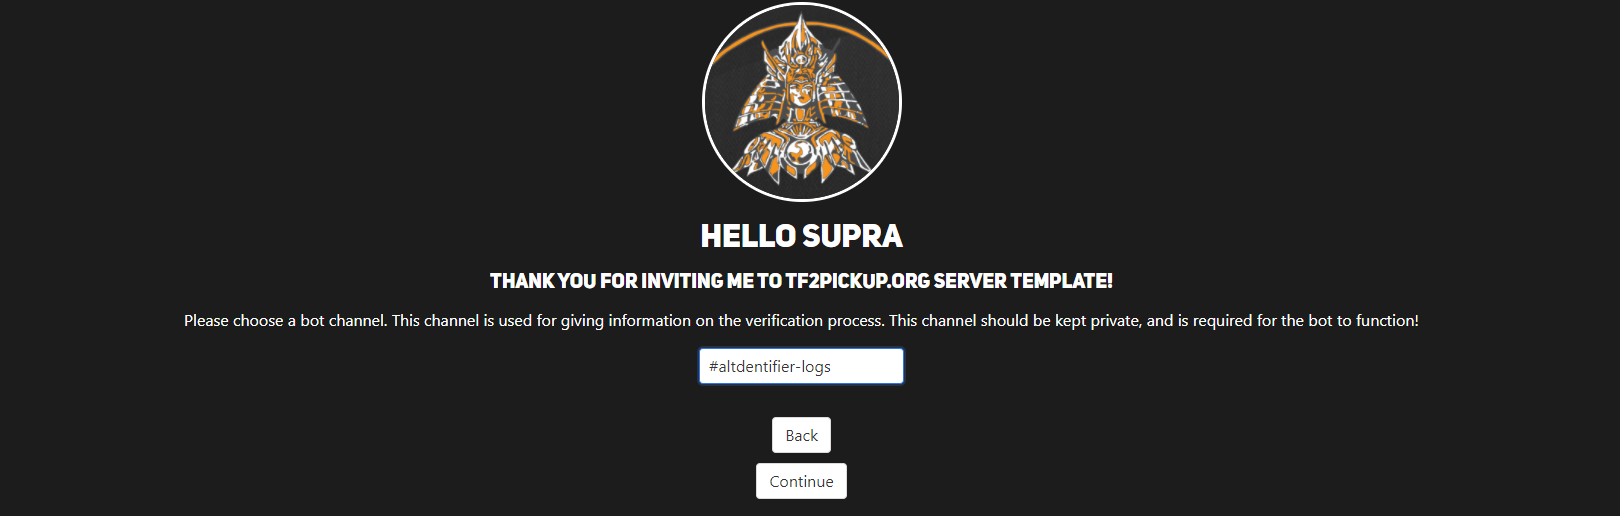
Warning channel is basically a channel where the user who has to verify themselves gets the notification about it. The AltDentifier sends a message on DMs and on this channel, so it's crucial to let people with the verification role see it.
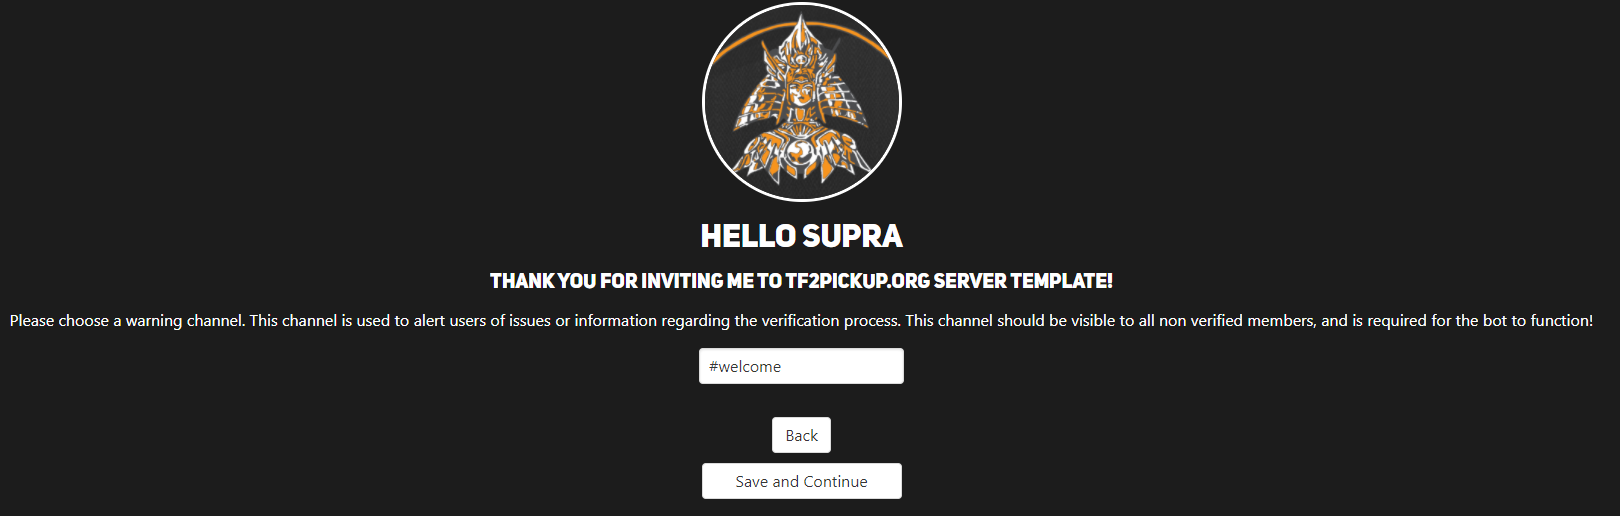 \
\
And that's it. Click Dashboard in order to enter the bot status on the server and change more specific settings.

AltDentifier main setup
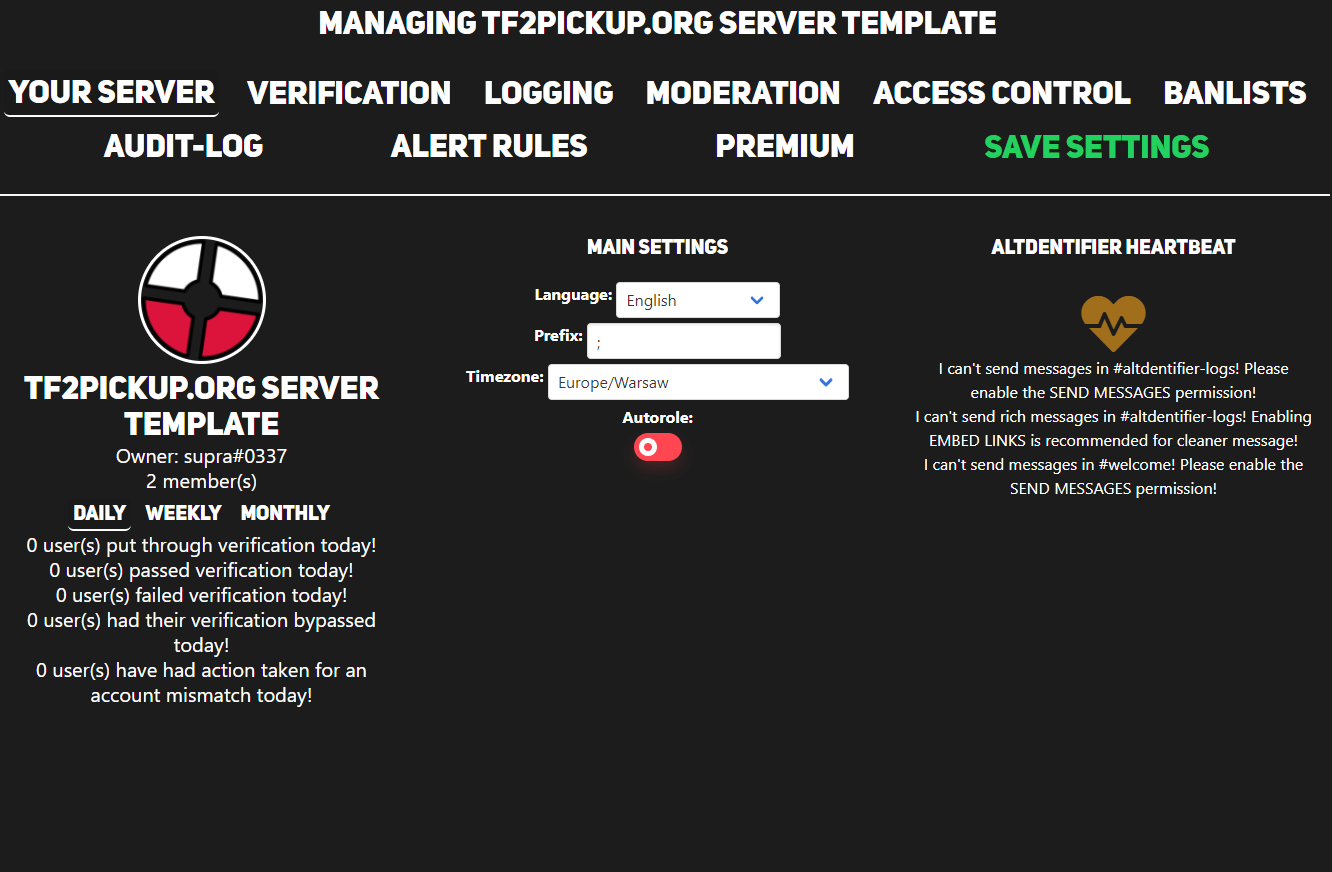
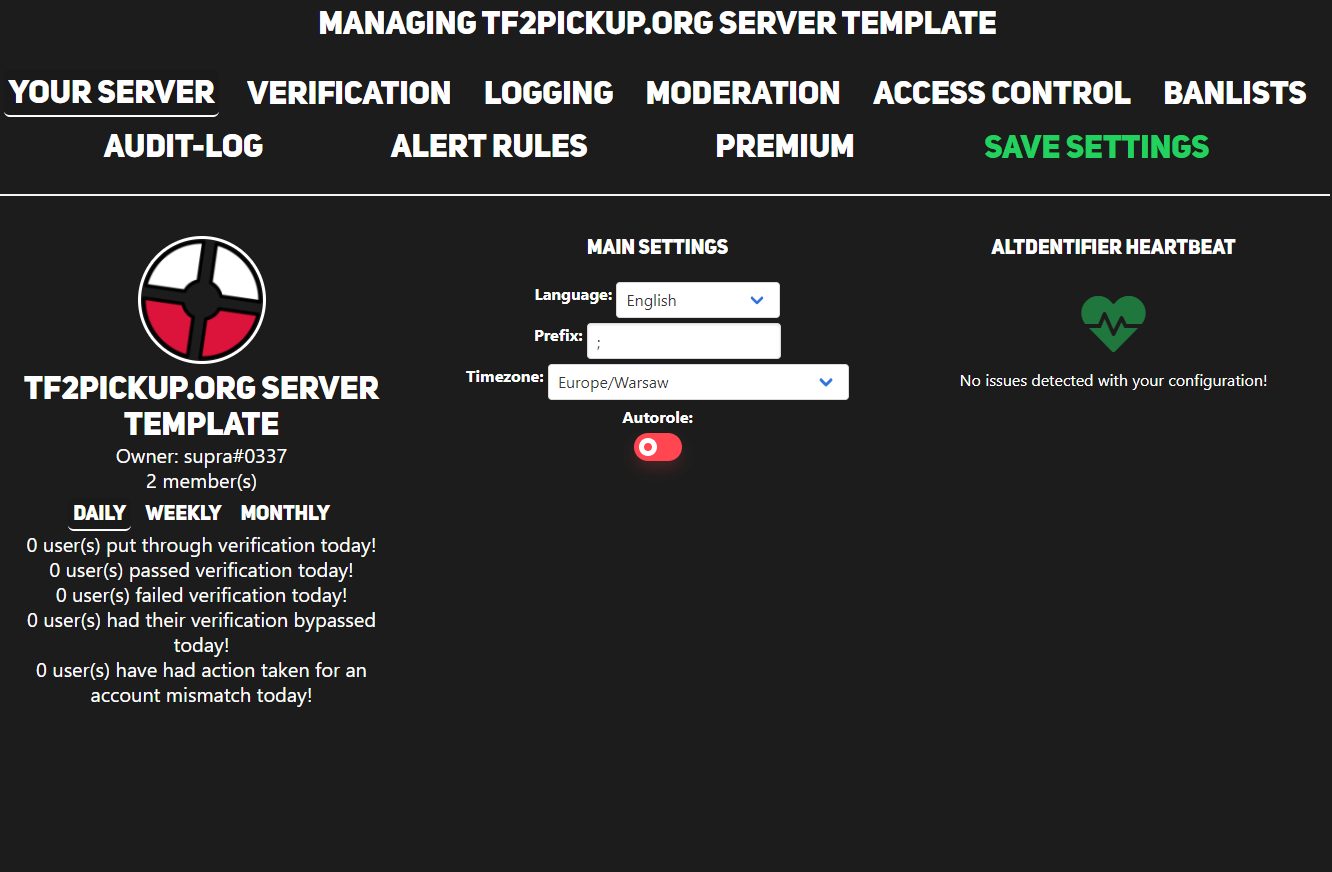
In this step you will have to set mostly the same settings as they're presented on the screenshots. That will make it way easier to set things up, however you should remind that is an example configuration. As you can see, some parts of the configuration are incorrect, since the AltDentifier Heartbeat is in the warning state. Make sure you click Save settings button at the top of the page after setting all options.
In the server setup the only thing you have to change is the Language and the Timezone configuration. Set it to something what fits you best.
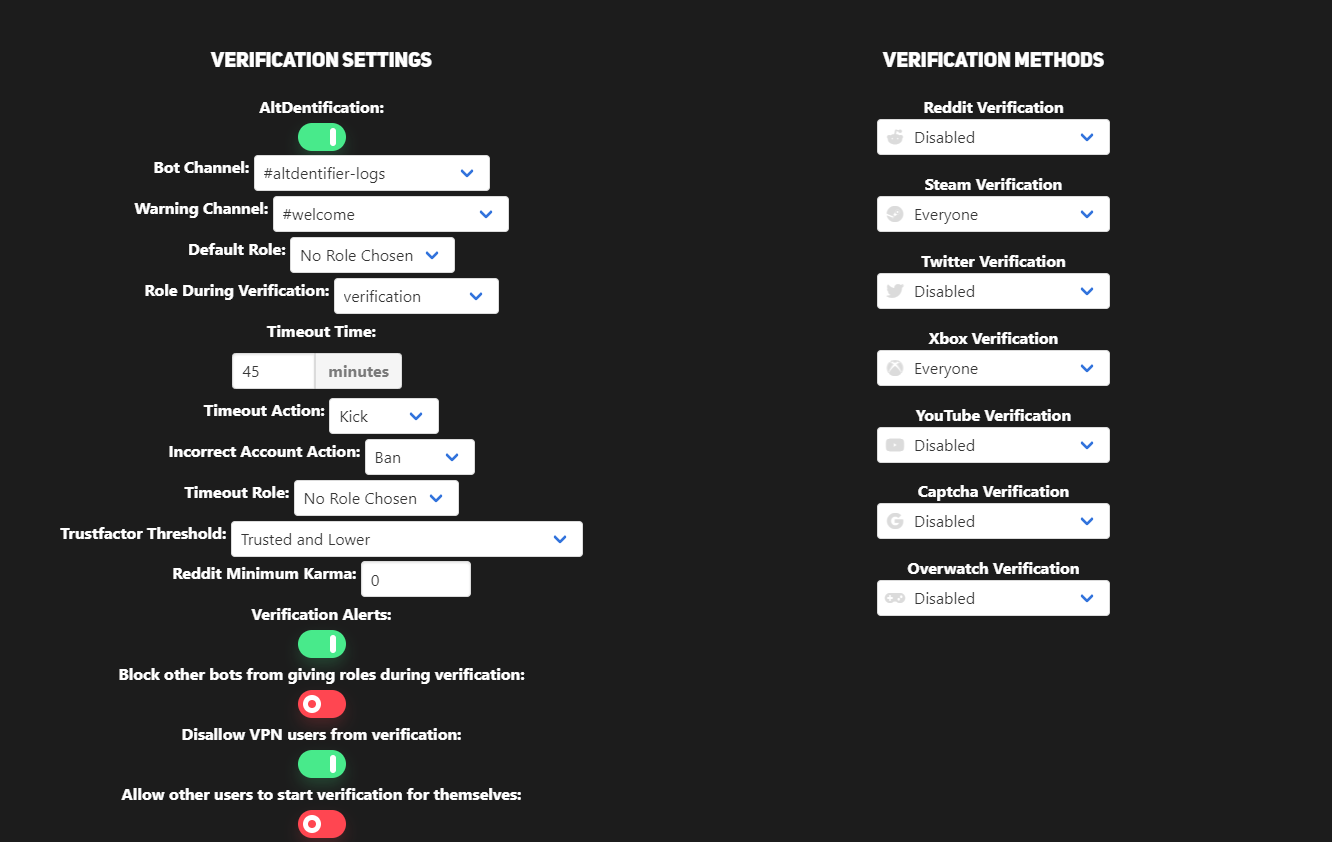
In the Verification tab set:
- Timeout Time -
45 minutes, - Timeout Action -
Kick, - Incorrect Account Action -
Ban, - Verification Alerts -
Yes, - Disallow VPN users from verification -
Yes, - Verification Methods:
- Steam Verification -
Everyone, - other methods -
Disabled.
- Steam Verification -
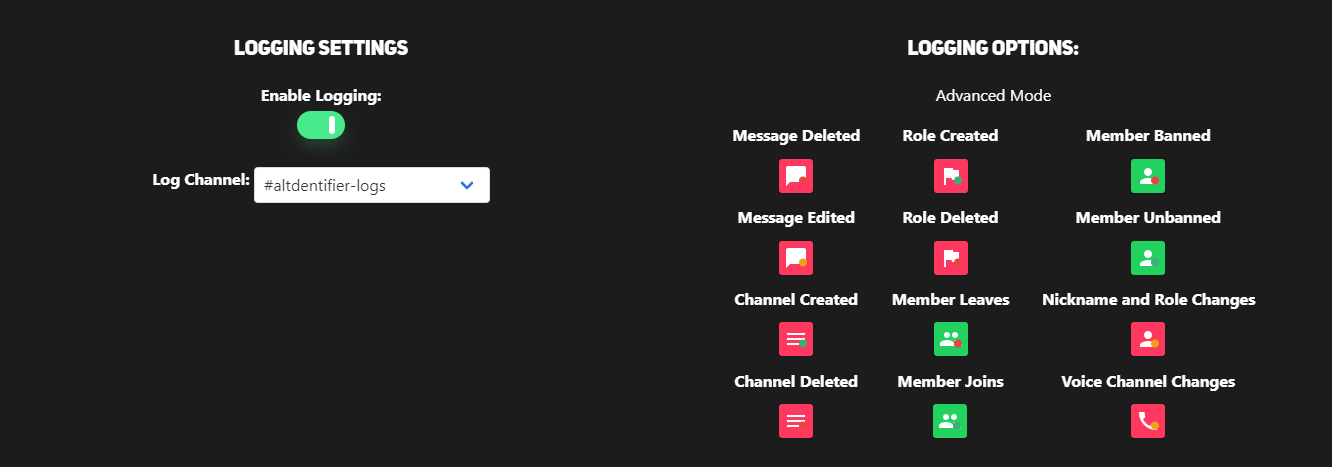
In the Logging section, unselect the following logging options:
- Message Deleted,
- Message Edited,
- Channel Created,
- Channel Deleted,
- Role Created,
- Role Deleted,
- Nickname and Role Changes,
- Voice Channel Changes.
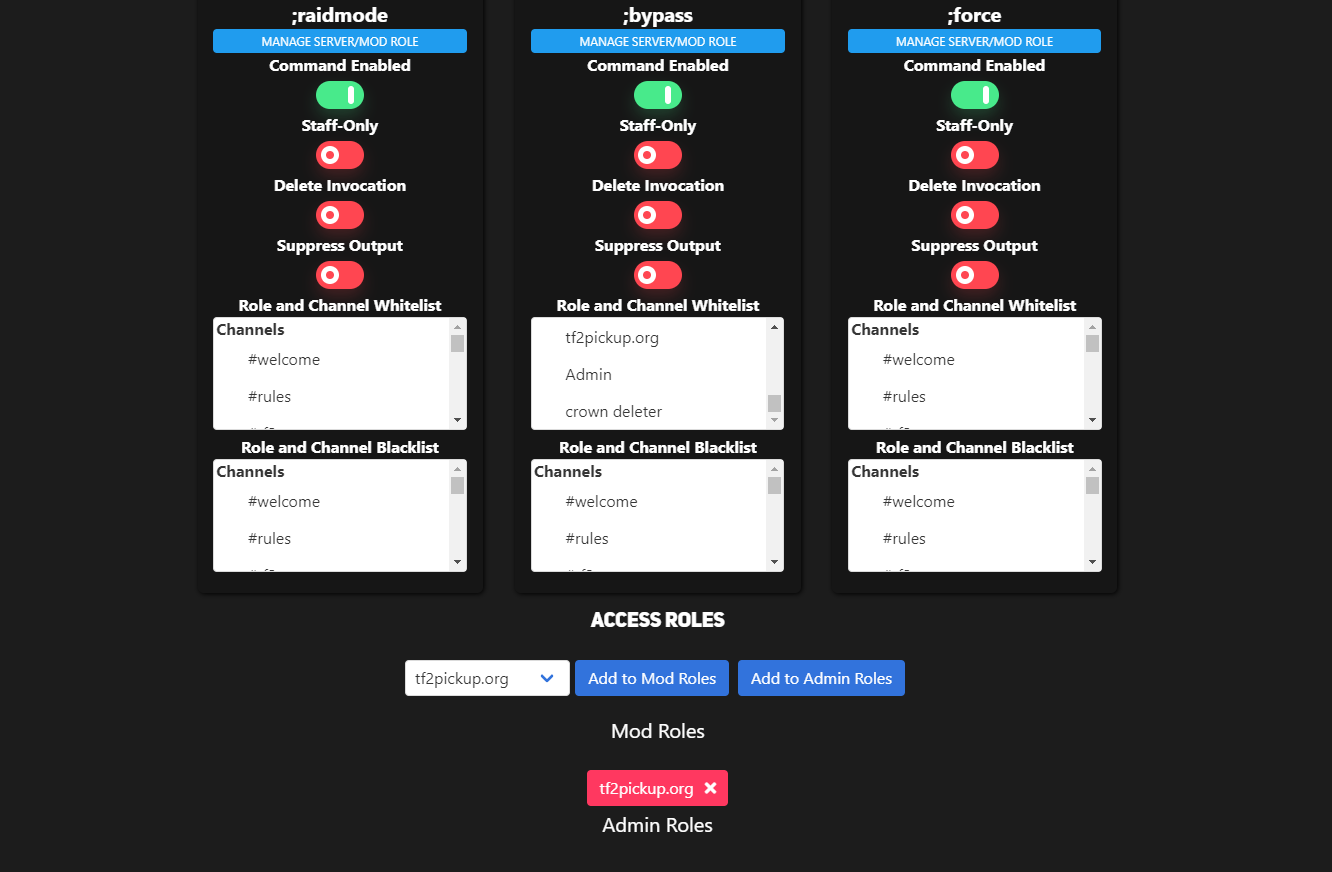
In the Access Control section, scroll down to the bottom of the site and add your moderation role (in our case tf2pickup.org) on Discord and add it to the Mod Roles.
AltDentifier Discord channel setup
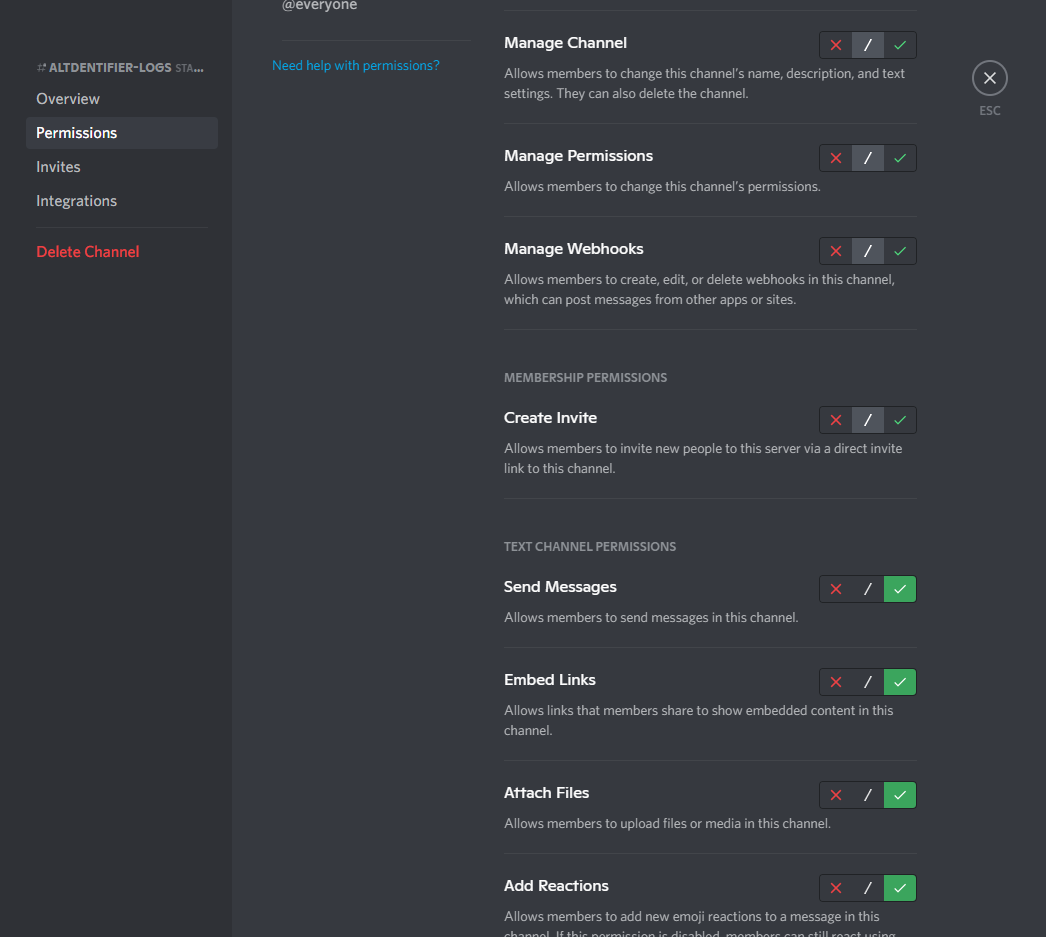
The last step of the AltDentifier setup is to give permissions for the AltDentifier bot on certain channels. Permissions can be given based on roles and Discord accounts directly (regardless if account belongs to a human or a bot). In this example the permissions are assigned to a bot role called AltDentifier and the permissions assigned are:
View Channel,Send Messages,Embed Links,Attach Files,Add Reactions,Use External Emoji,Mention @everyone, @here and All Roles,Manage Messages,Read Message History.
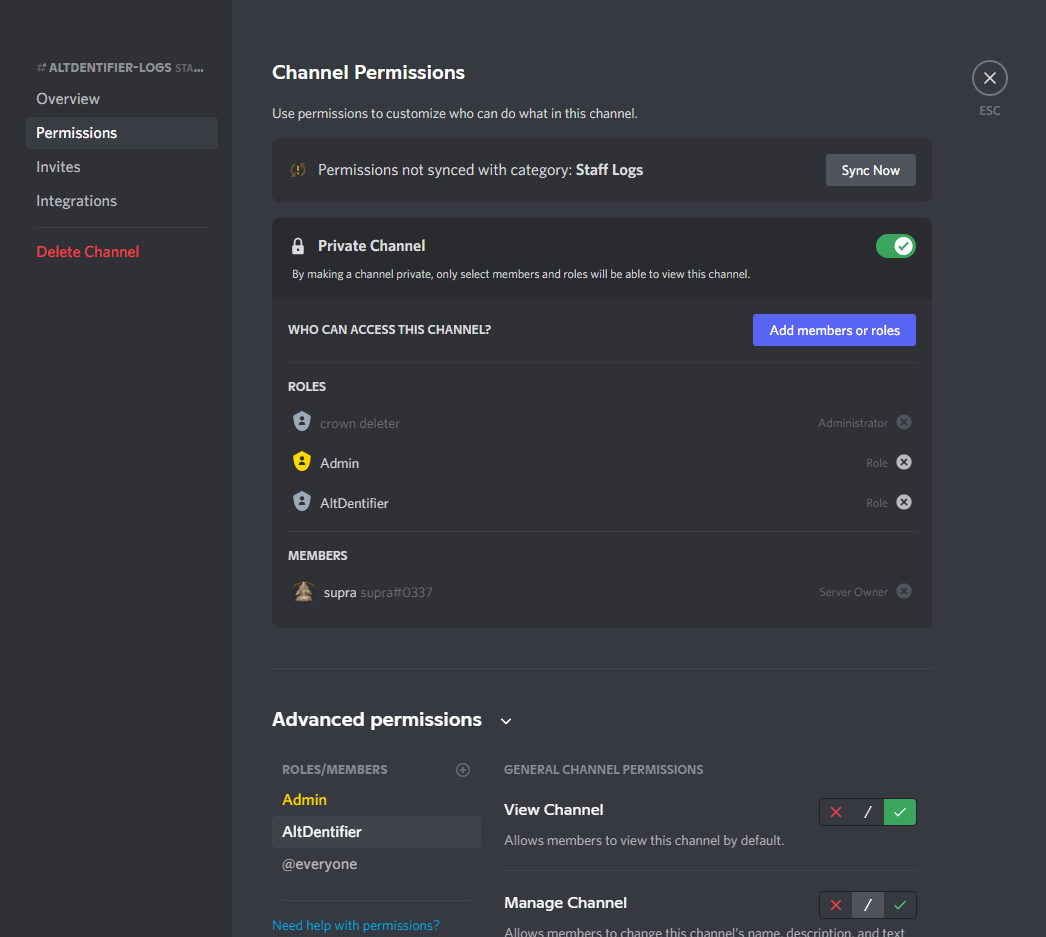
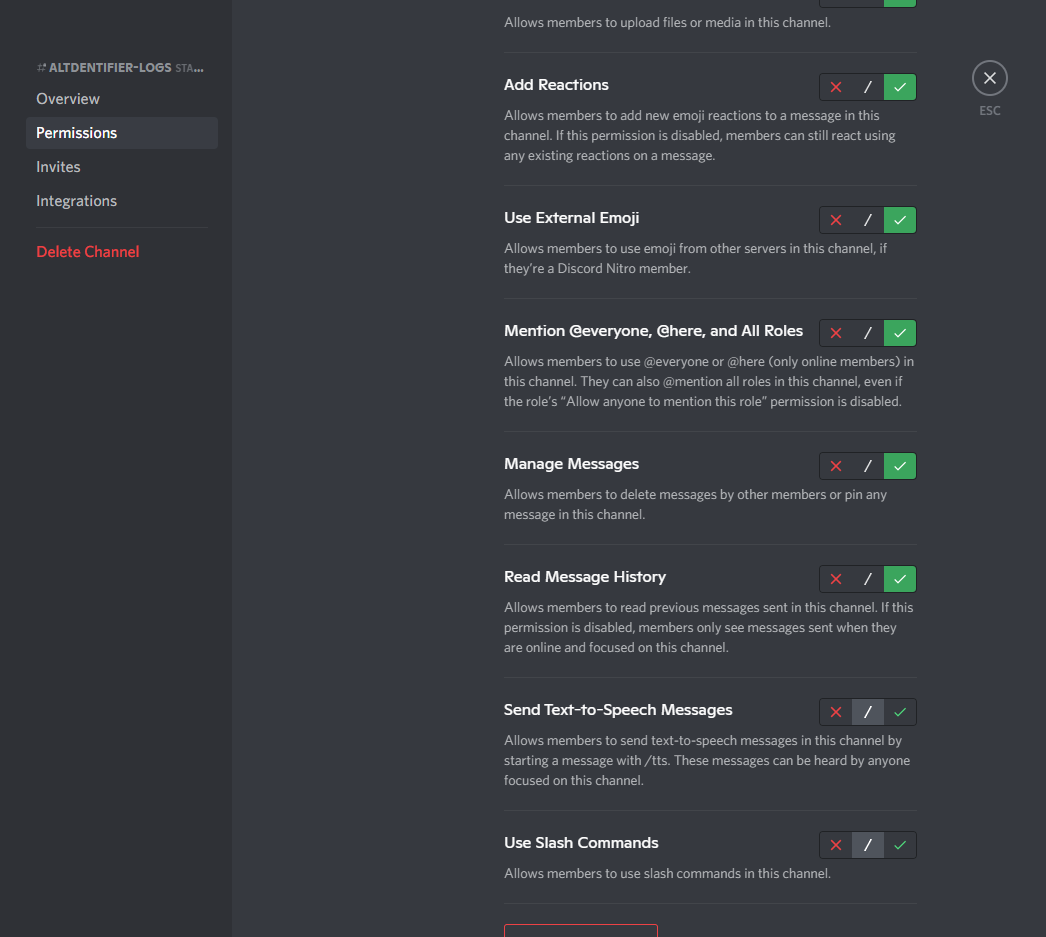
These permissions should be set on a channels: #welcome, #altdentifier-logs, #moderation-spam. After applying those changes, we can see the bot status changed to green:
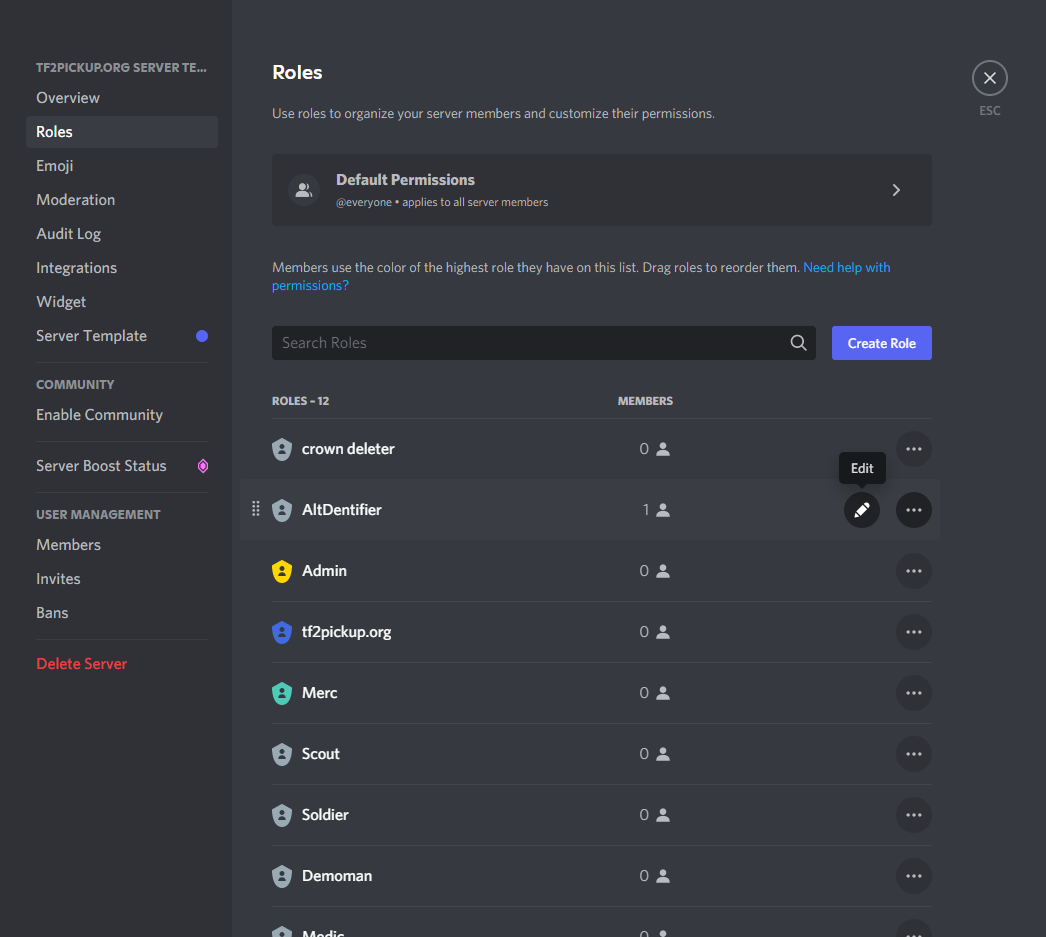
The last thing you should do is to add Manage Server permission for the AltDentifier role, so the AltDentifier could be able to track invites from which people join on the server. Make sure you move a AltDentifier role on the top of the list, but below the crown remover role.

For more you can find AltDentifier command list here.
Carl-bot
This bot combines many different moderation tools in one and we recommend it just because we have very good experience with it on many Discord servers. The most important features are:
- moderation tools aka warnings, (un)mutes, kicks, (un)bans by a command which lets you make temporary mutes/bans with an option to add a moderation reason and with an option to message the offender while some action against him is taken (like a mute),
- extensive logging options, from the moderation logging up to even the smallest things like avatar/nickname changes,
- reaction role support,
- word filters,
- many more.
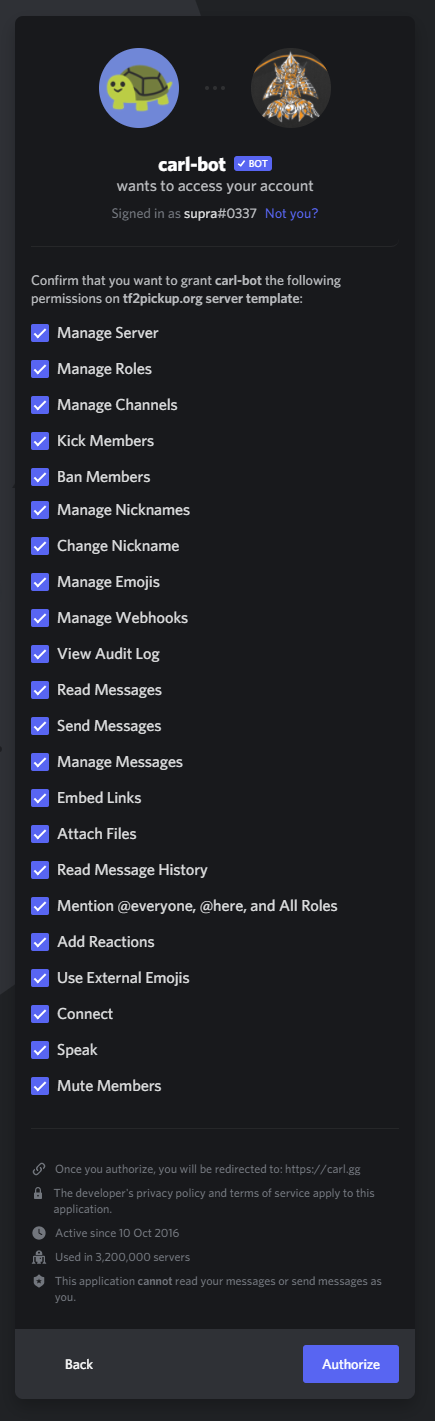
Use this link in order to add the bot. You don't have to untick any roles for this specific bot.
In this step, feel free to skip the initial configuration, since you get a setting list to set in the dashboard.
First, in the Bot settings delete the ? prefix, so ! prefix would be the only one available for the Carl-bot.
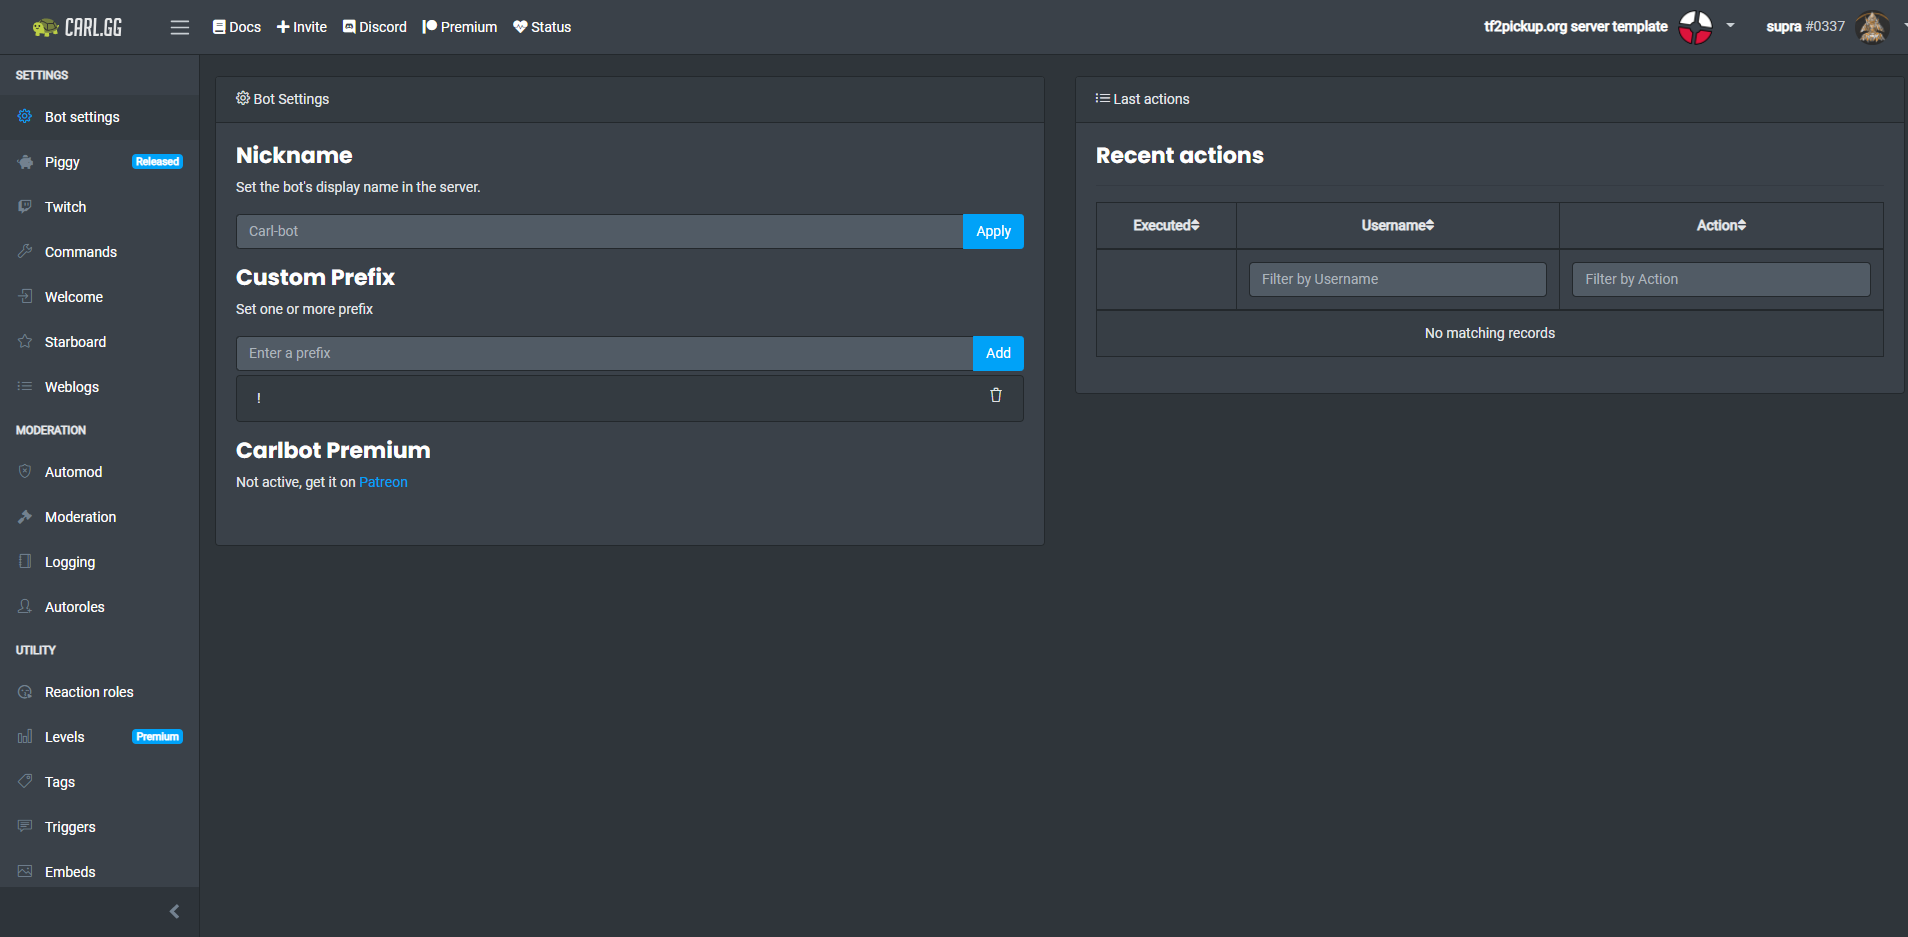
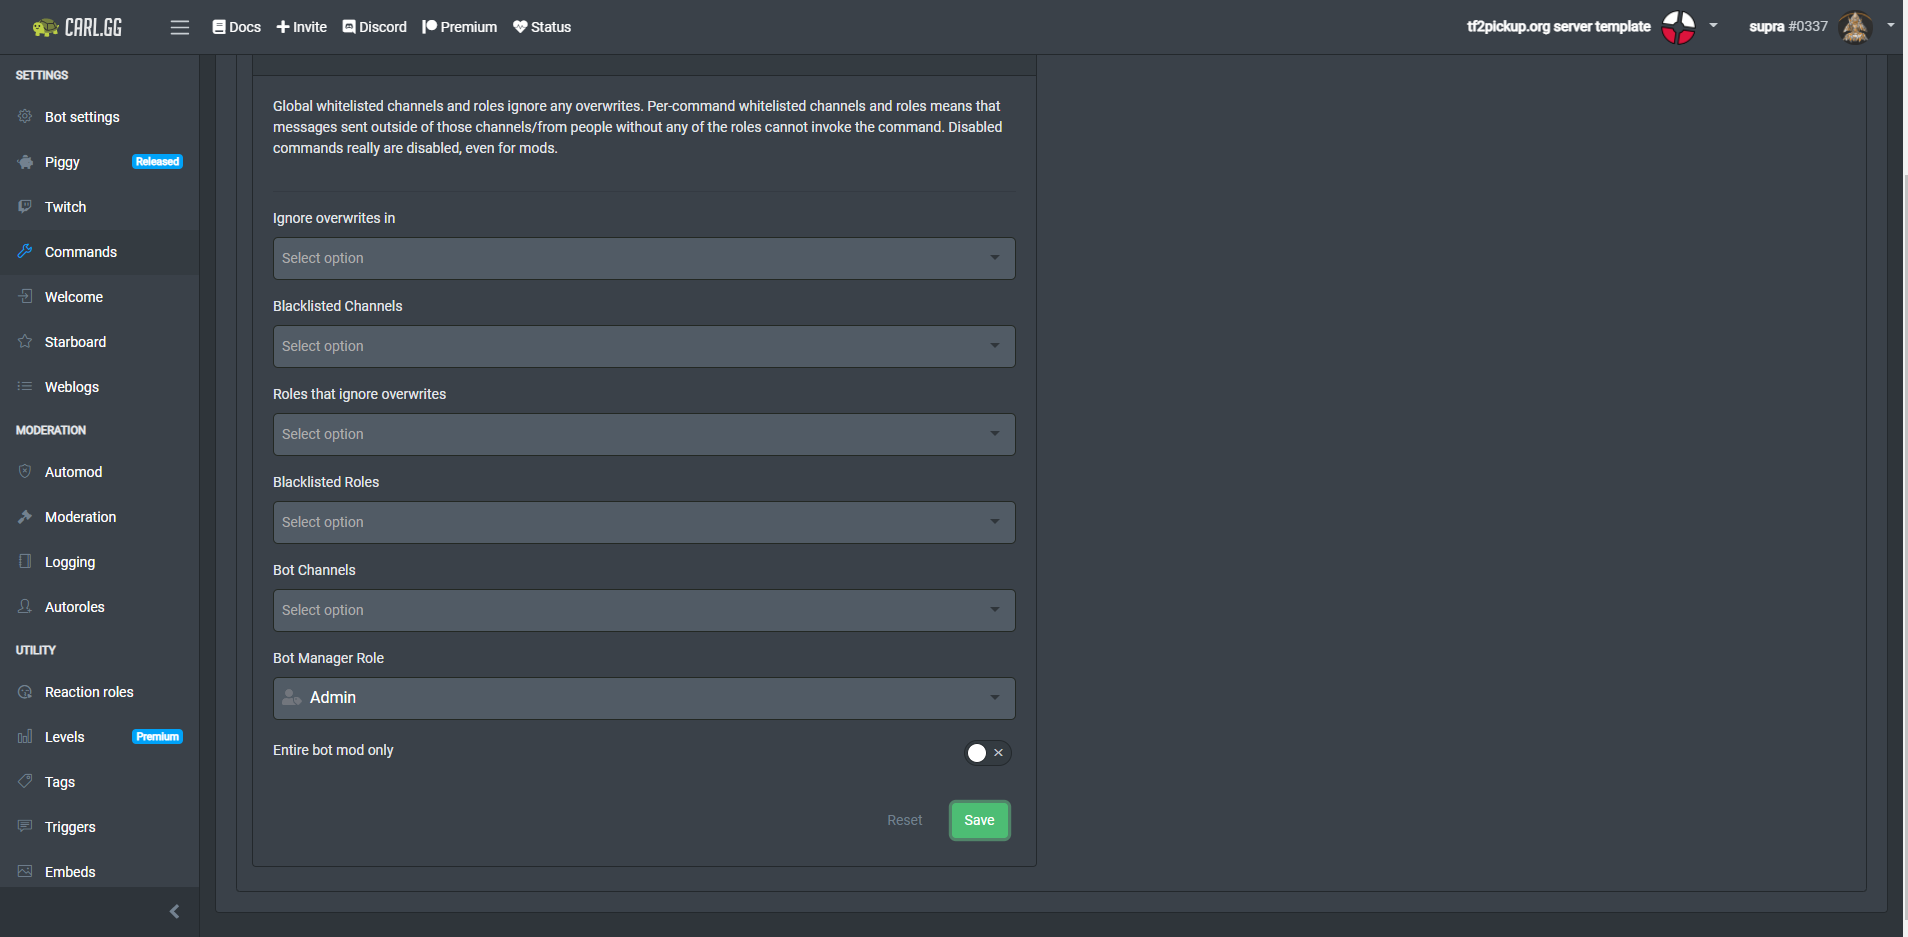
Then, scroll down to the Commands and set a Bot manager role the Admin role.
Next, go to the Automod tab and set:
- Log actions to -
#carlbot-logs, - Muterole -
Muted.

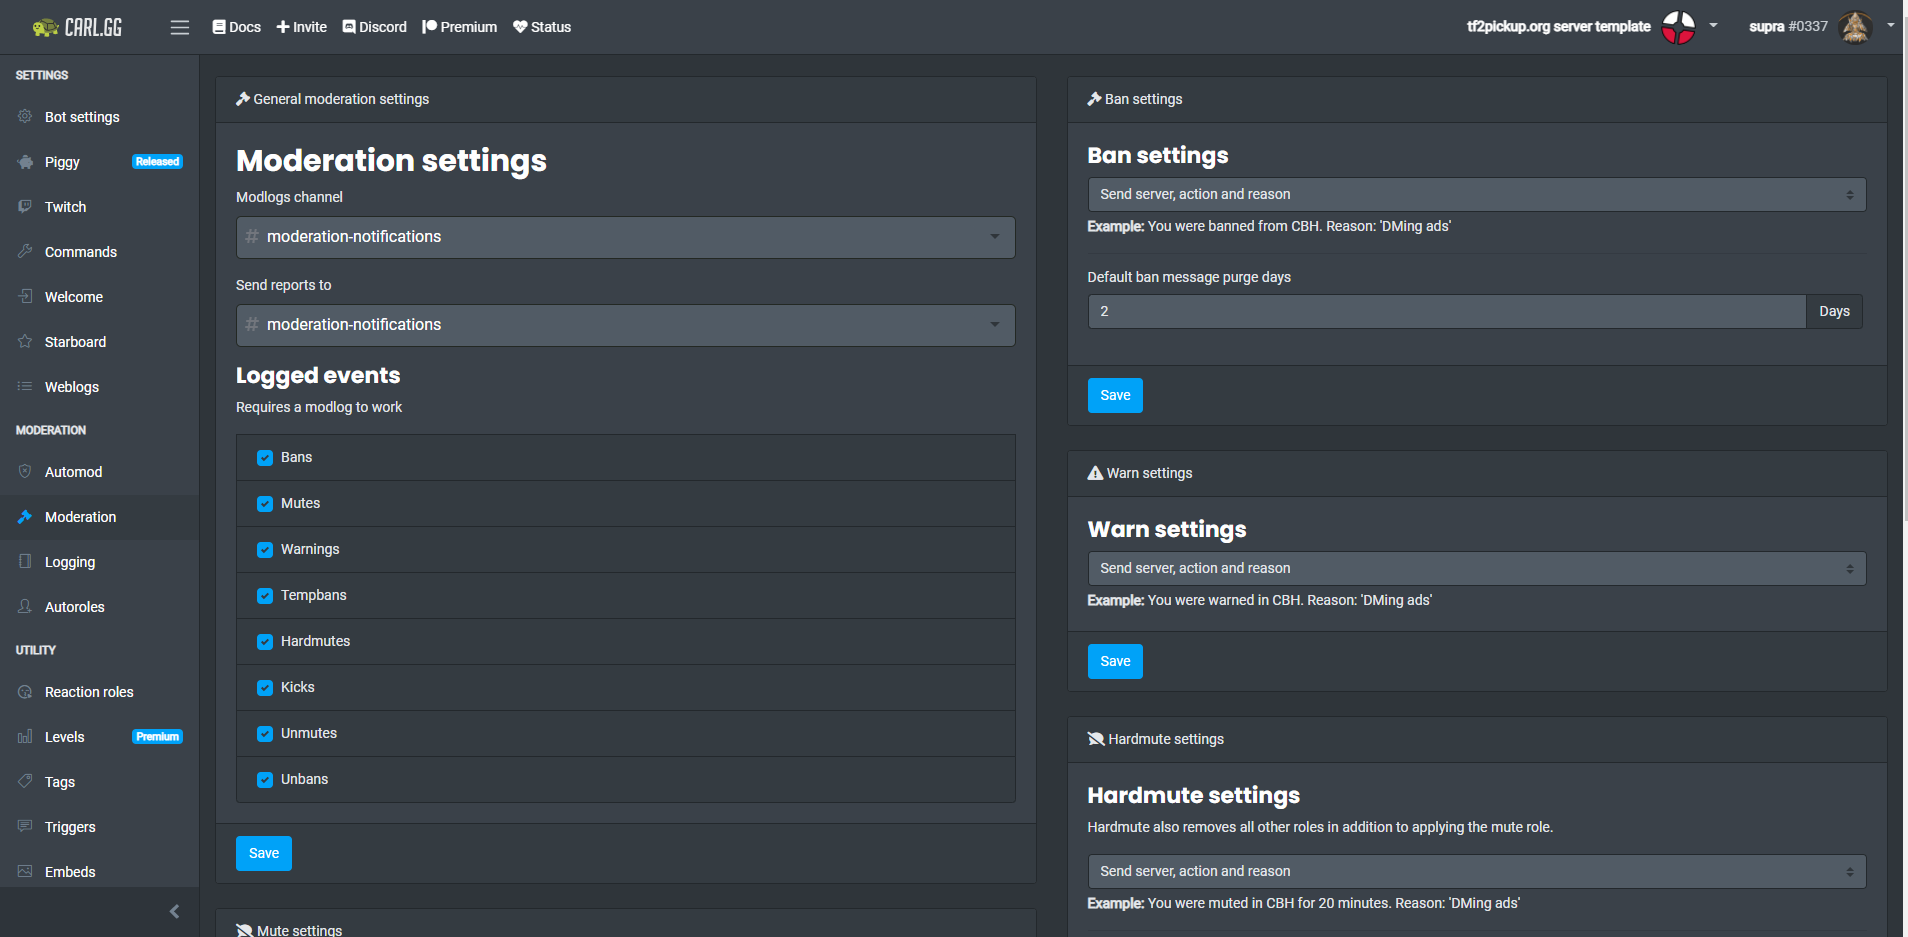
In the Moderations tab, under the Moderation settings section, set:
- Modlogs channel -
#moderation-notifications, - Send reports to -
#moderation-notifications, - Logged events - select all.
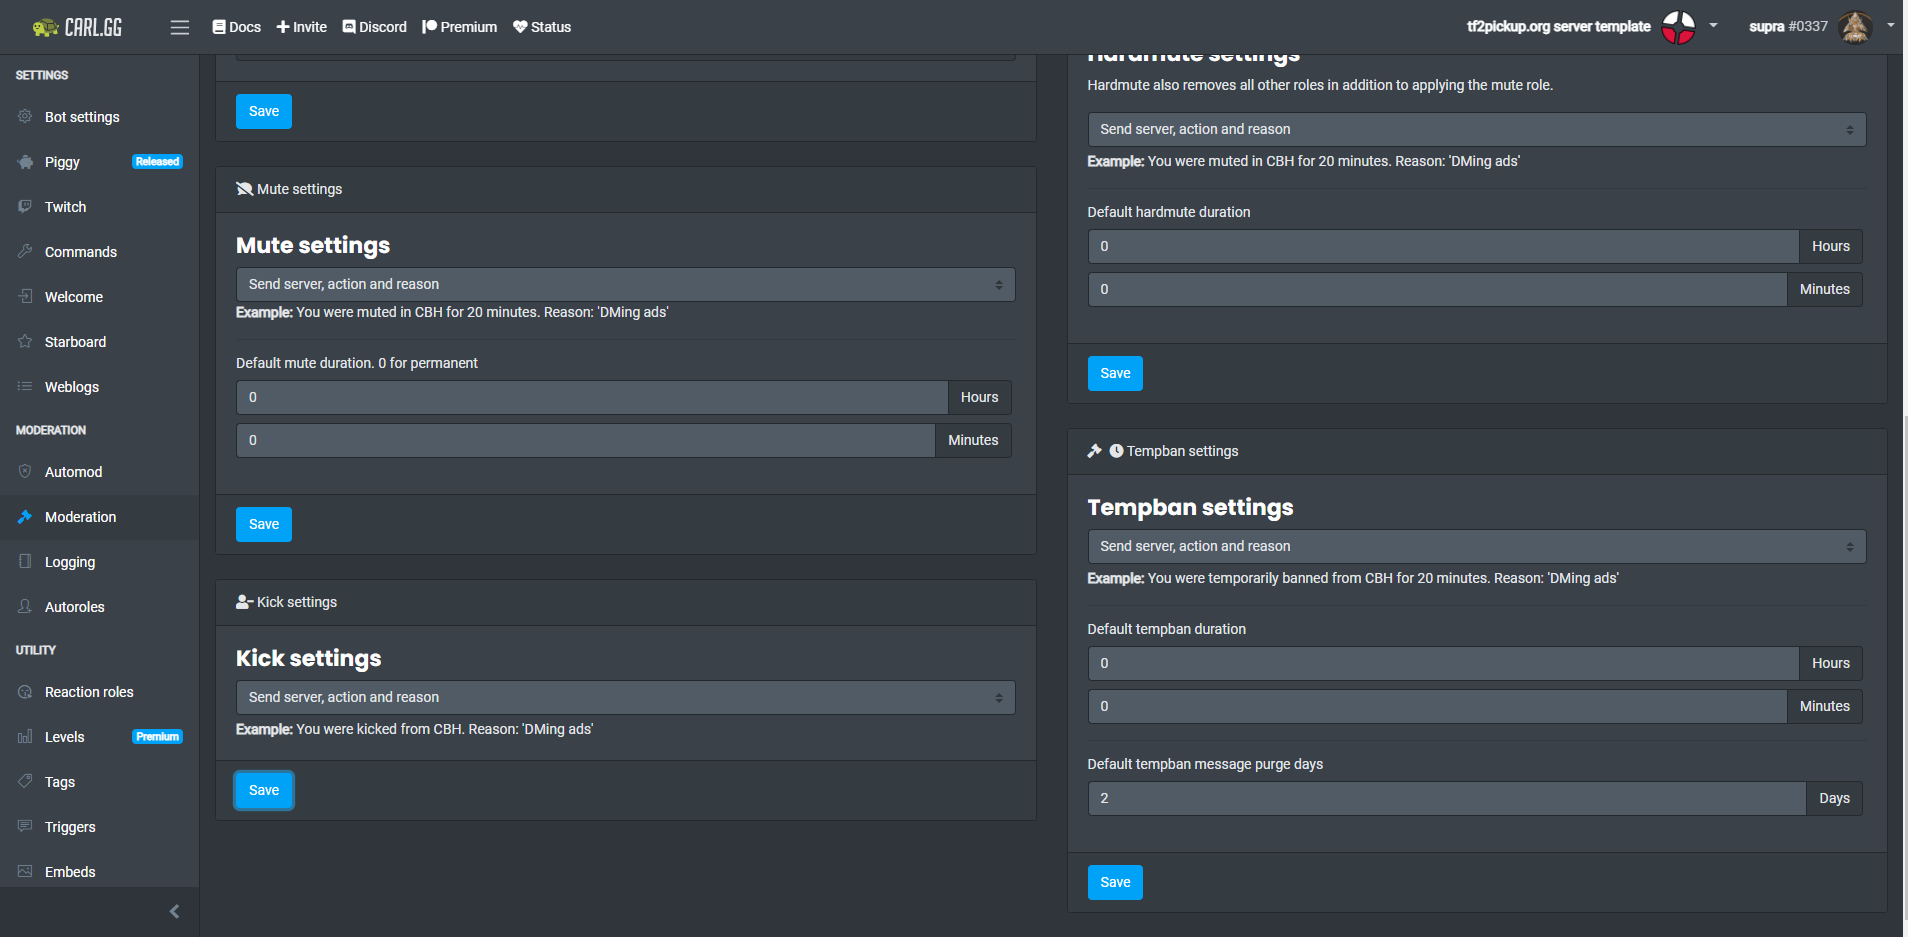
The rest of the settings in this tab defines how bans, warns, hardmutes, mutes, kicks and tempbans are done. In all these settings, make sure you will choose a notification option Send server, action and reason for an offender, so the offender will get a message on DMs that they got banned/warned/hardmuted/muted/kicked/tempbanned.
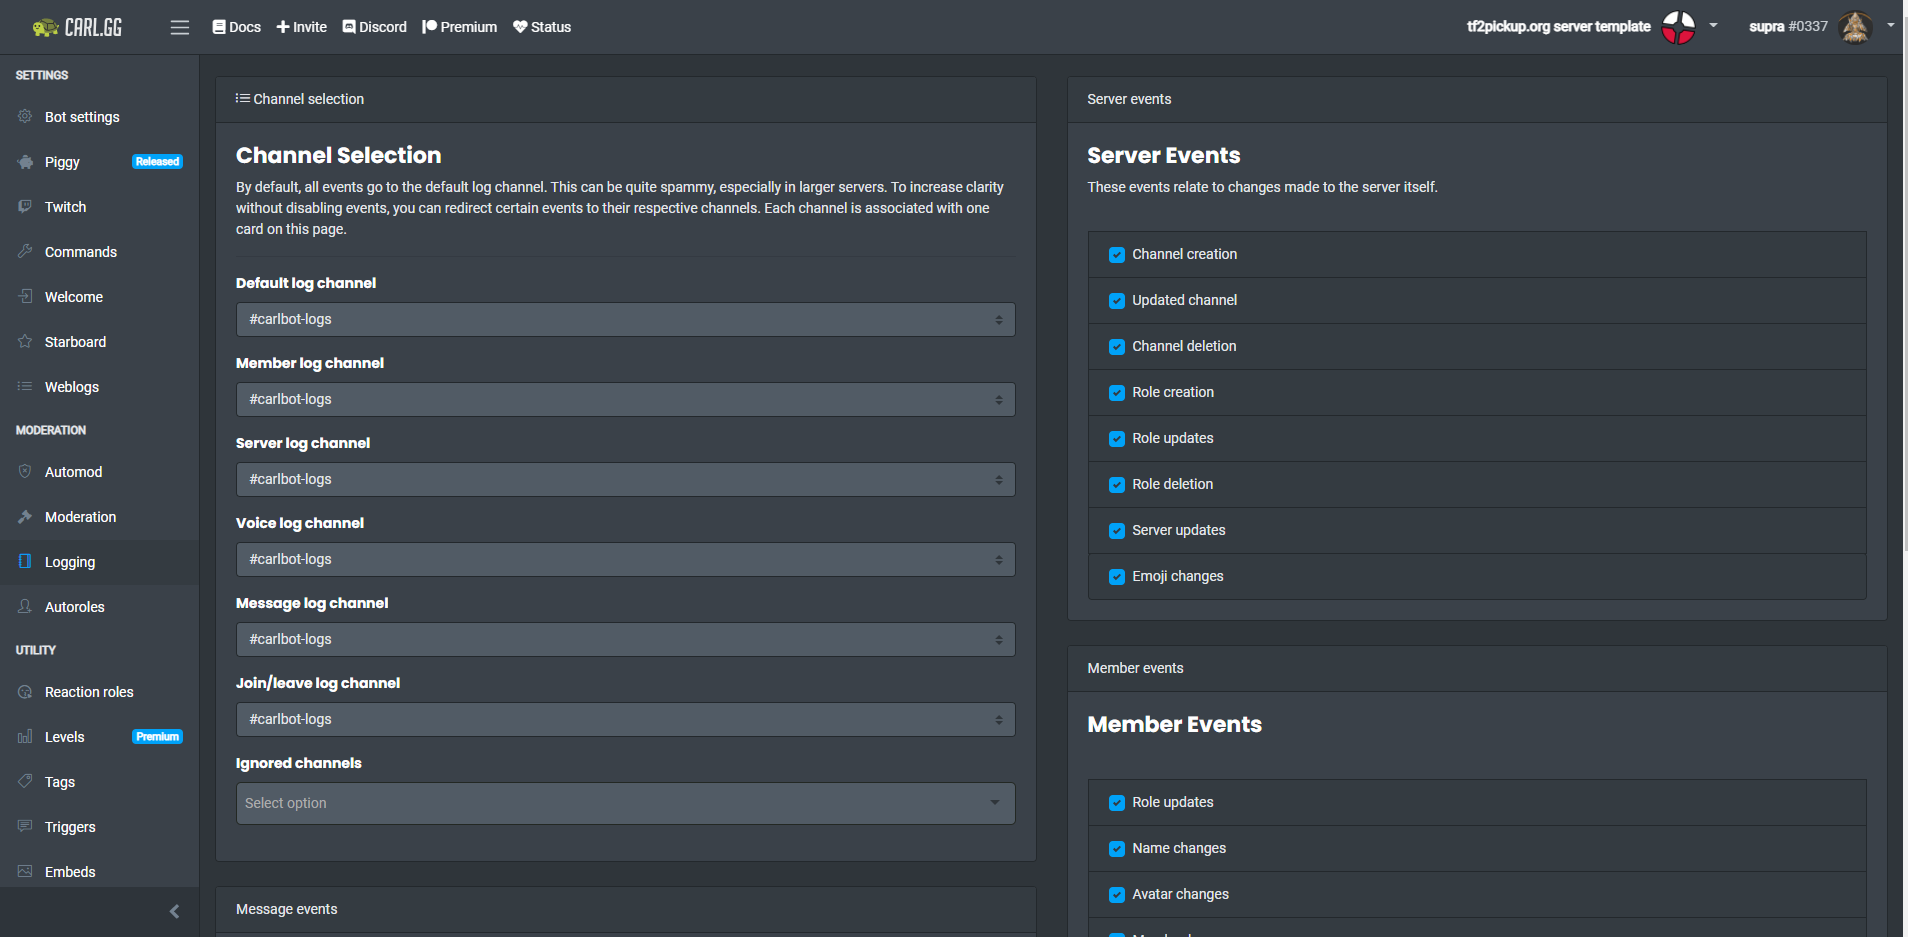
Next, in the Logging tab, under Channel Selection section, choose options from the list:
- Default log channel -
#carlbot-logs, - Member log channel -
#carlbot-logs, - Server log channel -
#carlbot-logs, - Voice log channel -
#carlbot-logs, - Message log channel -
#carlbot-logs, - Join/leave log channel -
#carlbot-logs, - Ignored channels - leave empty.
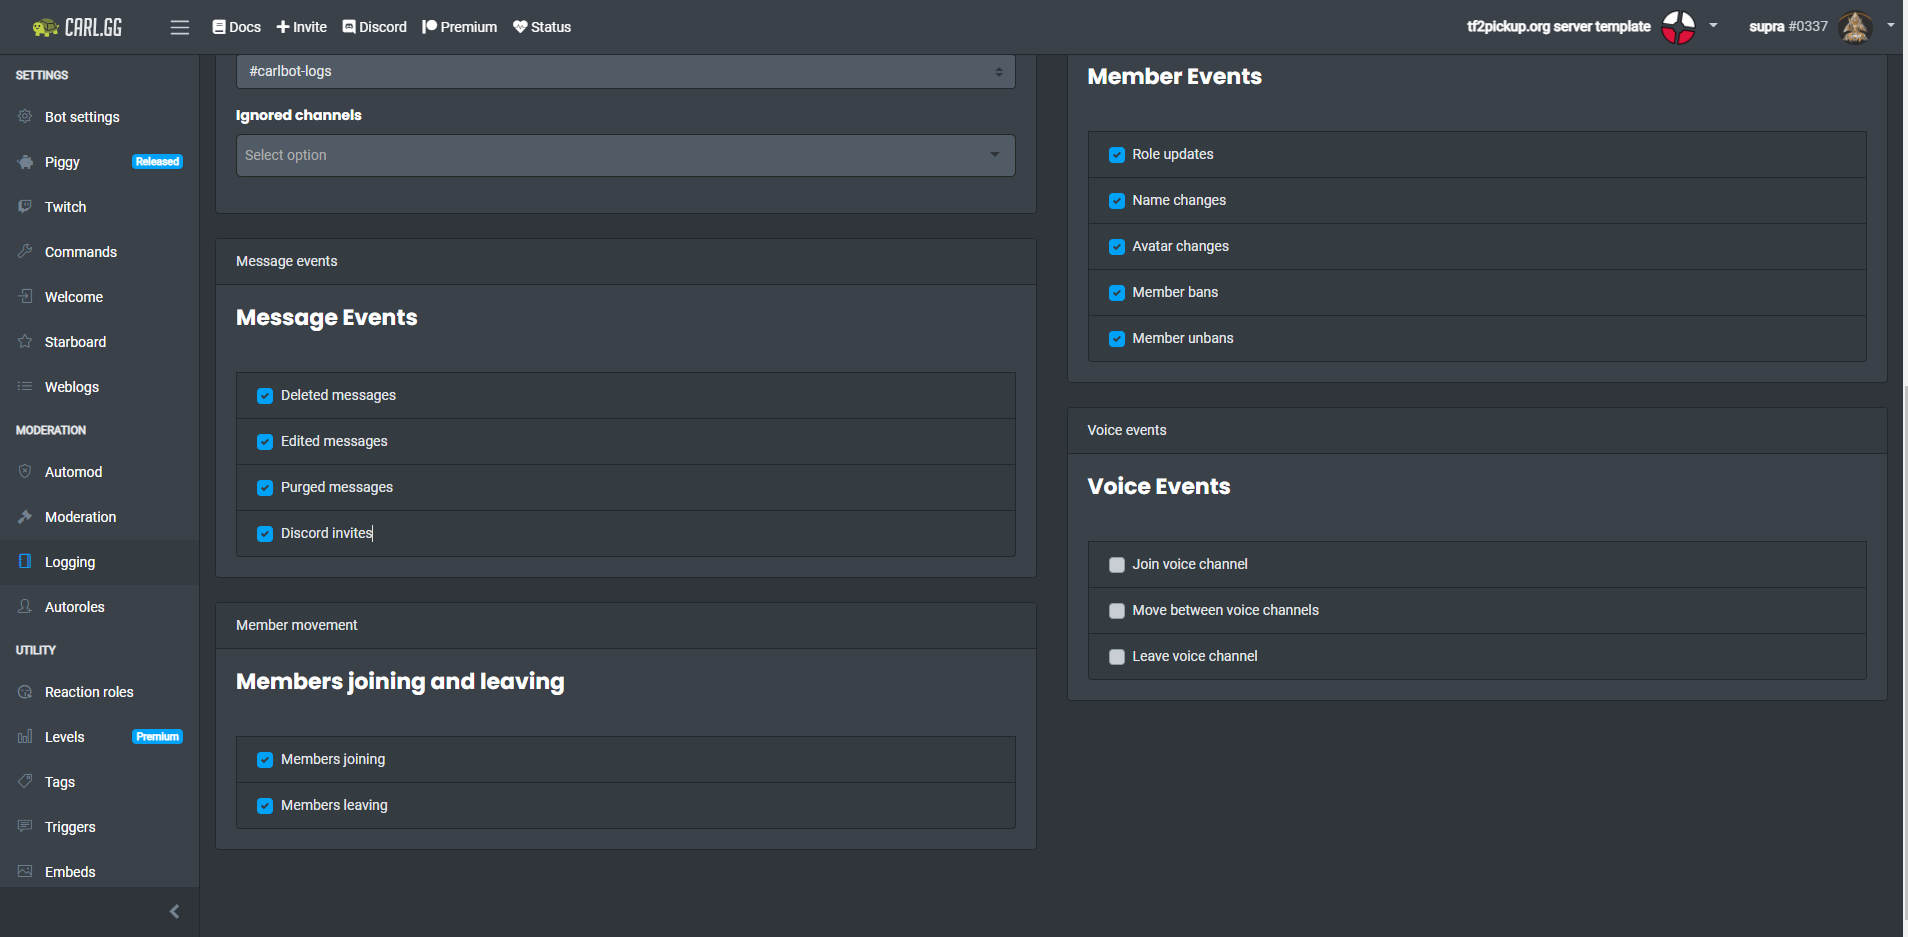
In the Server Events, Message Events, Member Events and Members joining and leaving select all options. Deselect all of them in the Voice Events section.
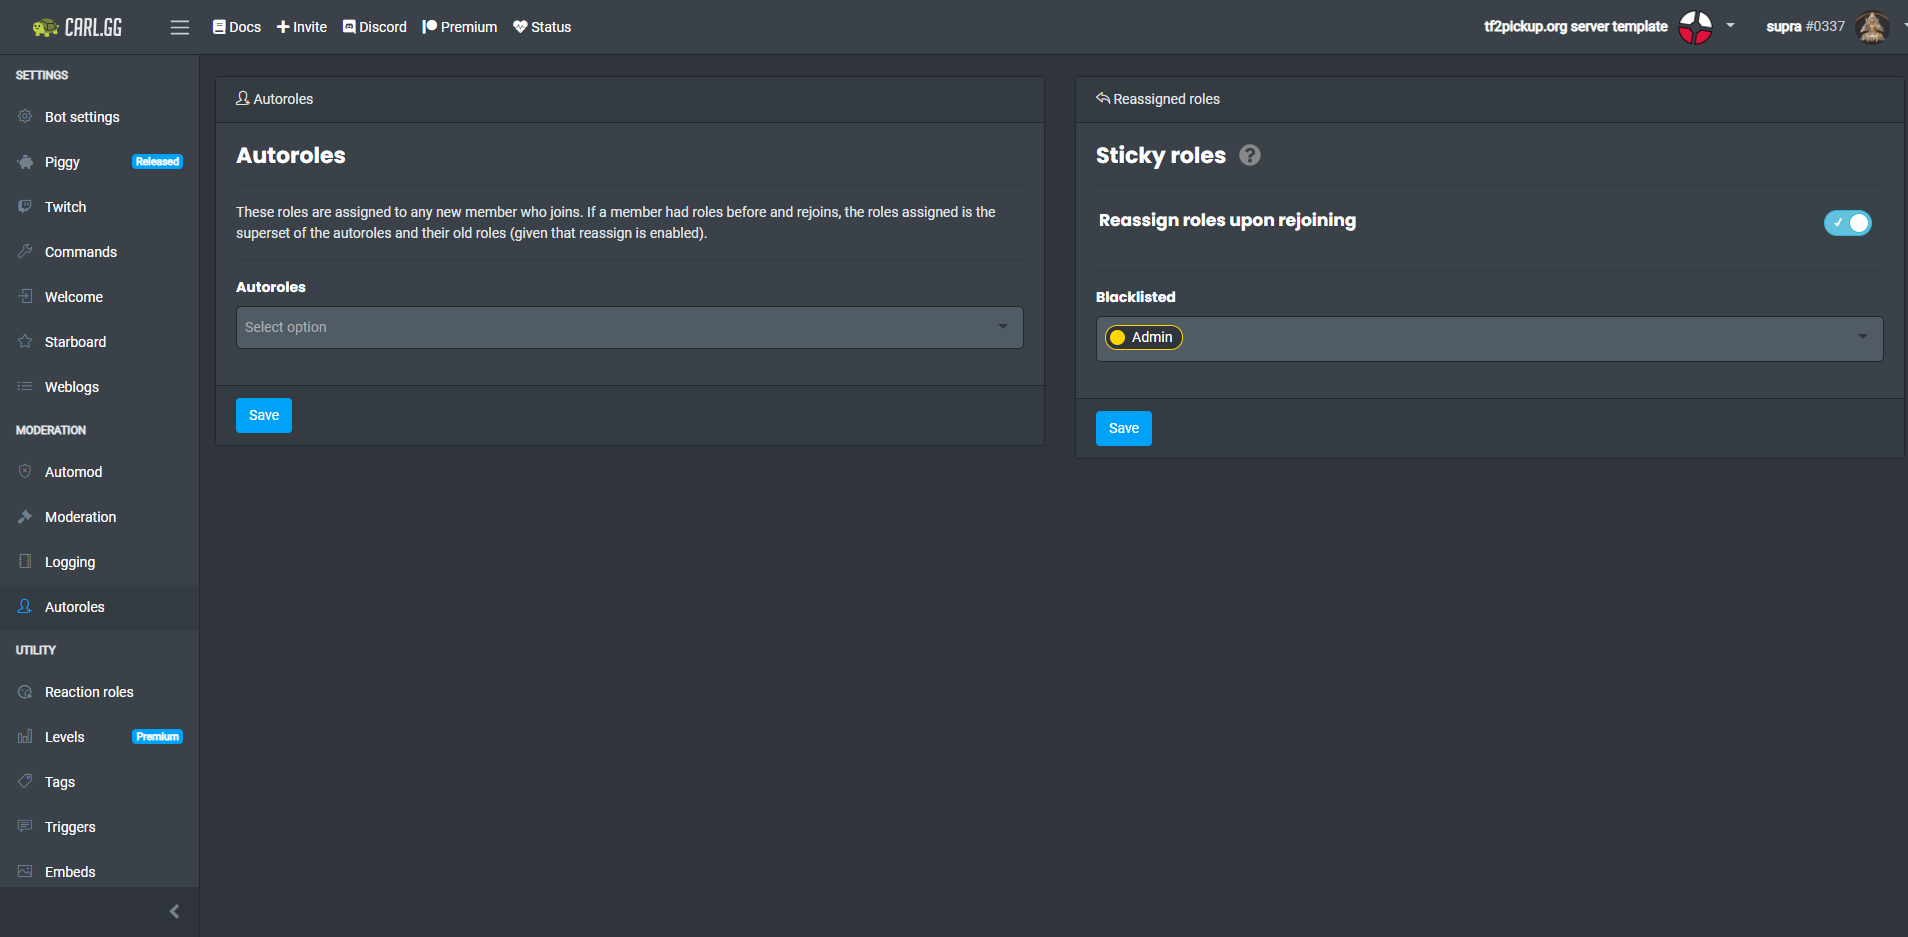
Eventually, go to the Autoroles tab and under Sticky roles section select Reassign roles upon rejoining option and add Admin role to the blacklist. In that way, if someone leaves the server, they will get all roles assigned back on the rejoin. It's important to have it set, because otherwise, if you mute someone, then that person could escape the mute by rejoining the server. The Admin role is in the blacklist, because if someone who is an admin leaves the server, that will let you have an option to freely readd the role to this person in a time you want, so that will prevent potential situation where some ex-admin could rejoin the server in order to abuse their admin rights given by that role by for example banning everyone on the server.
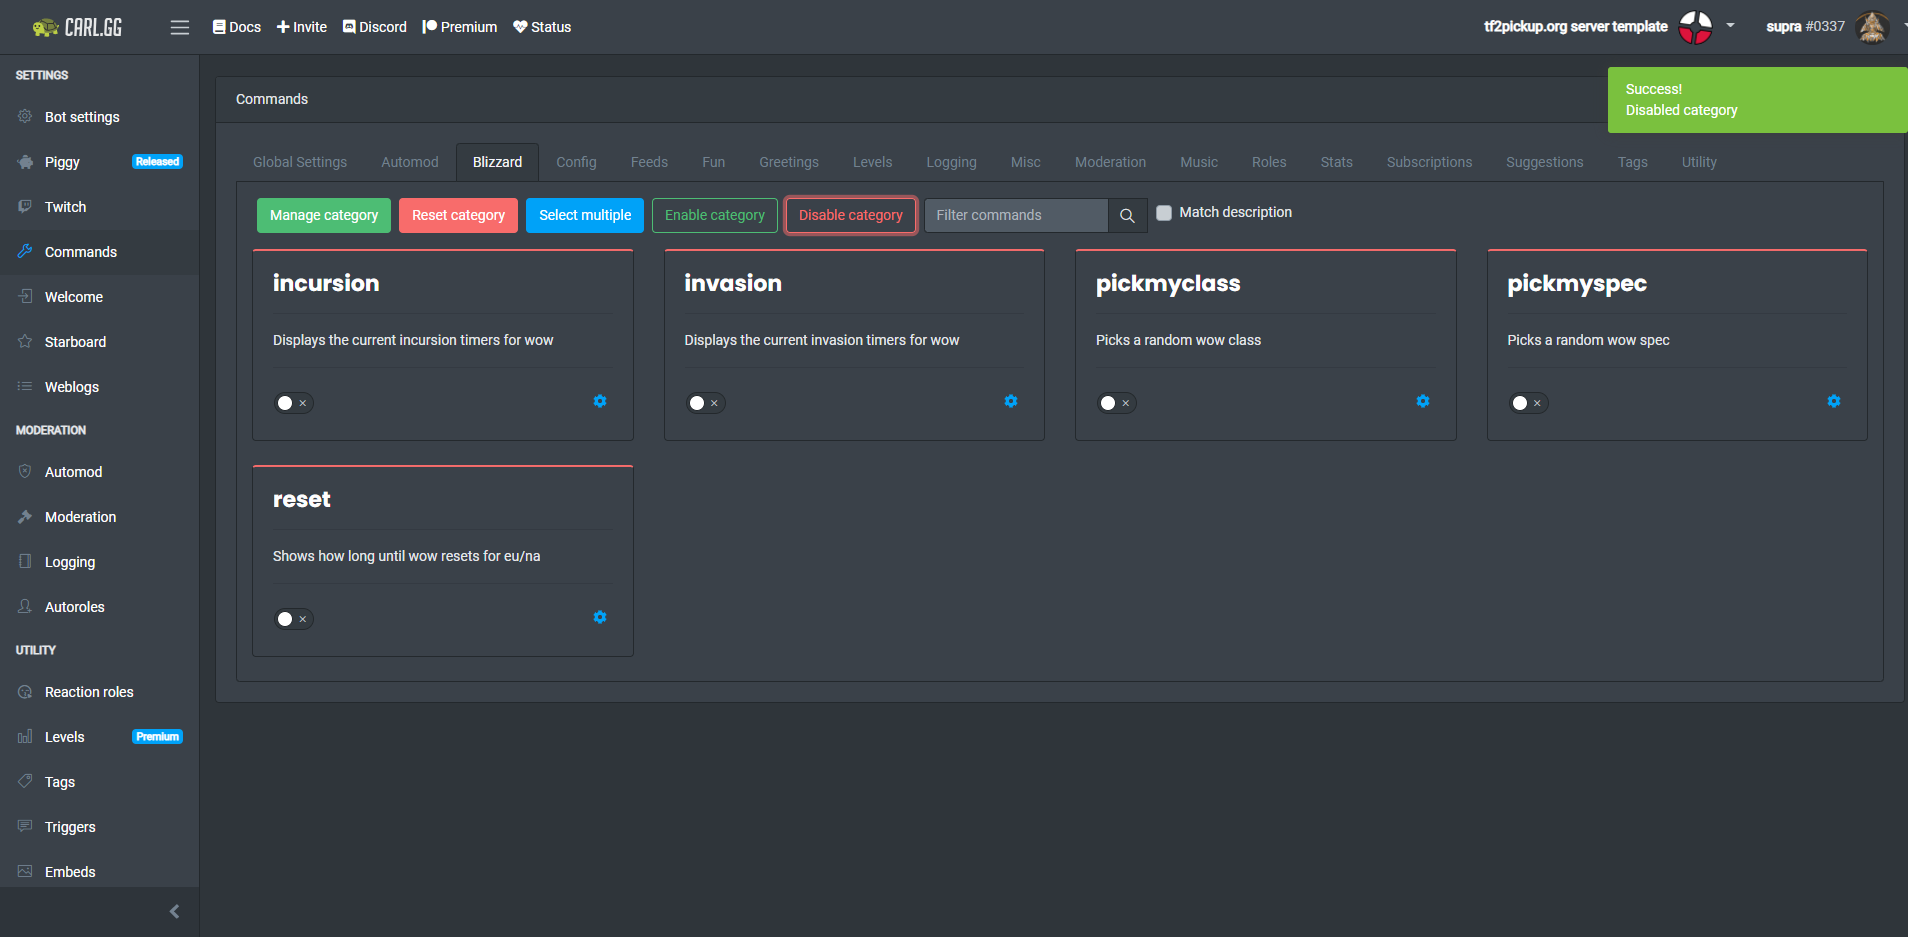
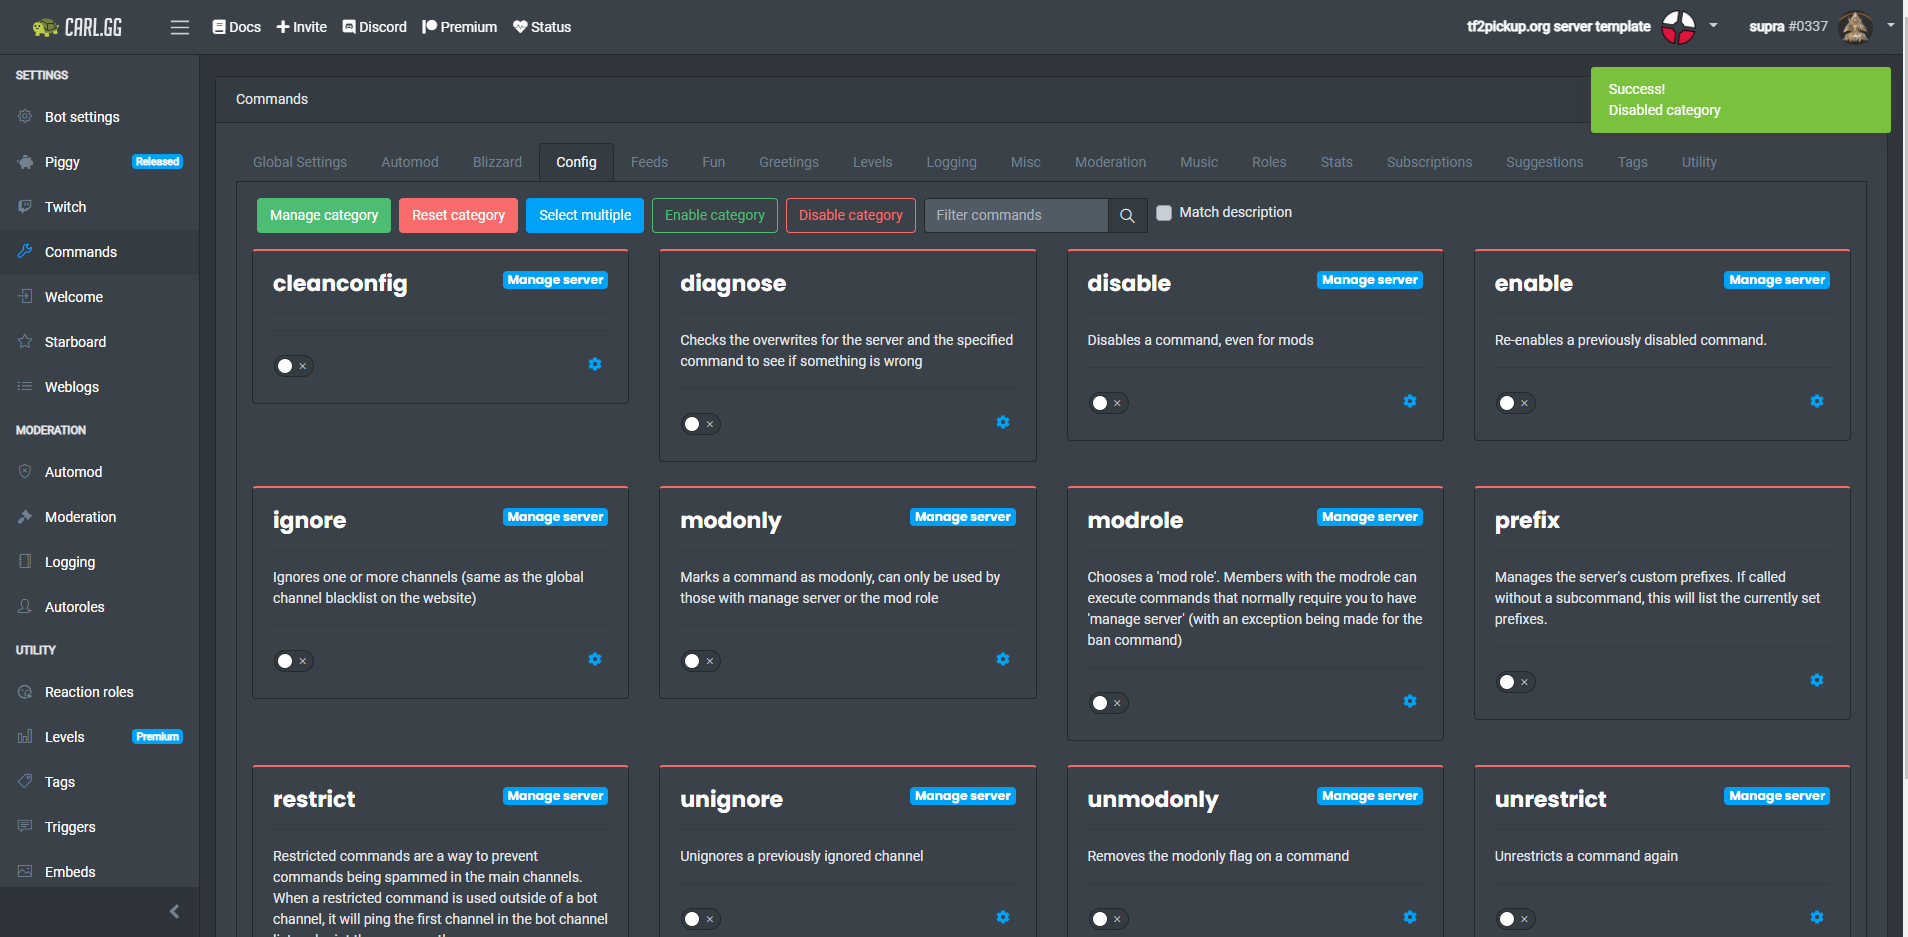
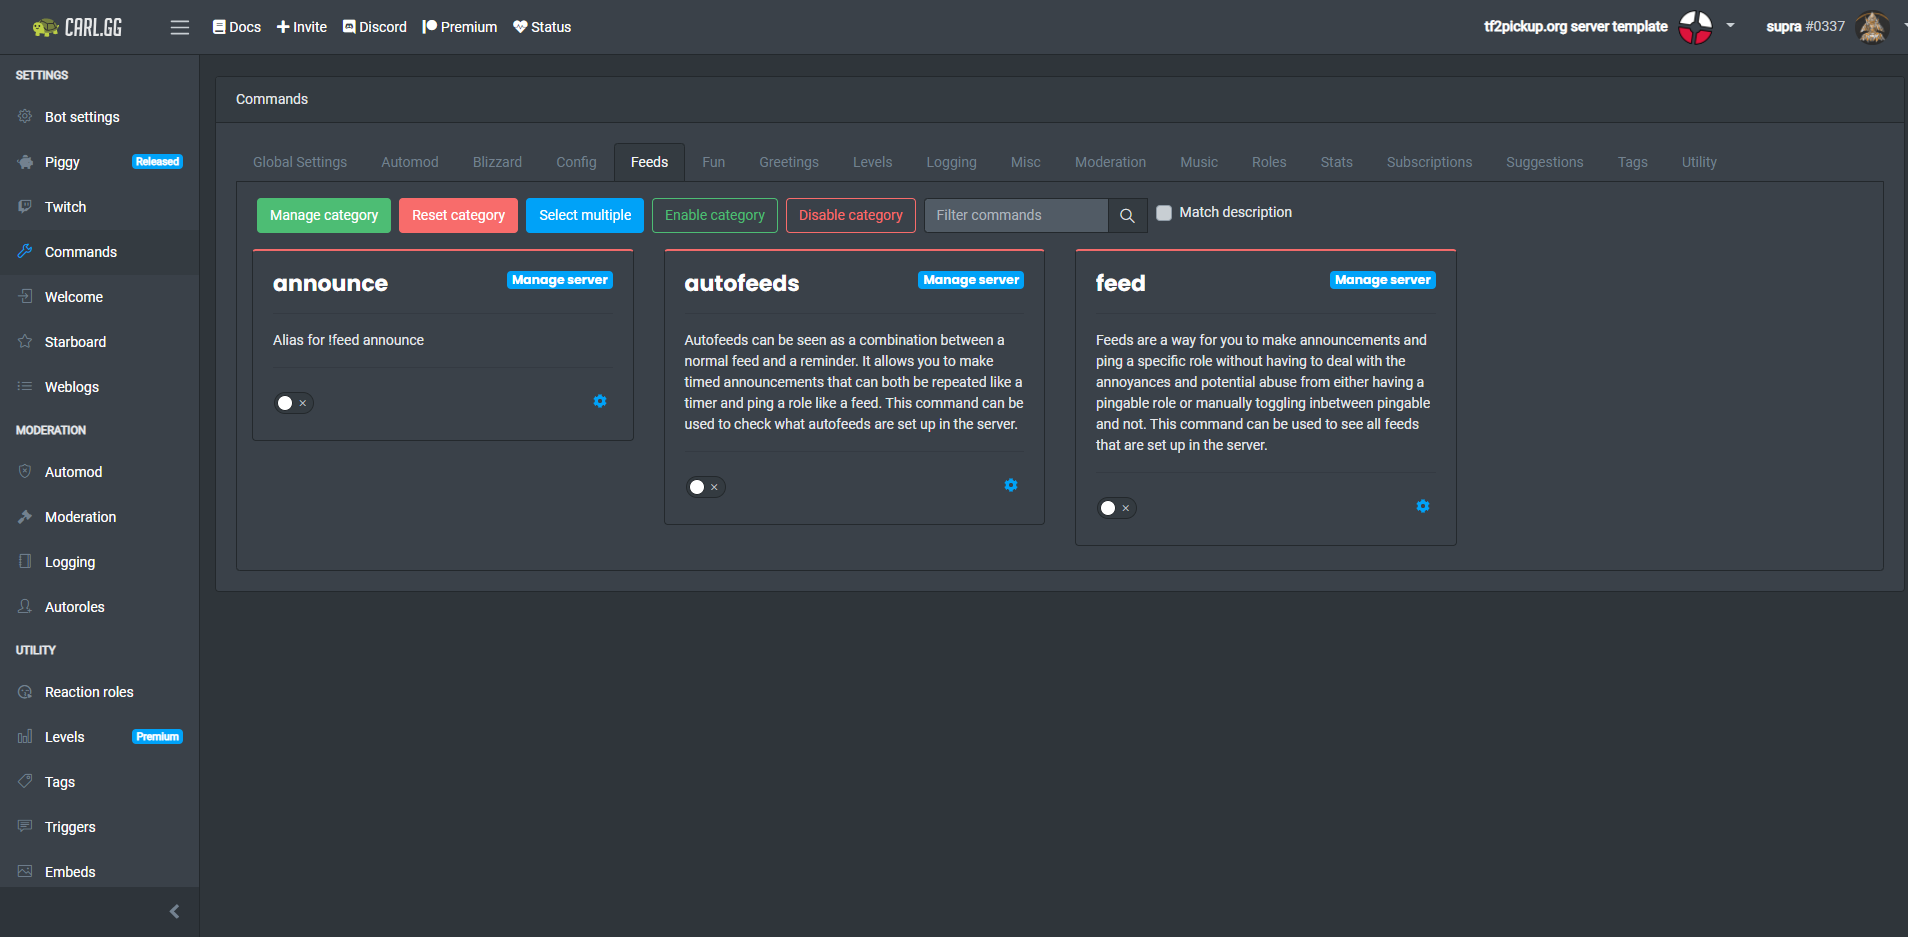
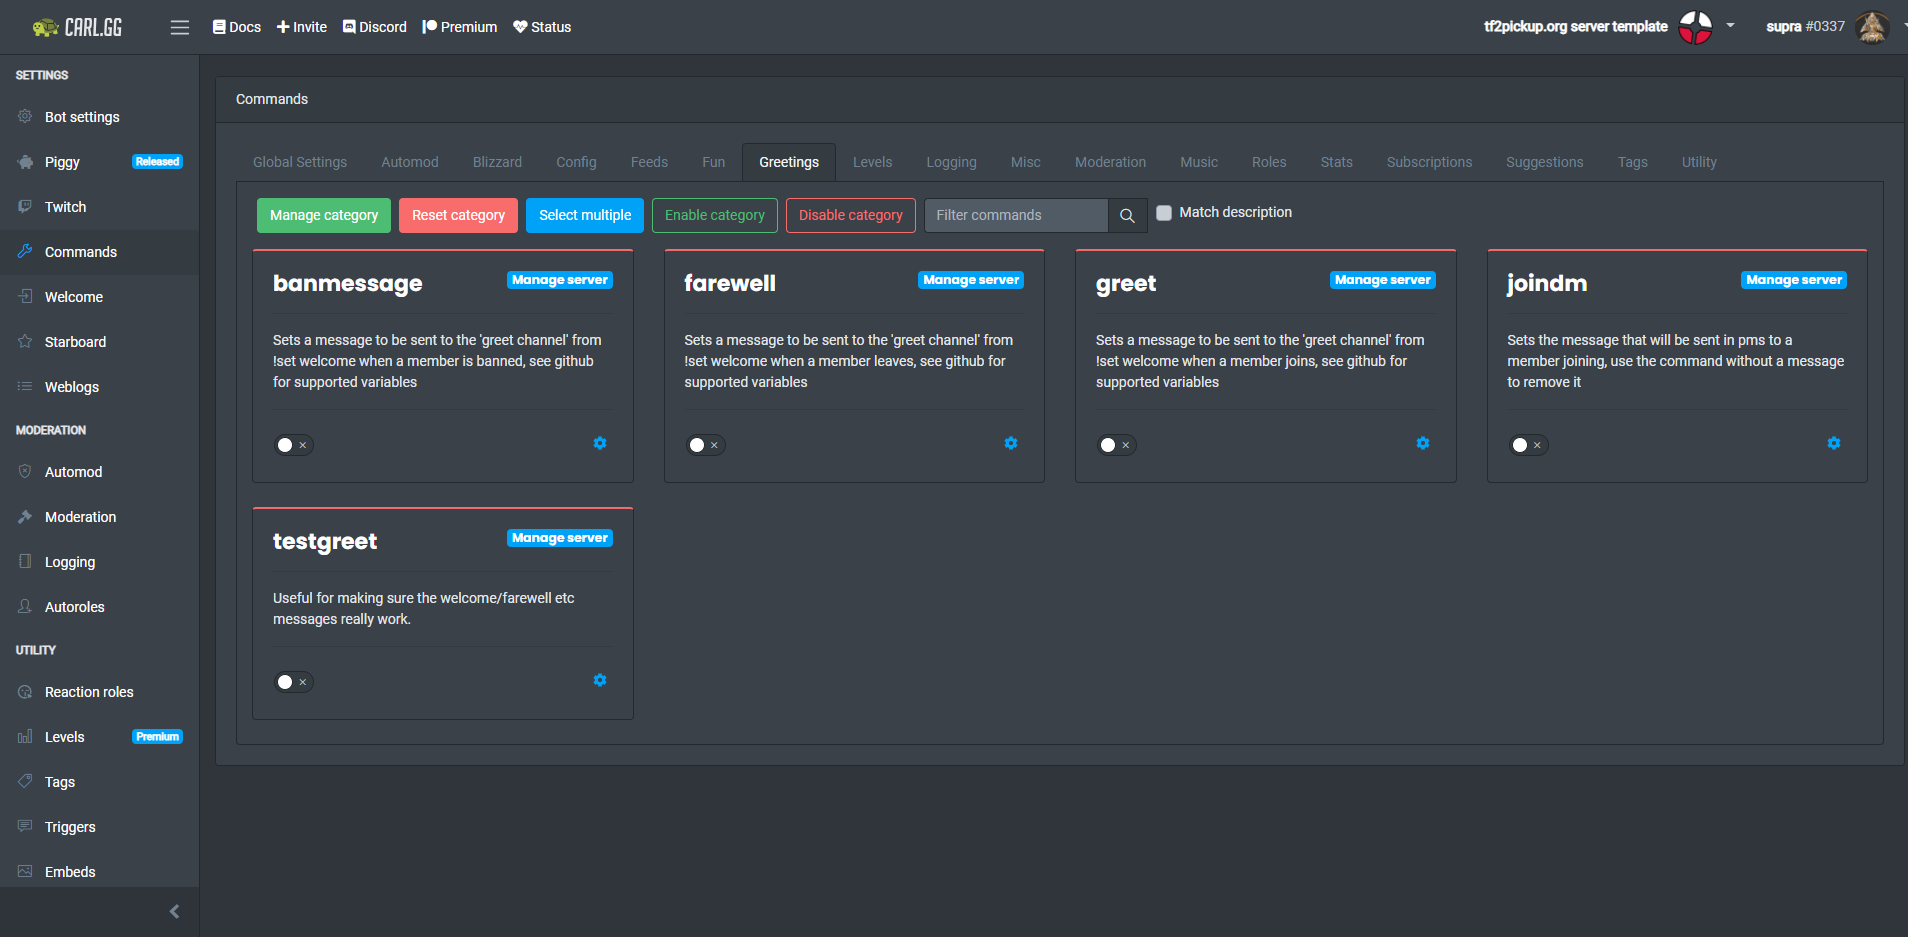
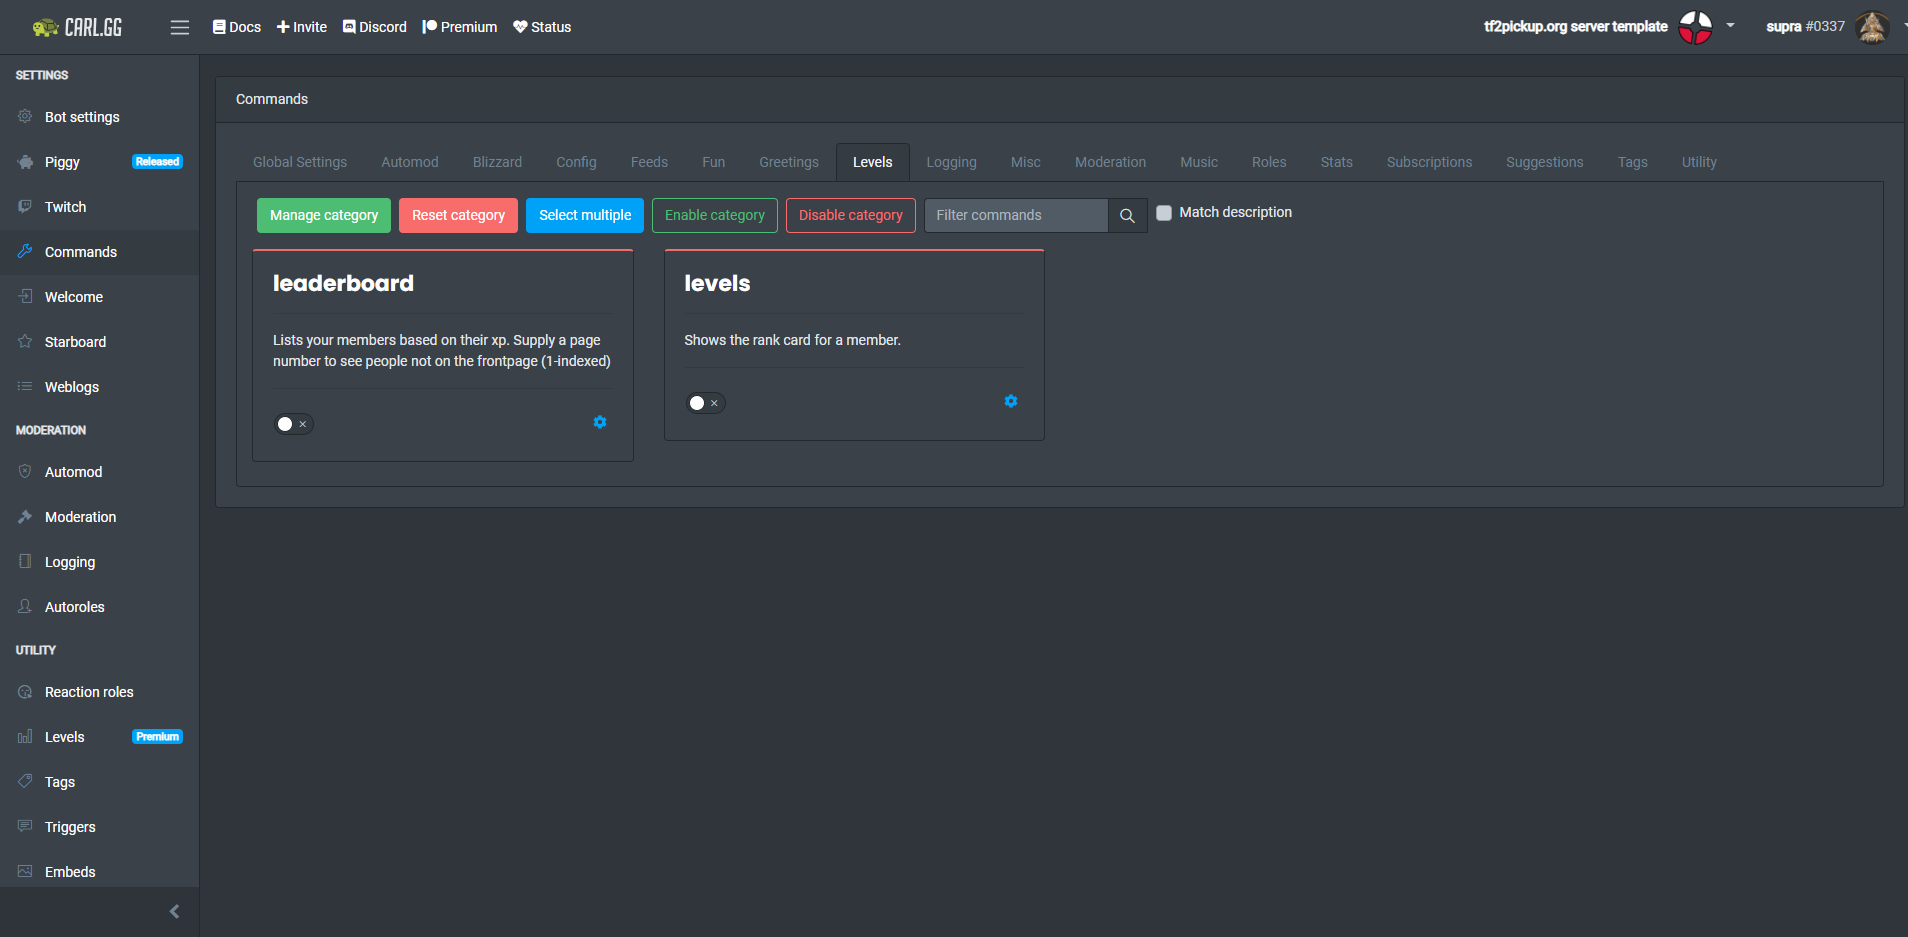
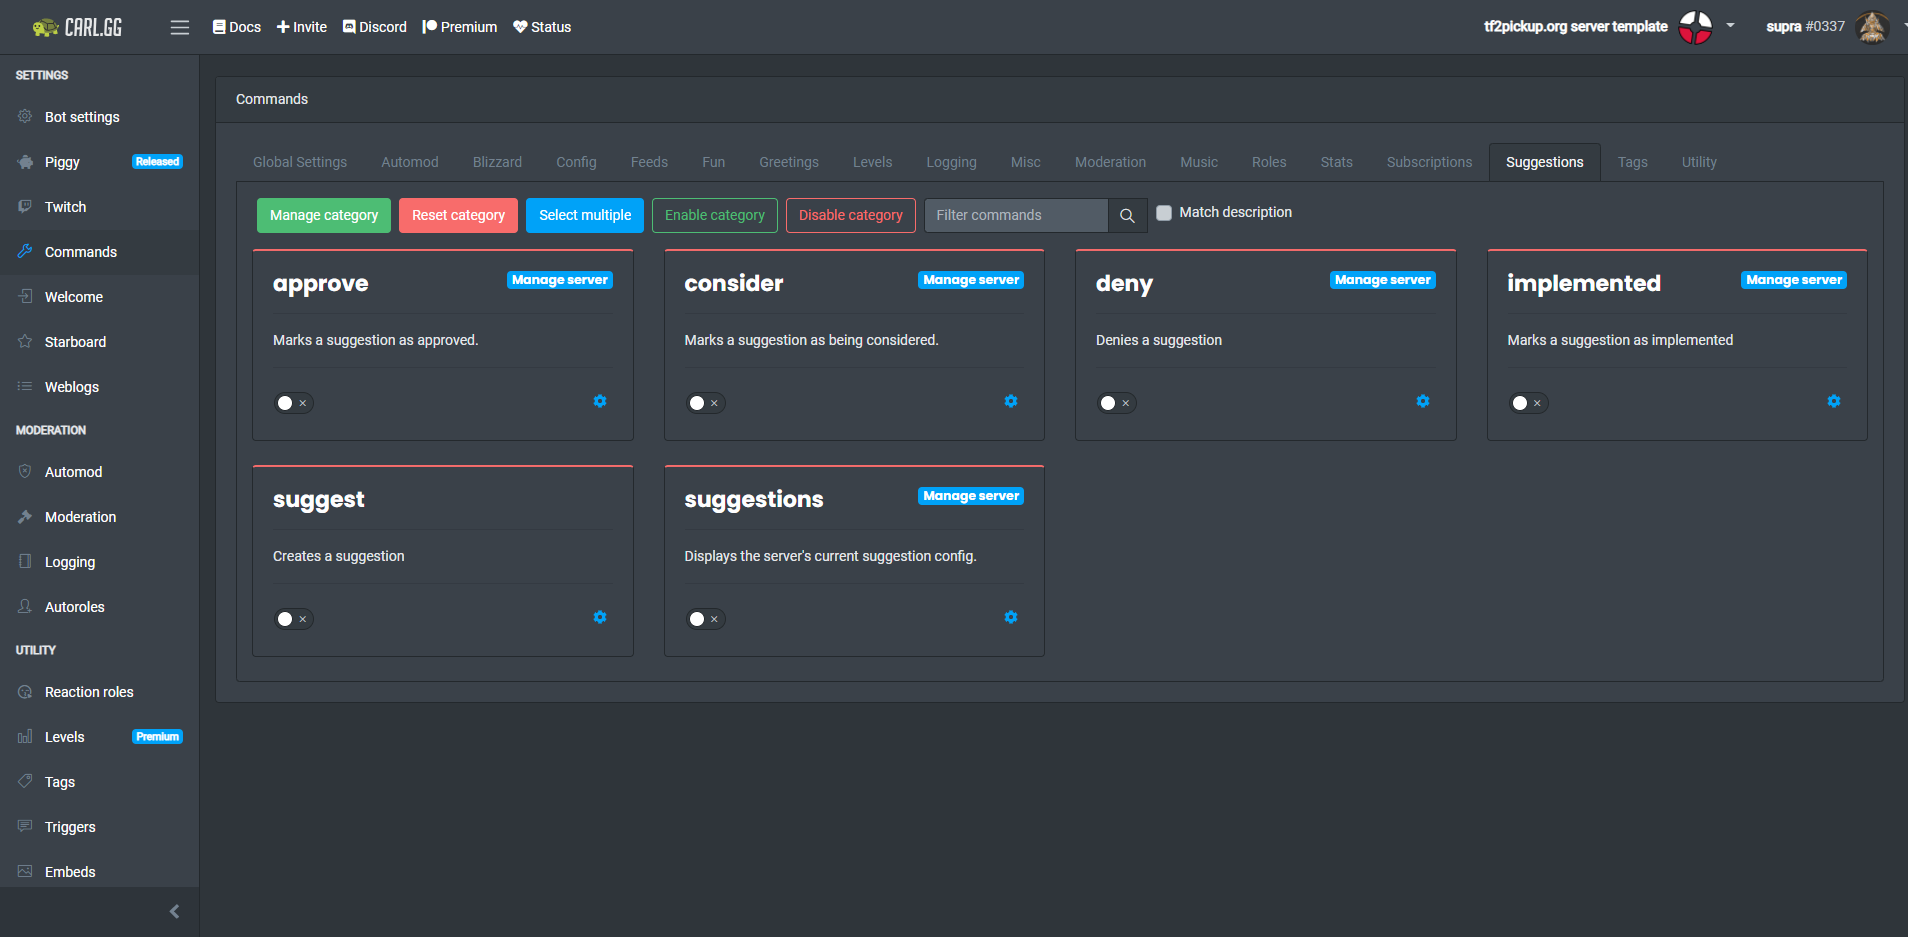
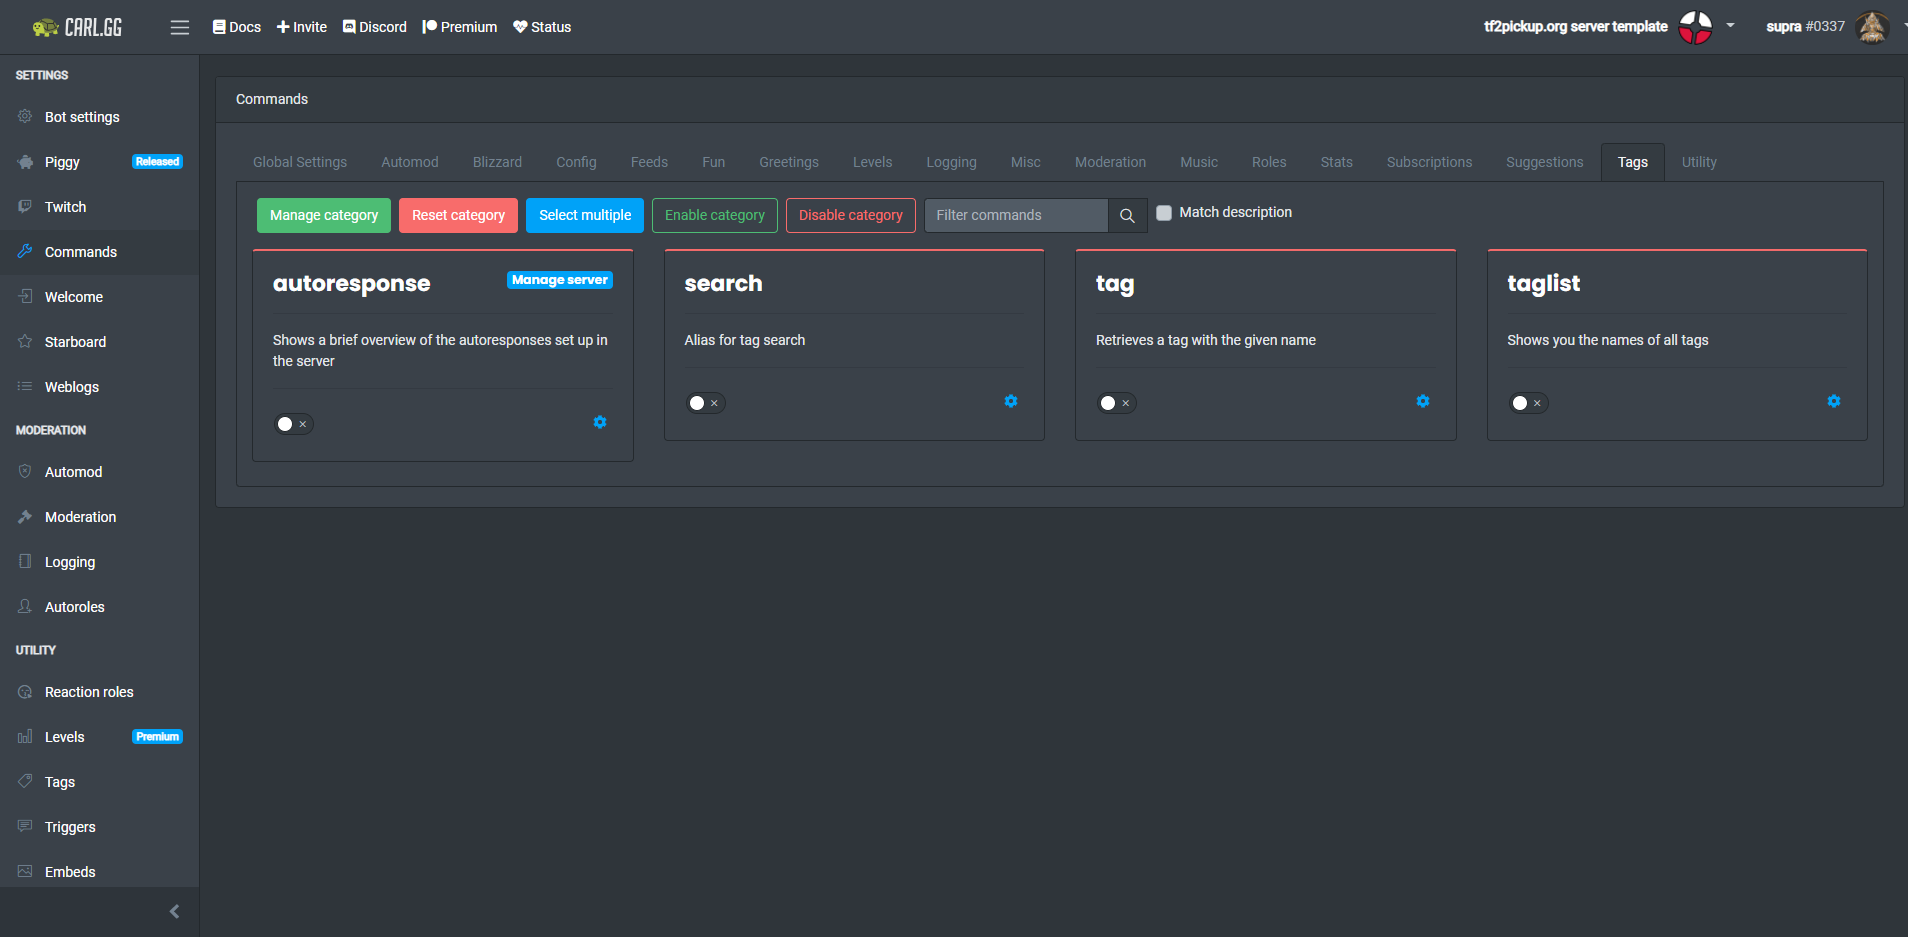
The last part of the configuration in the dashboard would be to disable command groups. We suggest to disable the following command groups:
Blizzard,Config,Feeds,Greetings,Levels,Suggestions,Tags.
In the end make sure to move the carl-bot Discord role to the top of the list, but below the crown remover role:
Streamcord
This bot lets you make two things related to the Twitch streams:
- create a Twitch feed where you can see who's live on Twitch,
- create a live role being assigned to people streaming on Twitch in order to highlight them on Discord user list and with nickname colour.
Invite bot to the Discord server by this invite link. Unselect Administrator, Connect, Speak and Use Voice Activity permissions since they are not really needed for this bot.
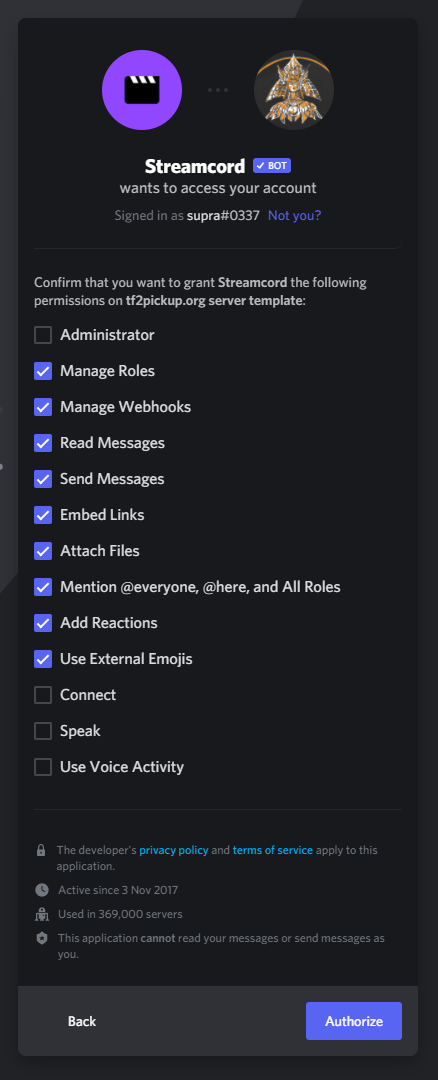
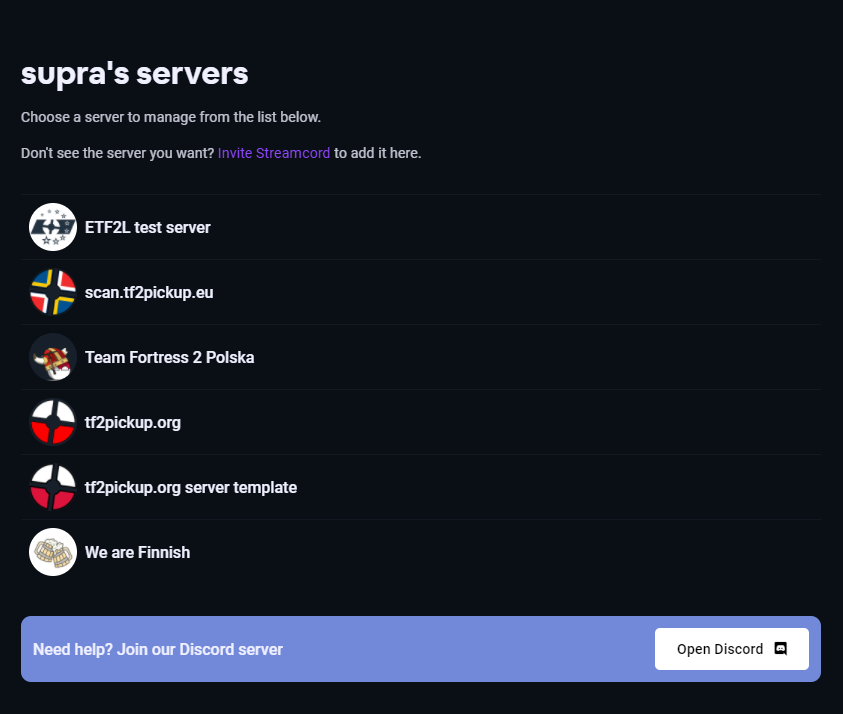
Choose the server you want to use the bot from the list.
Streamcord settings on Discord
The website part is done, now you have to set up a proper channel permissions on the #twitch channel for the Streamcord role (it gets added on bot join on the server). It should have the following list of permissions on this channel:
View Channel,Send Messages,Embed Links,Attach Files,Add Reactions,Use External Emoji,Mention @everyone, @here and All Roles,Manage Messages,Read Message History.
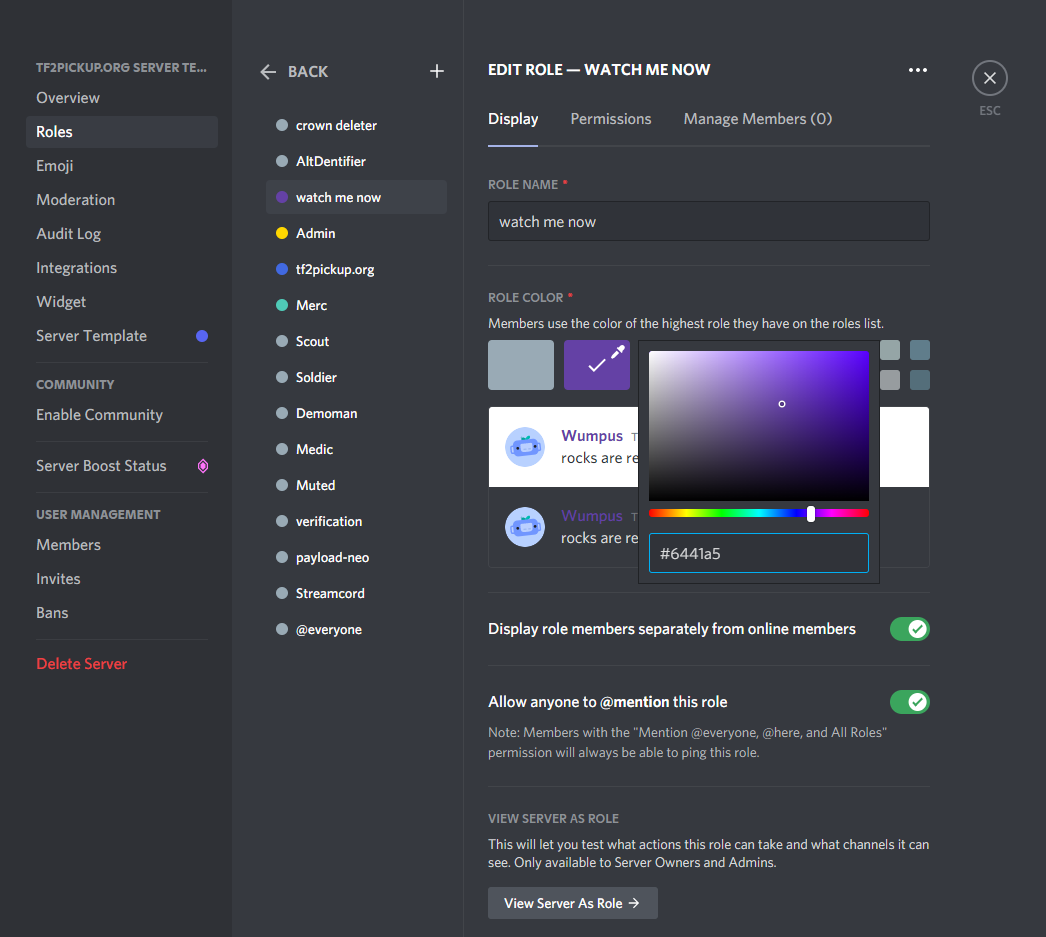
After the channel permissions are set, set up a role called watch me now. It should be below moderation bot roles and it can be above the administration role if your server is small (otherwise put it under the admin role on the list). Edit the role.

Assign the colour #6441a5 to the role, make sure Display role members separately from online members and Allow anyone to @mention this role is checked. Also, head over to the Permissions tab and unselect all permissions from this role.
Streamcord website settings
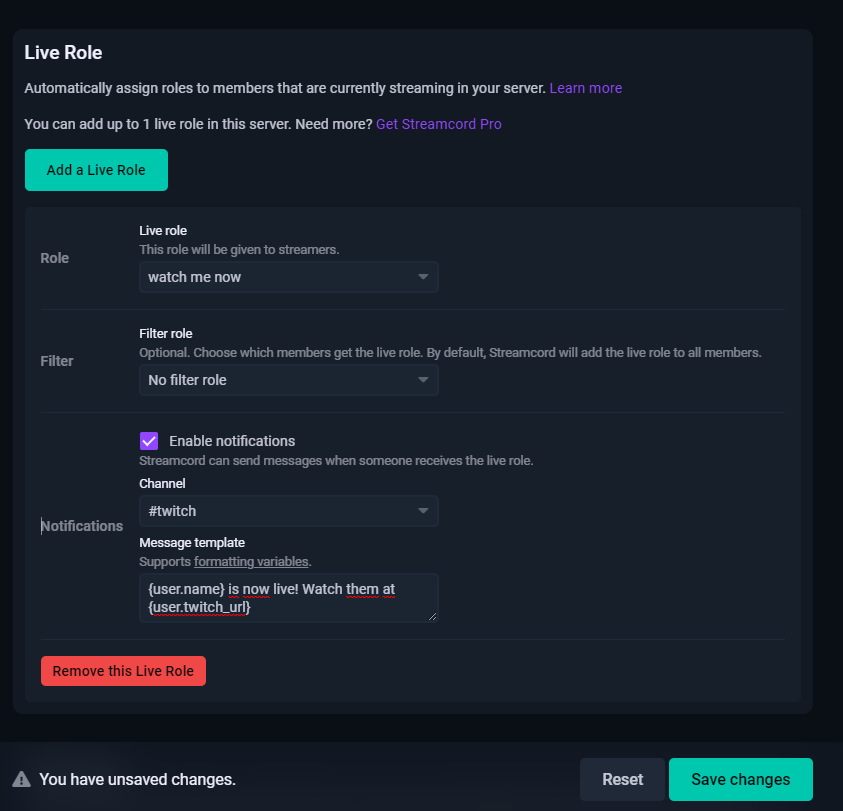
Then go to the Live Role tab and click Add a Live Role button.
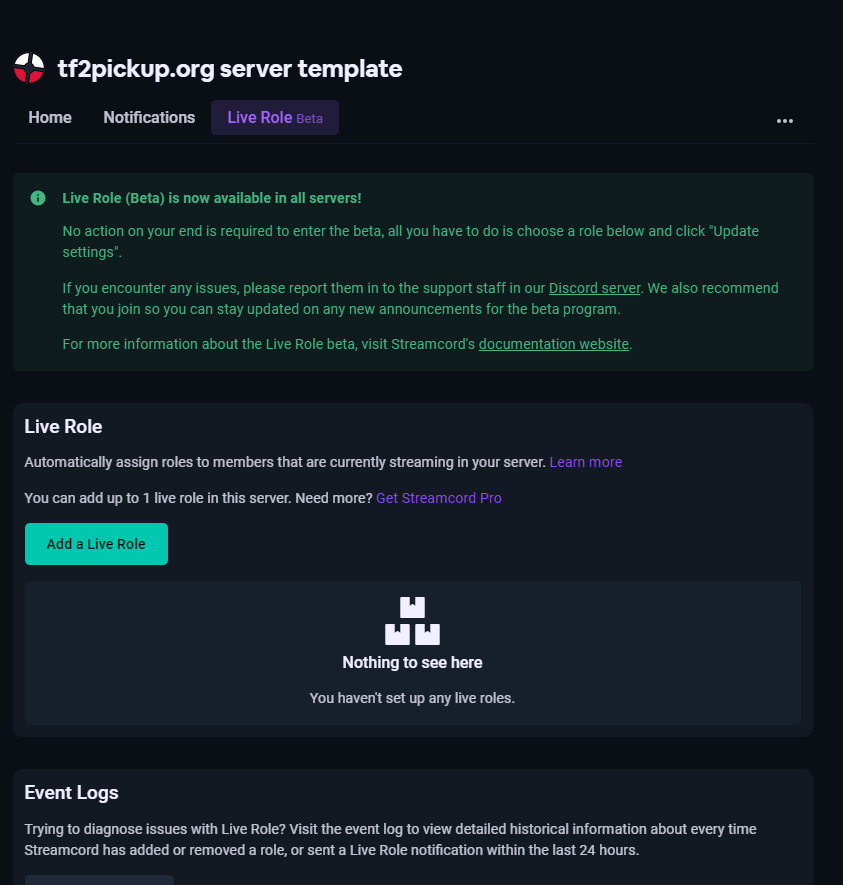
Choose watch me now Role from the list, leave Filter role empty, tick Enable notifications, select channel named #twitch and use a template you want to. The template used in the example below is:
{user.name} is now live! Watch them at {user.twitch_url}
After filling all values, click Save changes to save it.
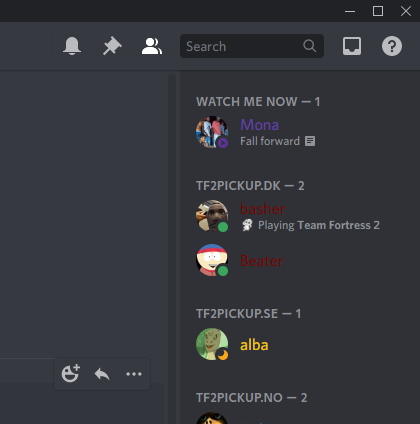
In the end, the Twitch feed should look like this:
Moreover, the Streamcord live role should be noticable in this way:
Statbot
Statbot is a bot letting you count server usage statistics in the last 30 days. It counts user messages, time spent on voice channels, game activities and more. After going to Statbot's site click on Start Tracking Now!.
![]()
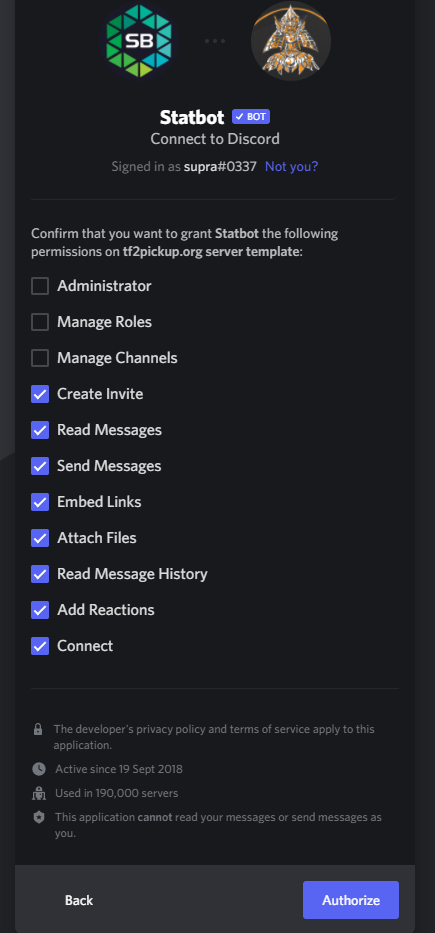
Uncheck Administrator, Manage Roles and Manage Channels permission from the bot. It's unneeded for our use case. After adding the bot on the server, go back to the main page and click Dashboard button on the top right corner.
Click on Statbot Dashboard and choose to Log in from the dropdown list.
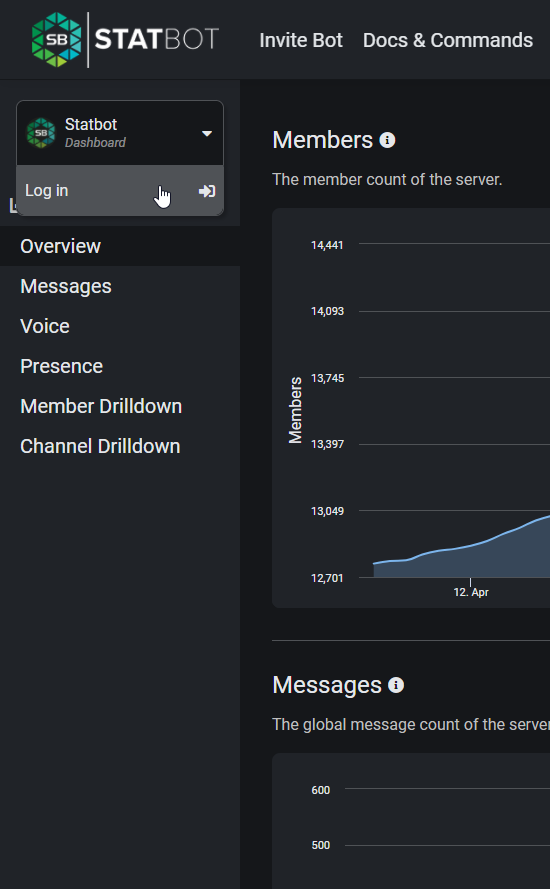
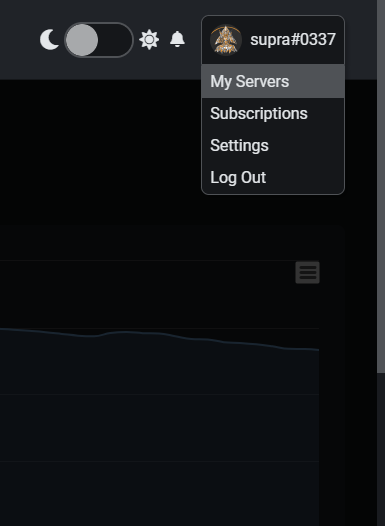
After logging in, choose My Servers from the top right dropdown list.
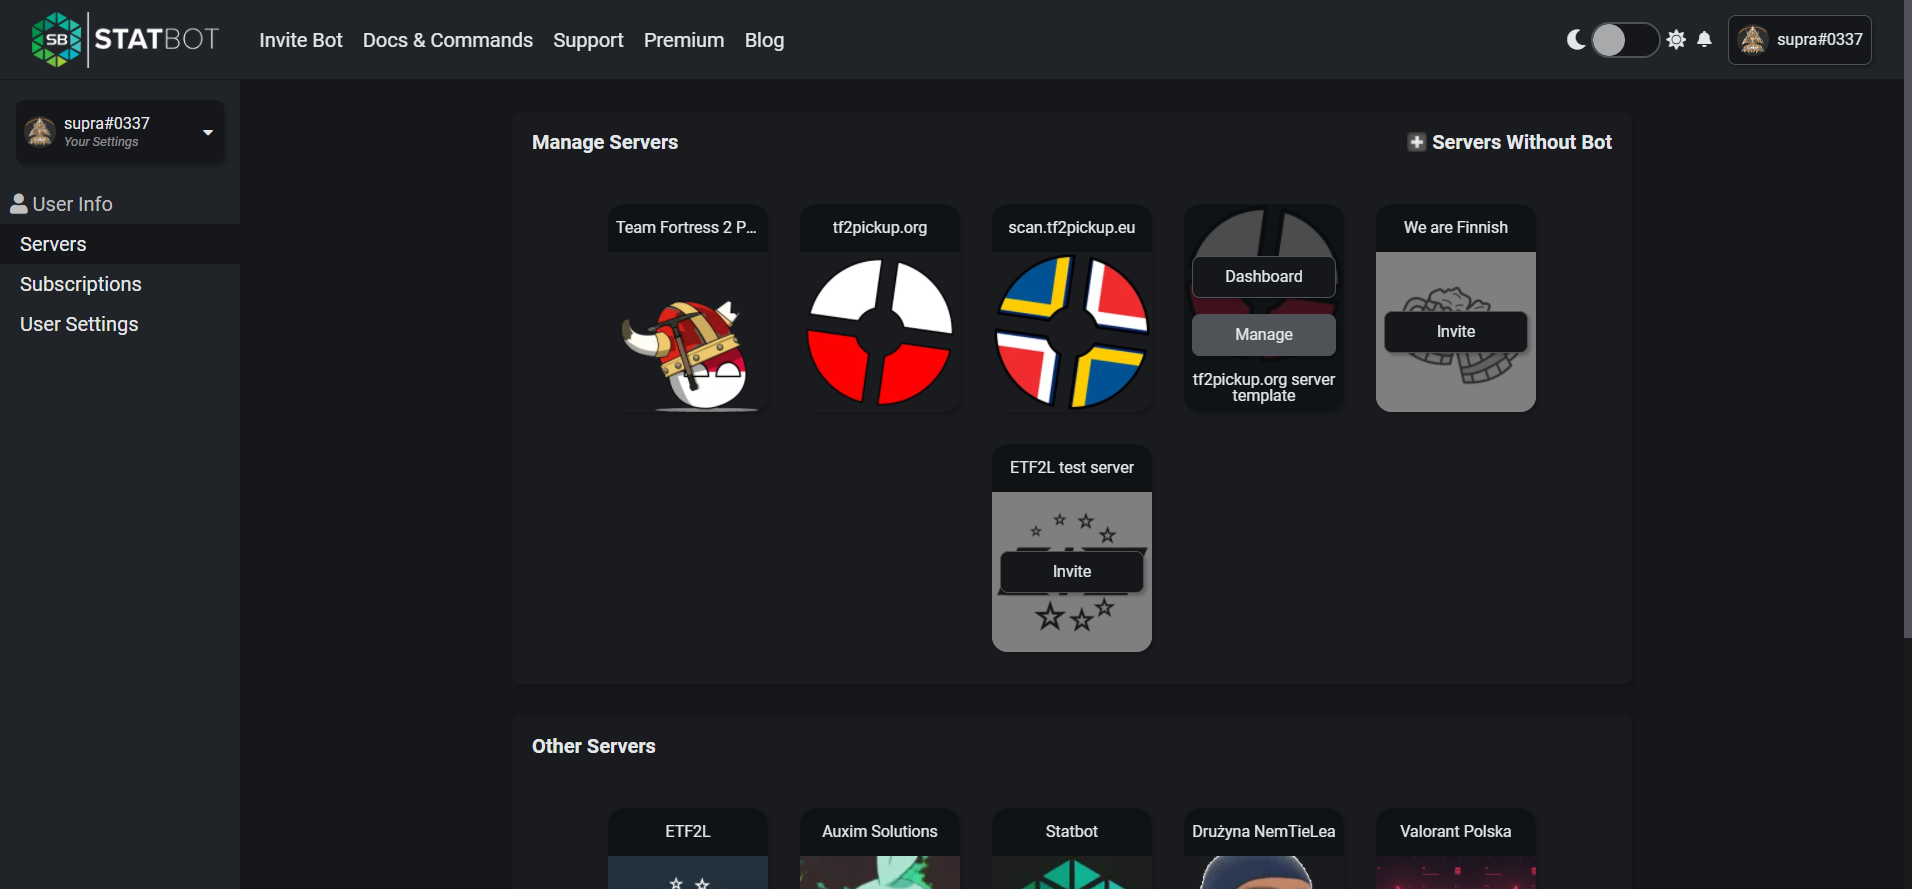
Then, choose the server you want to set up the bot by hovering on its icon and clicking Manage.
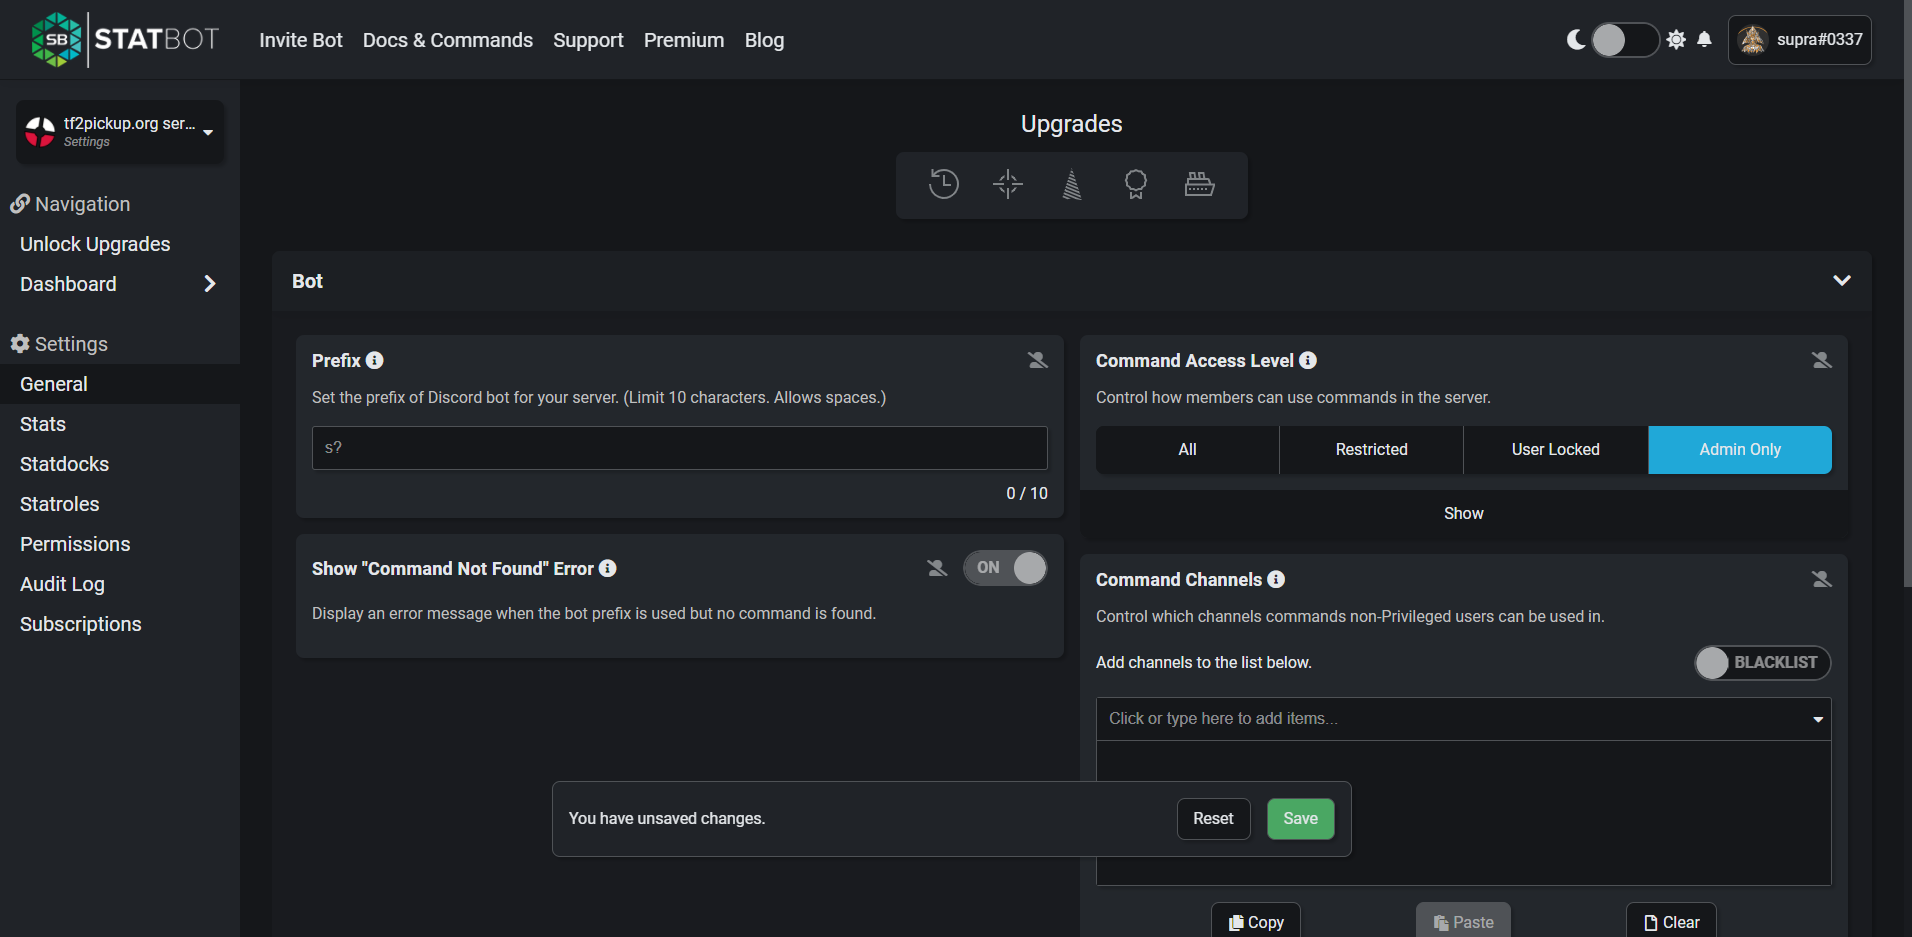
Change the Command Access Level to Admin Only, as this is not needed at all for the bot in order to work.
Then set Dashboard Access Level to Public. Save all changes by clicking on Save. After that, go to the Stats section on left side of the website.
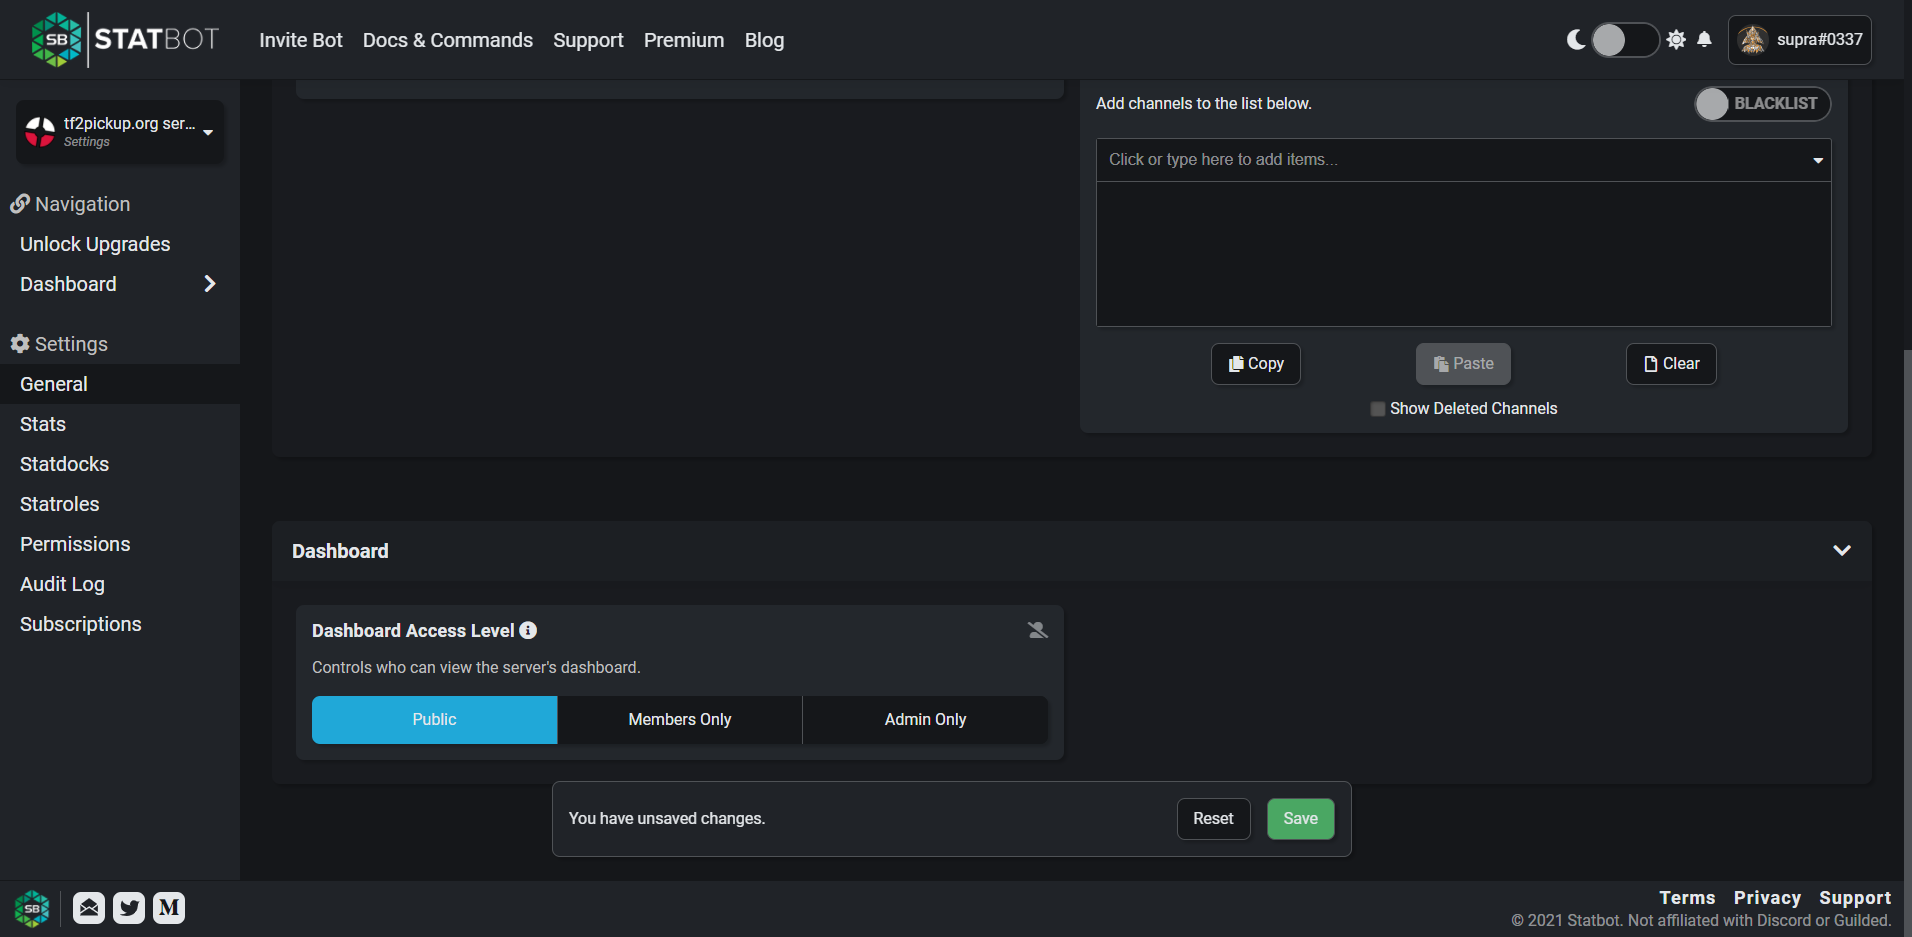
Then scroll down and change the Lookback time to All. In the Channels section choose:
Staff Logssection,tf2pickup.orgsection,Staffsection,welcome,rulesandtwitchchannels.
These settings are made in order to exclude logging on these channels. Make sure the Blacklist option is selected.

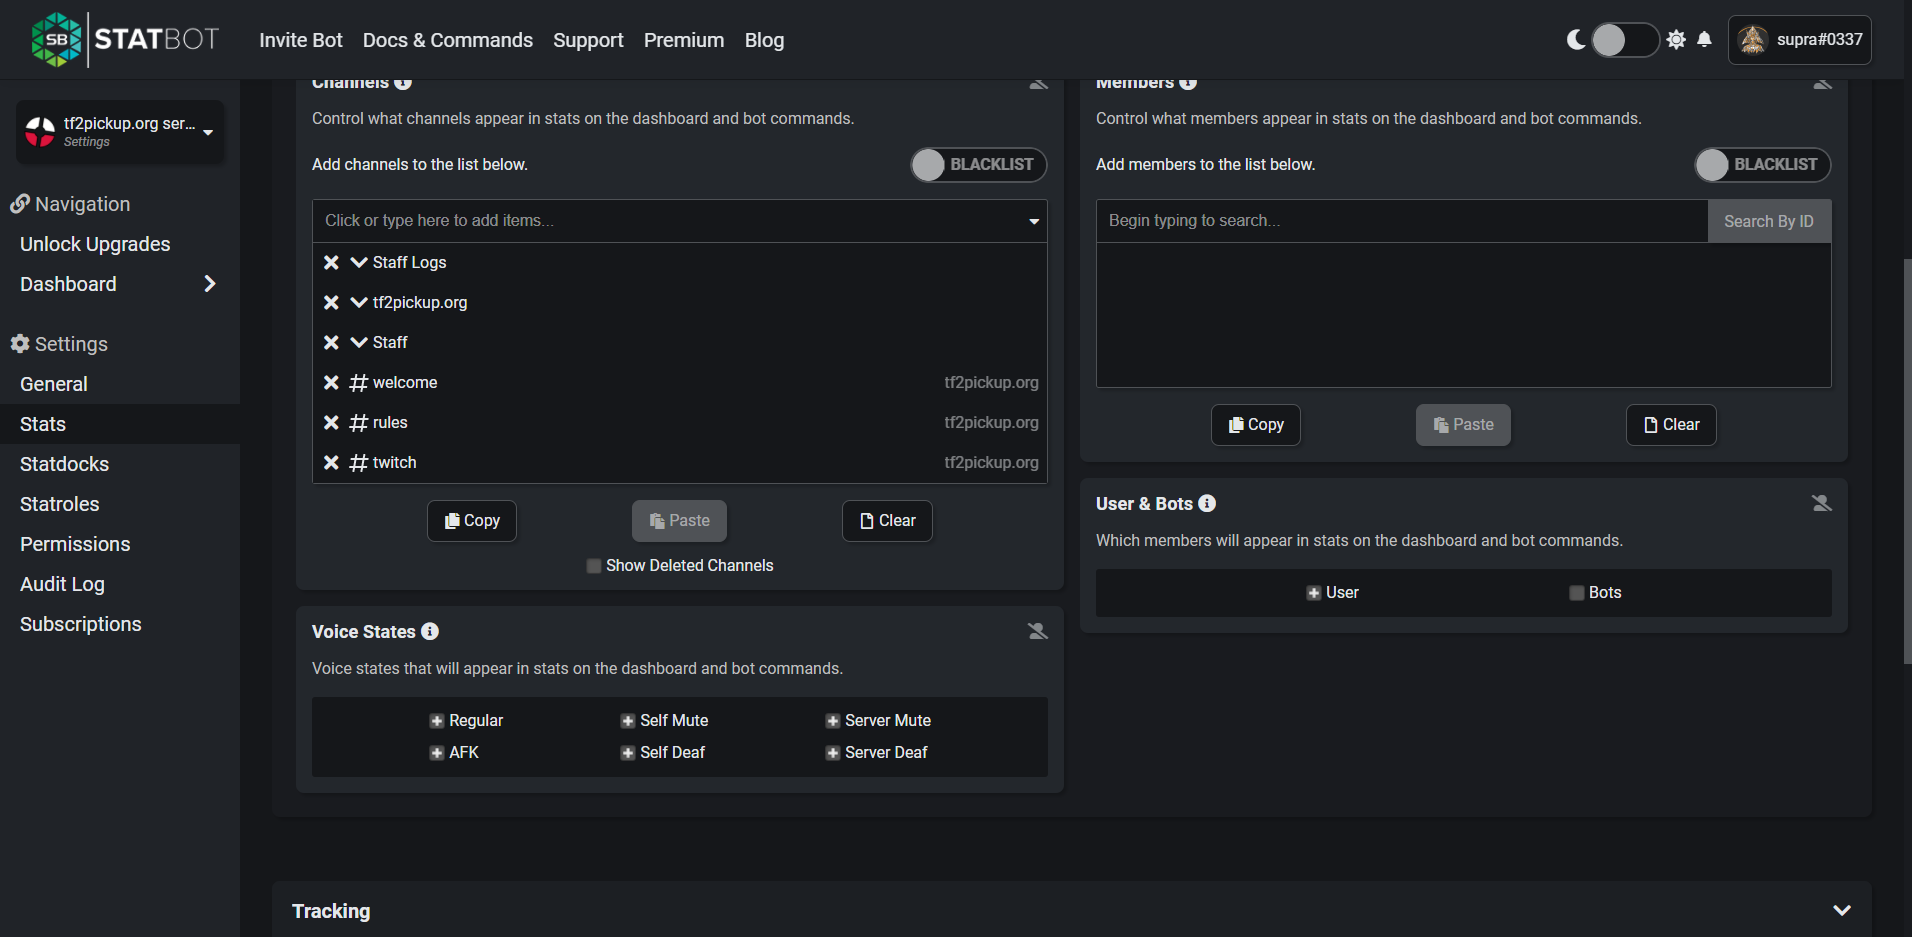
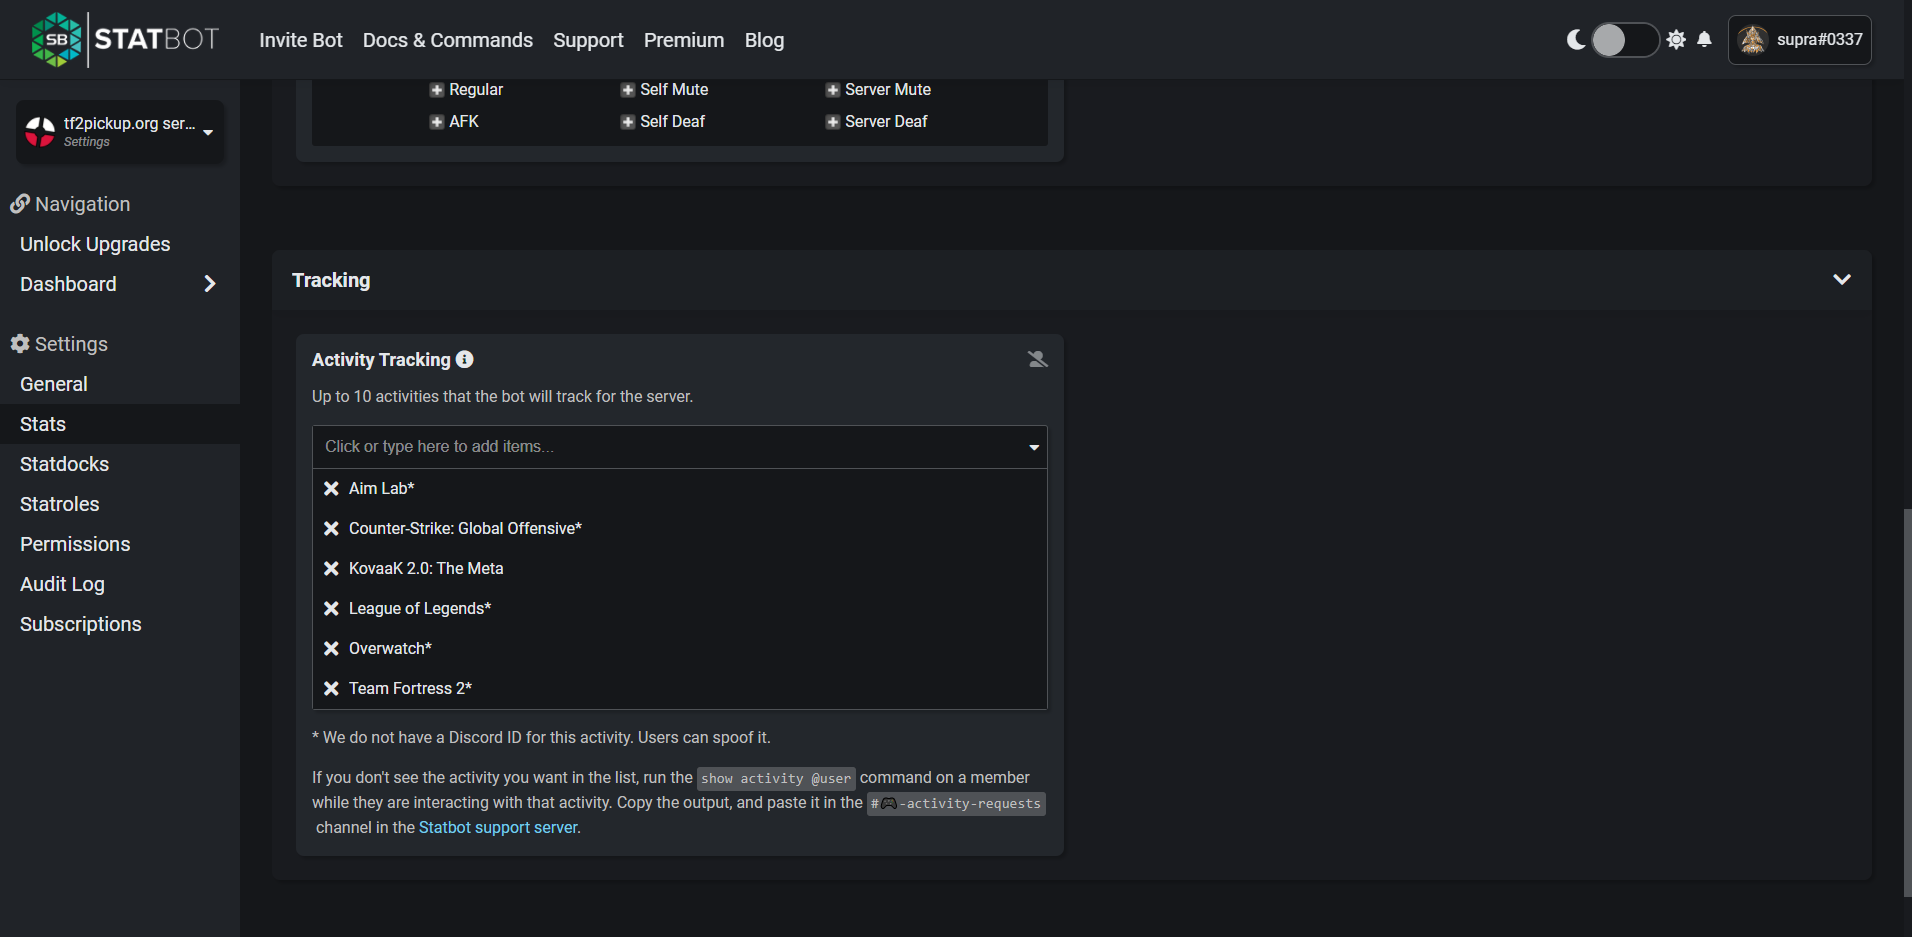
In the end scroll down to the bottom and add some games people on the server usually play, so it can be shown in the stats when these gets gathered.
After that the bot should be up. This is an example server dashboard where you can watch user stats on the server.
payload-neo
The payload-neo bot is a result of the development of sharky, later developed by 24. The bot is open-source and its source code can be found here. The bot command list can be found here. The most important features are:
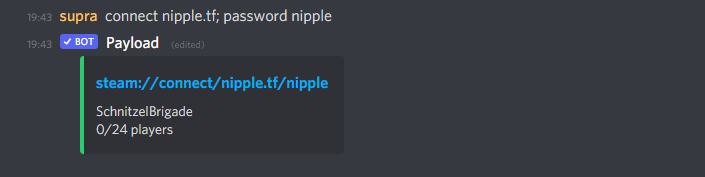
- connect string conversion to a clickable Steam URI,
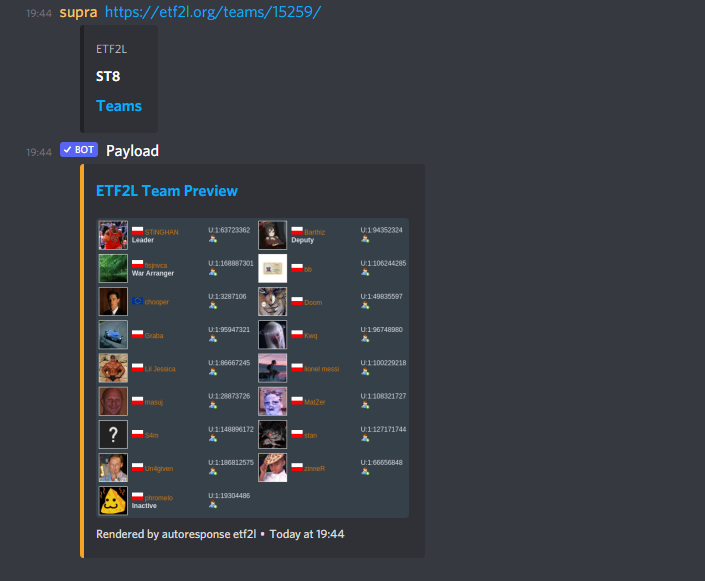
- ETF2L/UGC team profile previews,
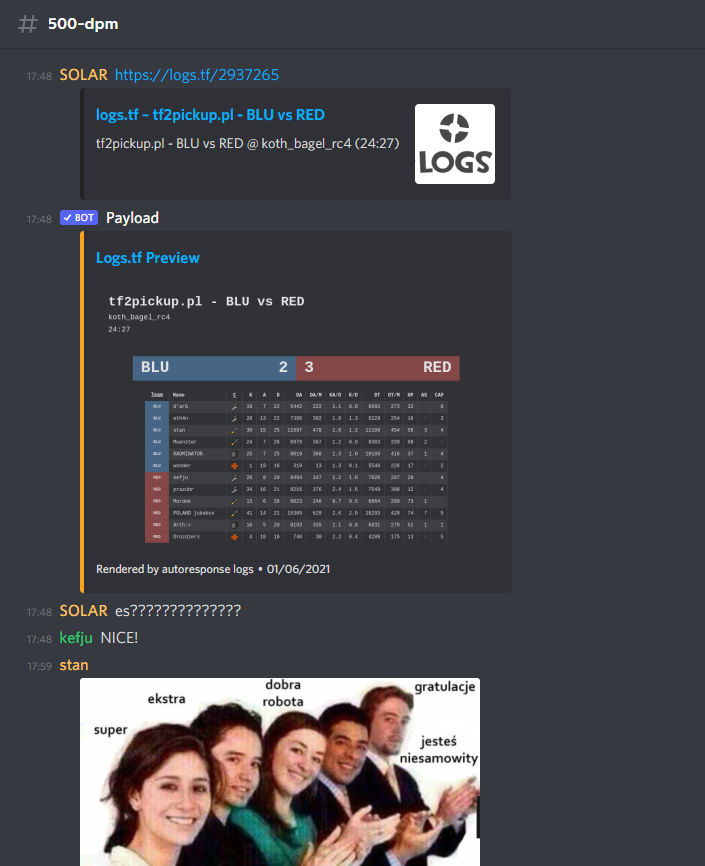
- logs.tf game previews,
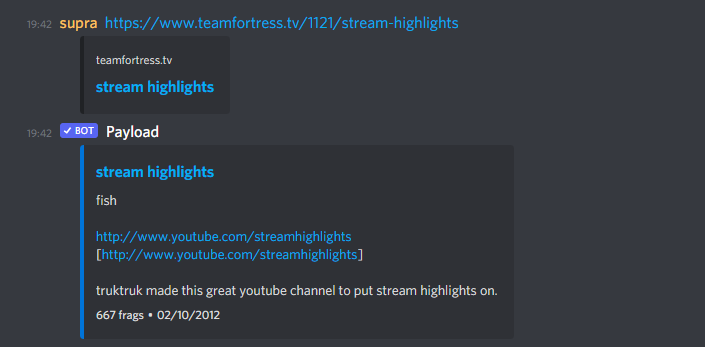
- teamfortress.tv thread previews.
This bot does not need any specific configuration, as long as it's allowed to speak on public channels. Just invite it as you do with the other bots and that should be it.
Ticket Tool
Ticket Tool is a utility bot letting you have a support queue for player queries, for instance if someone notice a cheater or abusive behaviour, this bot lets people report and have a conversation with the server staff about it. After setting a bot, player could be able to open a ticket by clicking a button like this:
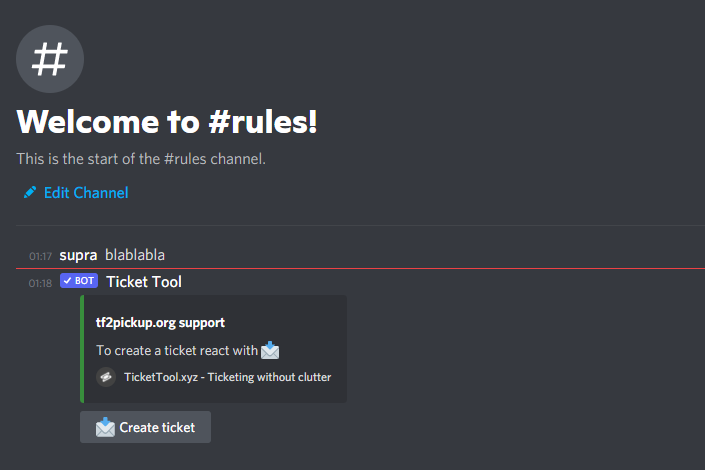
In this guide, this ticket panel will be placed in the #rules channel.
Ticket Tool configuration
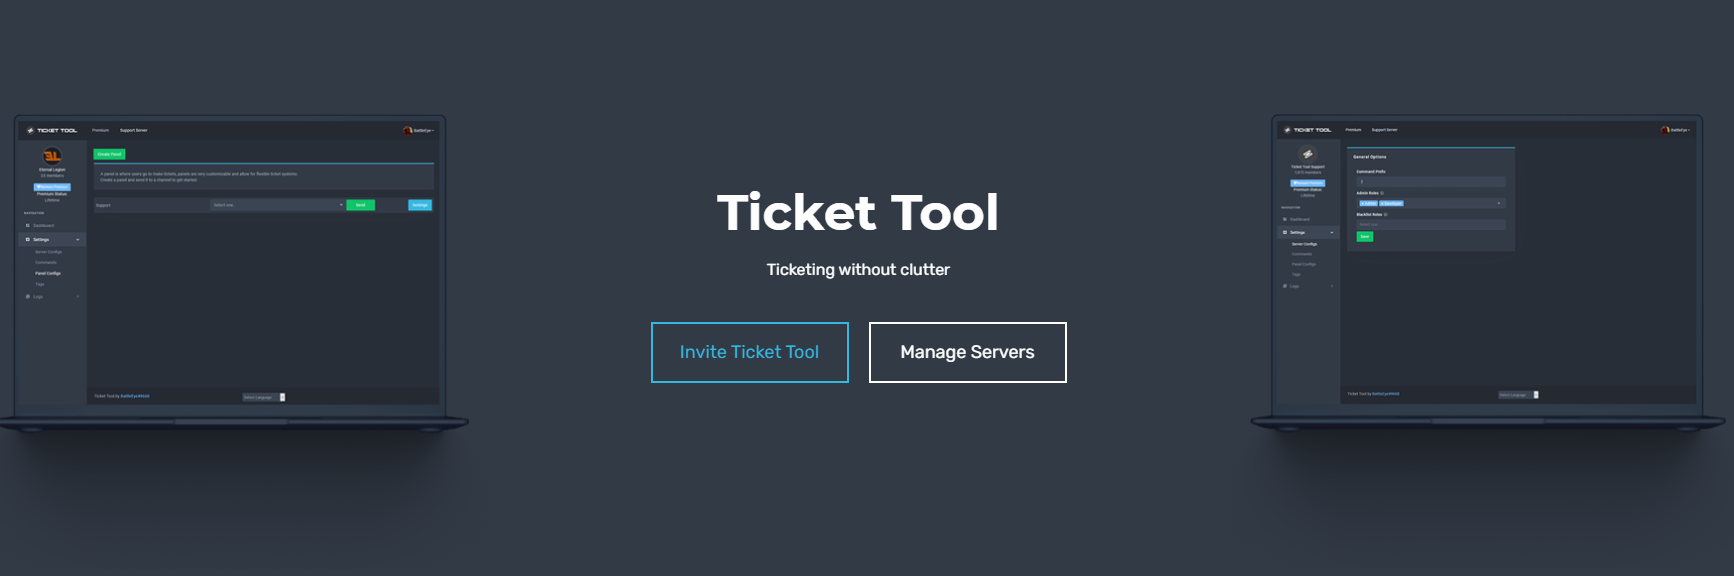
In order to invite the bot, enter this website and click Invite Ticket Tool.
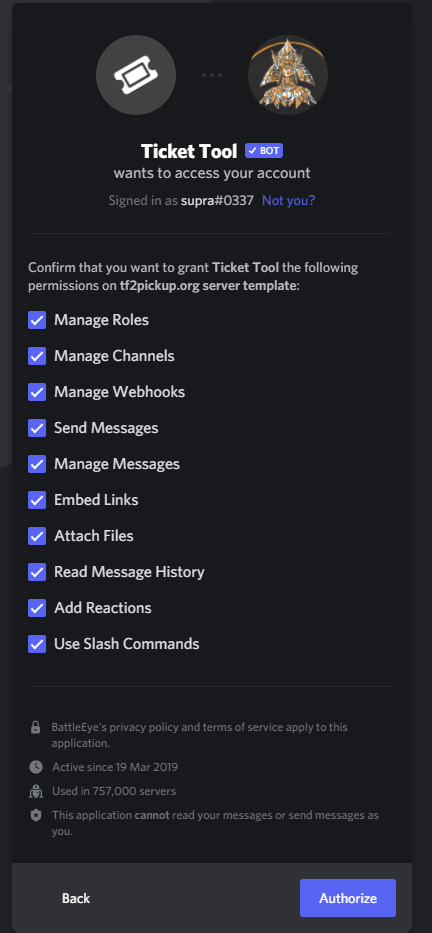
Then make sure you'll live all permissions ticket and click Authorize.
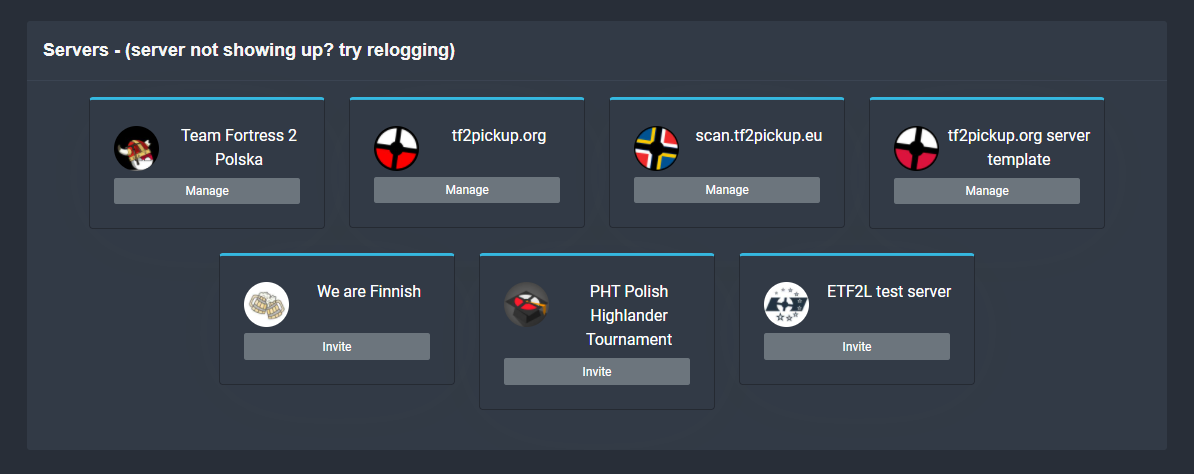
After that, go back to the main page and choose Manage Servers. You will have to choose the server you want to set up Ticket Tool for. In our case it's tf2pickup.org server template.
After that, you will see a window with the bot server permissions. The Administrator permissions should remain unticked. Select Panel Configs tab on left.
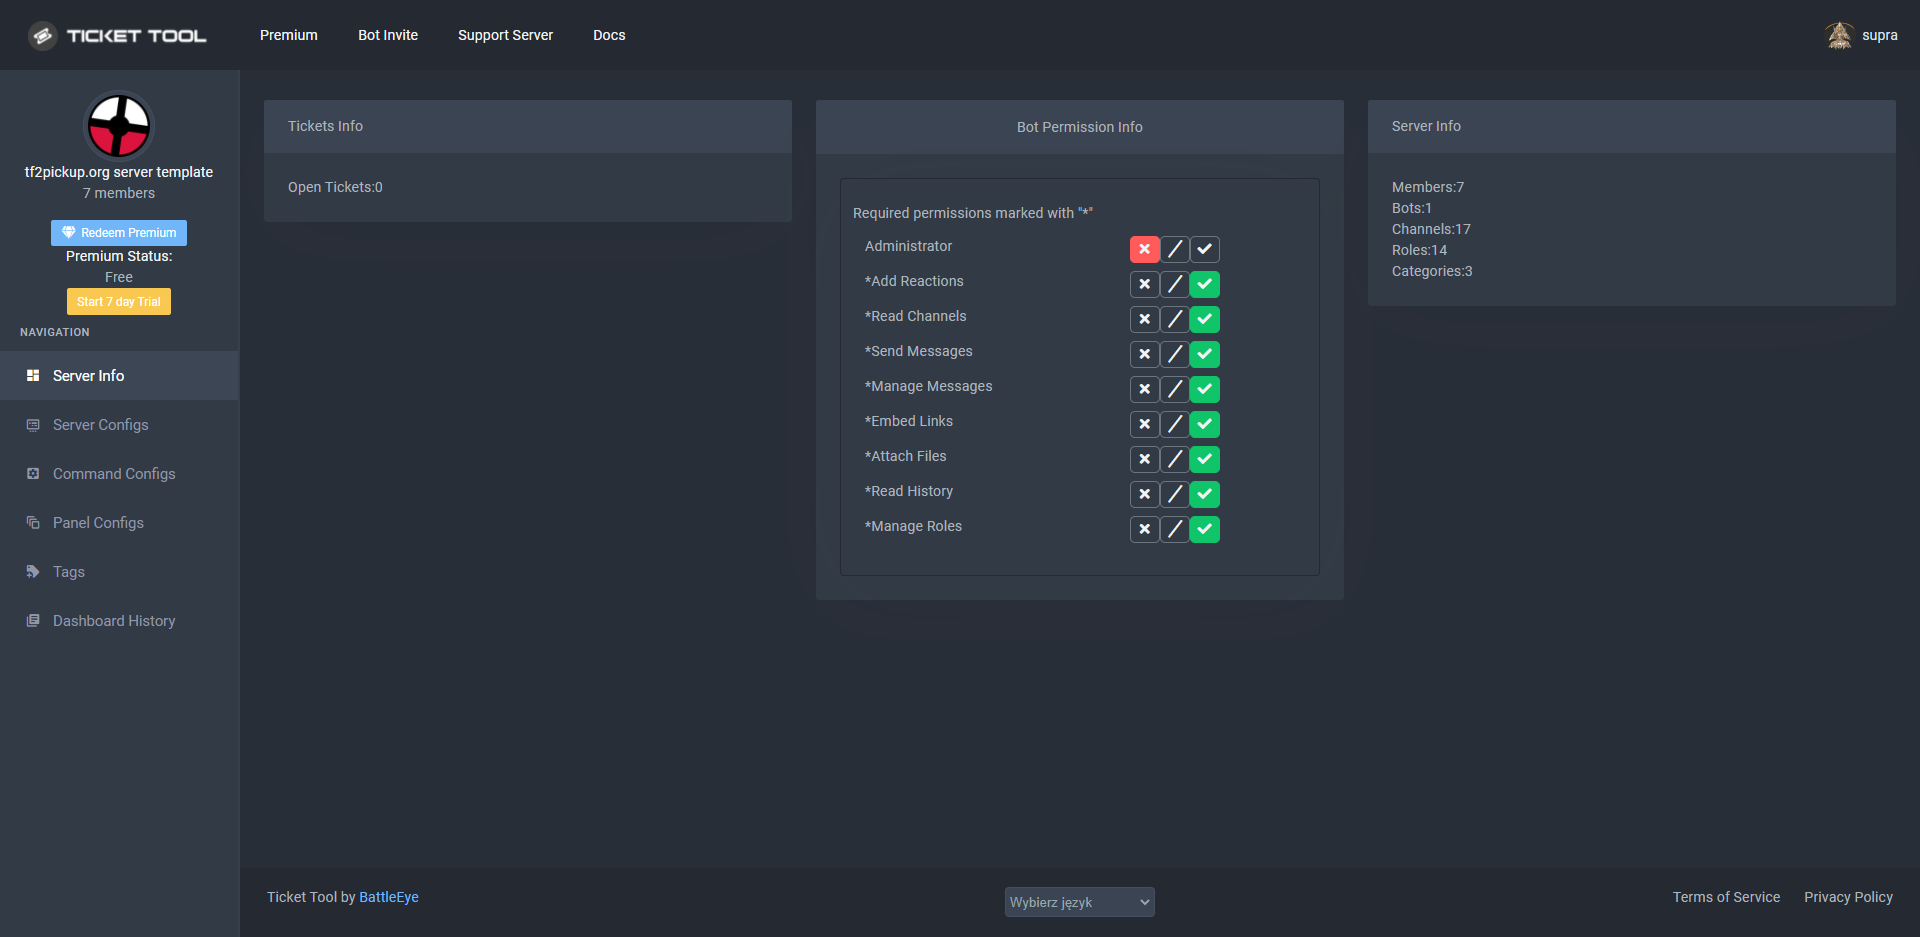
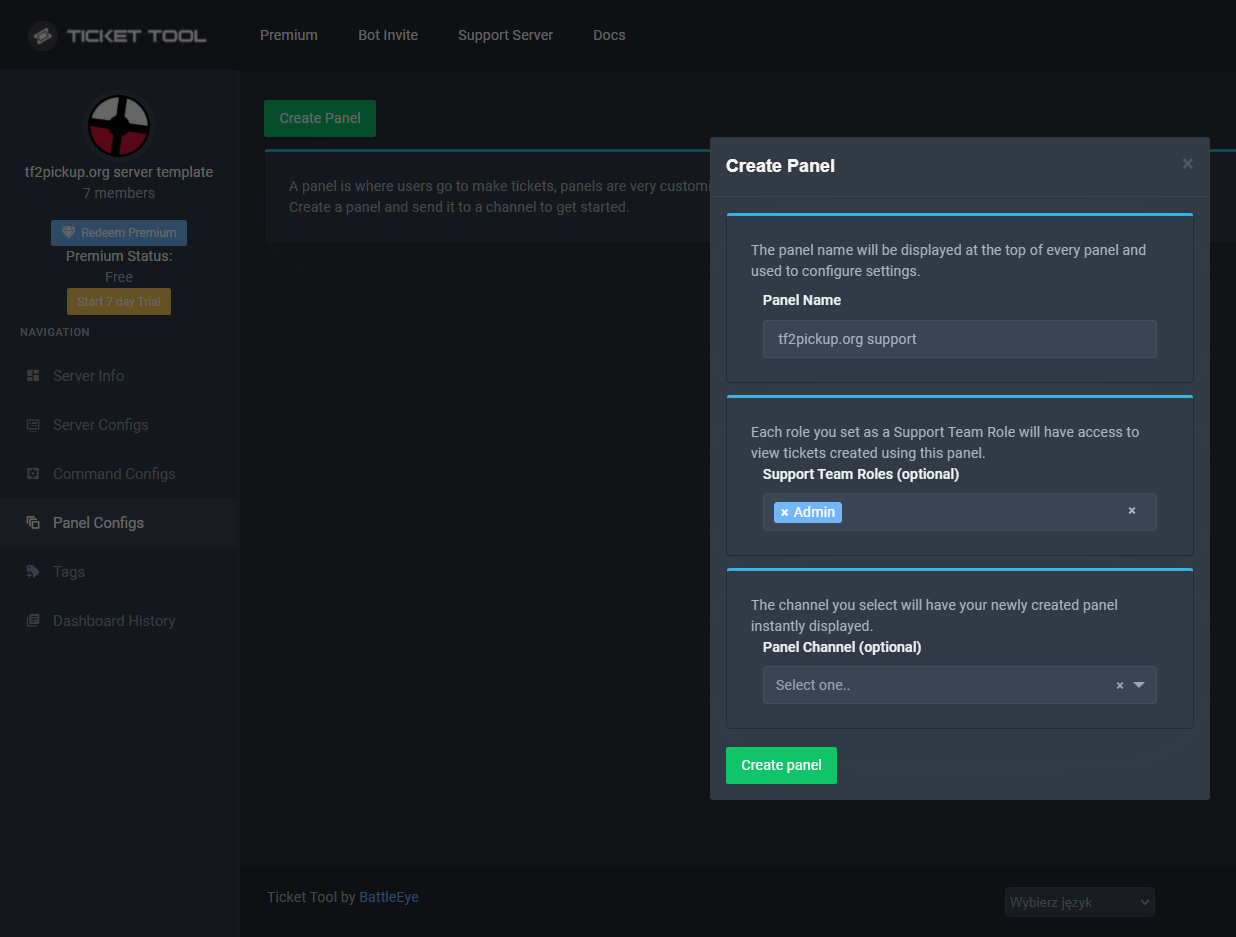
That menu lets you create a new panel - it will be used for creating tickets and in the end it will create an "open ticket" button you saw above. Click Create Panel, define a panel name tf2pickup.org support in the Panel Name, assign an admin role Admin to the Support Team Roles and leave Panel Channel empty. The panel will be added in the end of this guide.
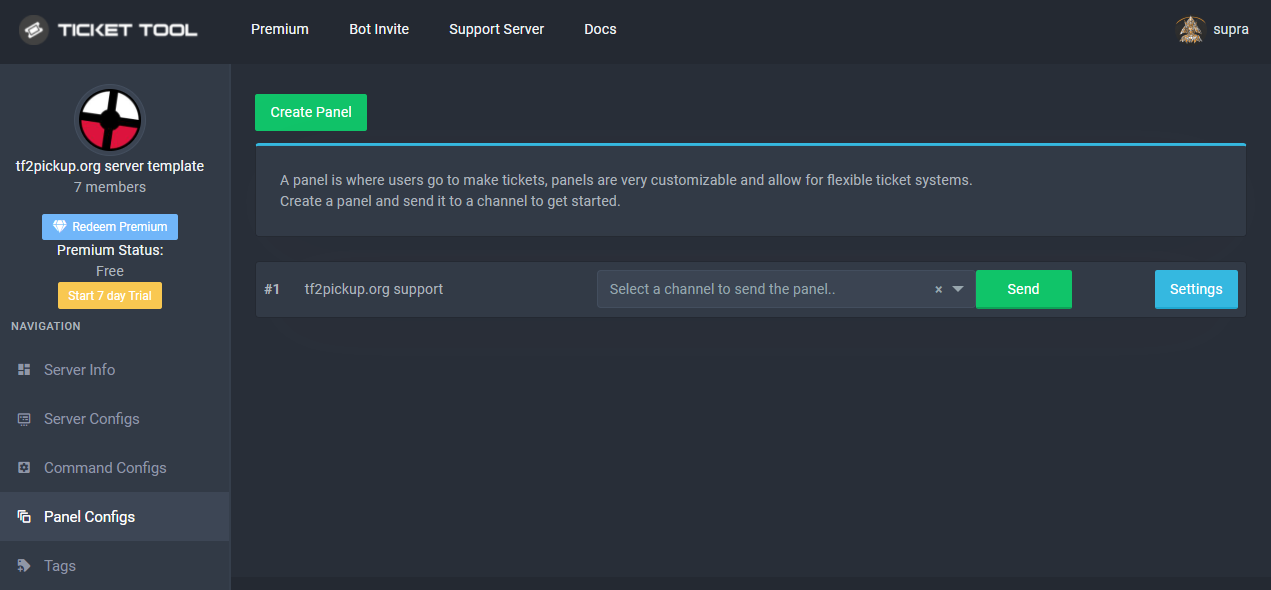
After that, the panel should be created. Click Settings in order to open up the support queue settings.
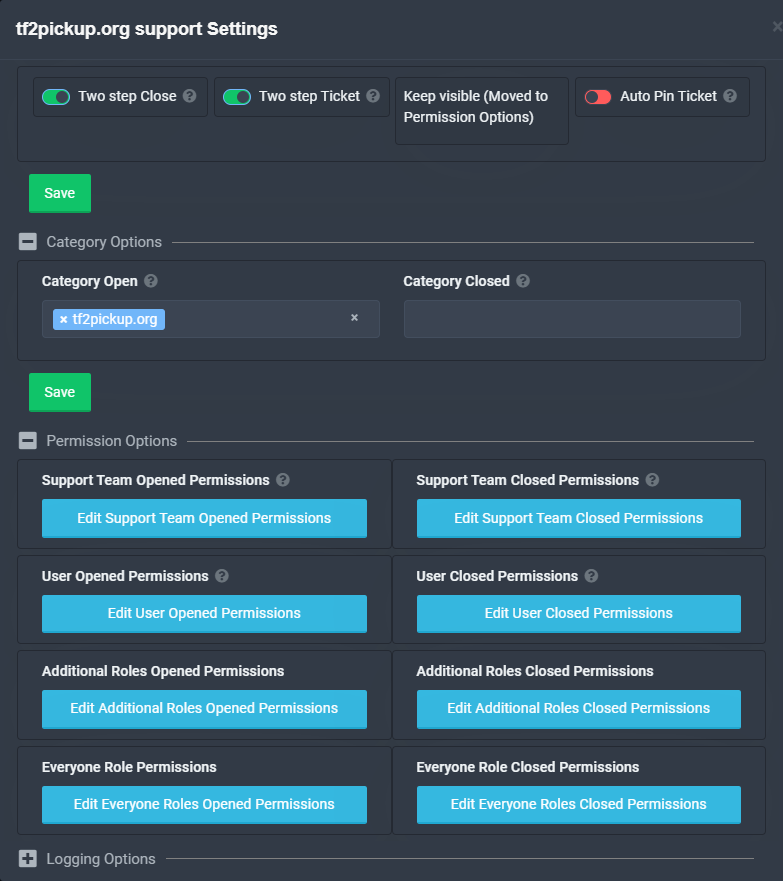
You have to click Save after every single setting section, otherwise you will lose all changes made in them.
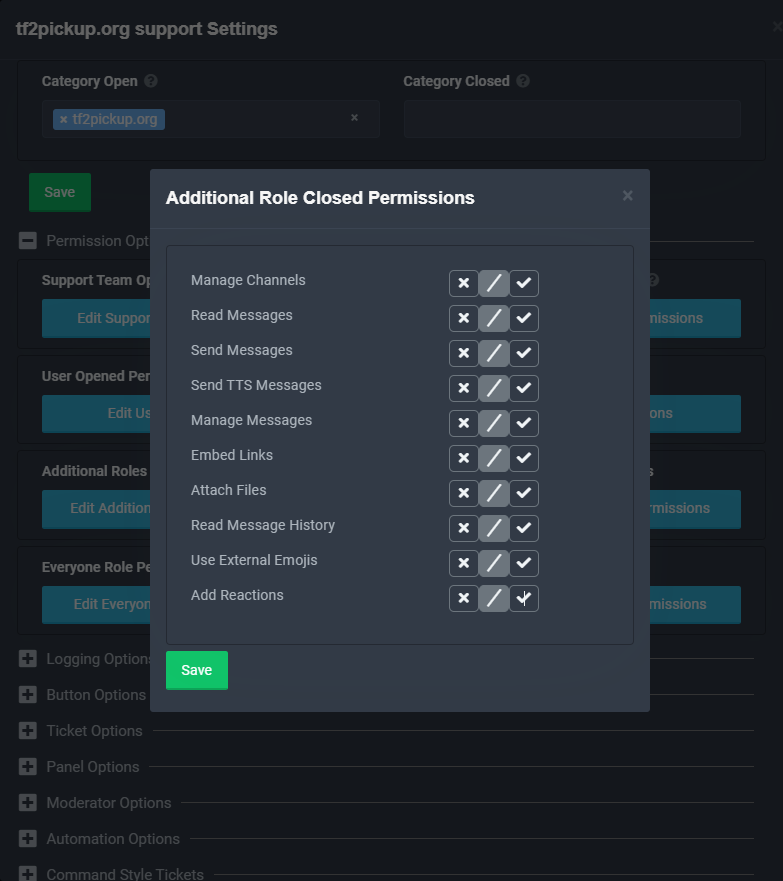
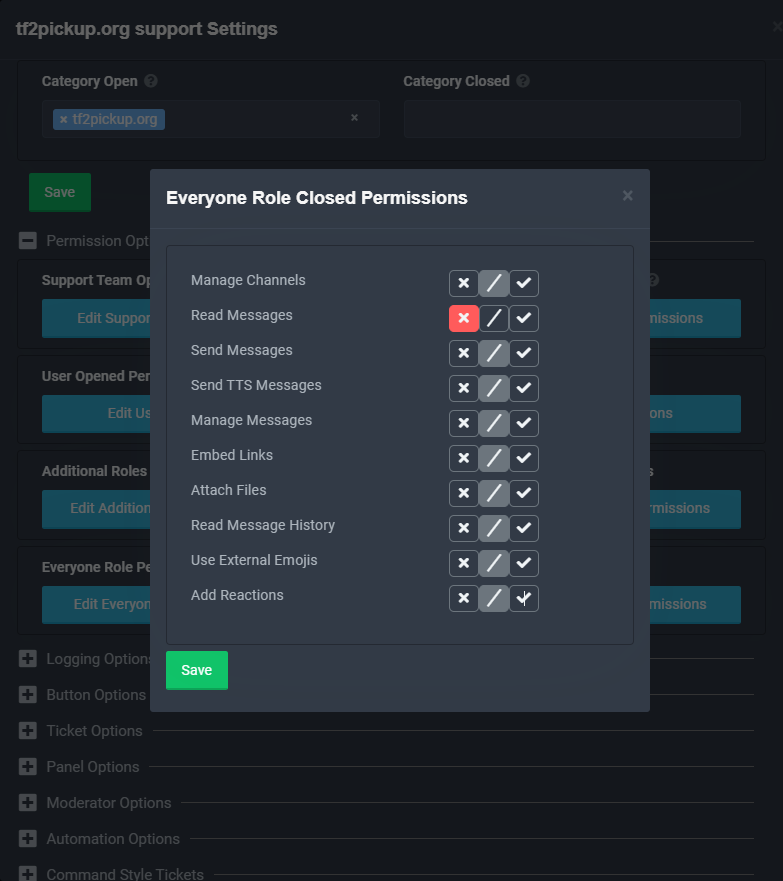
Make sure to leave Two step Close and Two step Ticket selected and Auto Pin Ticket unselected.
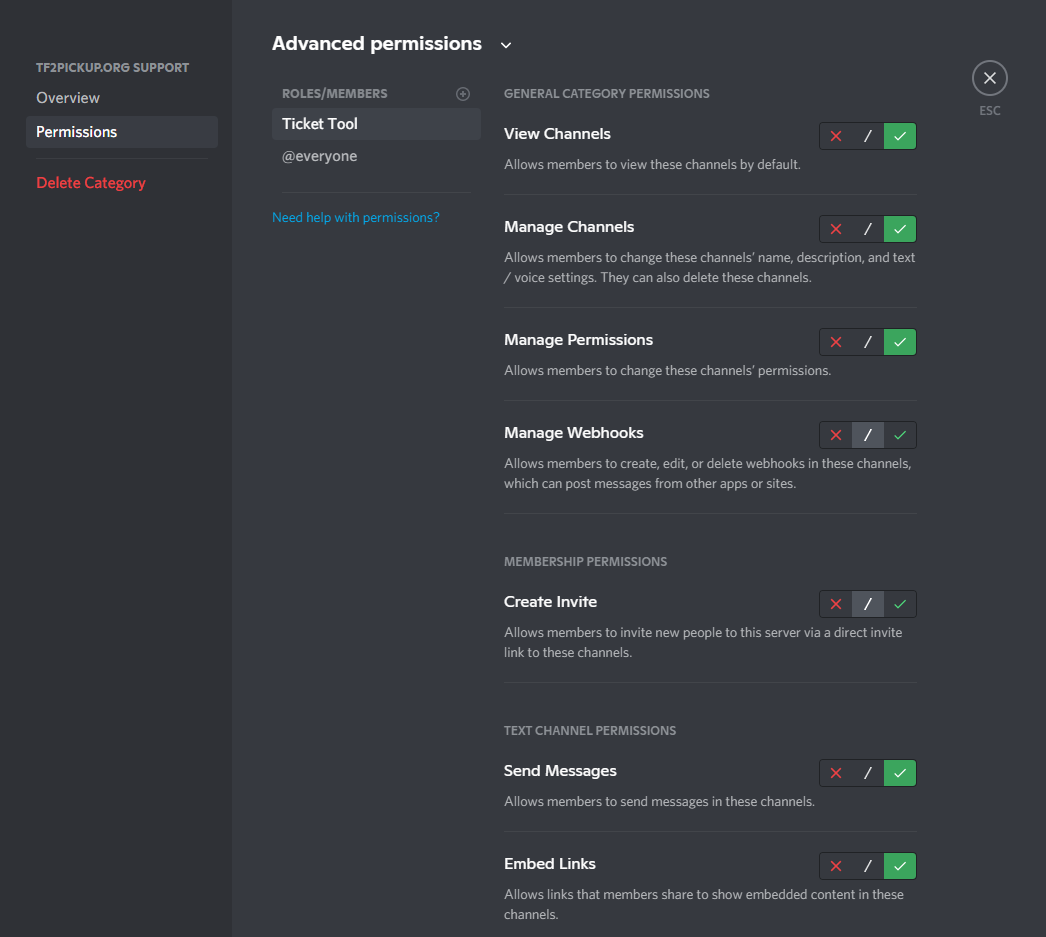
In the Category Options, select category tf2pickup.org. That will let support queue open ticket under that channel category. After that, you will have to set up permissions for the sections. We suggest you to set them like on the images below:

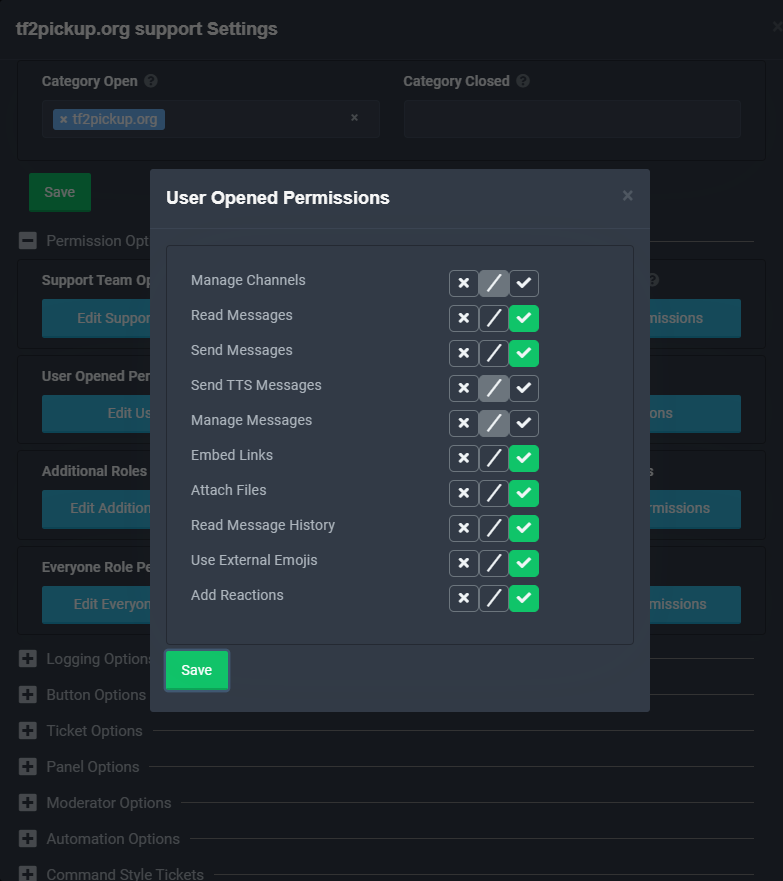
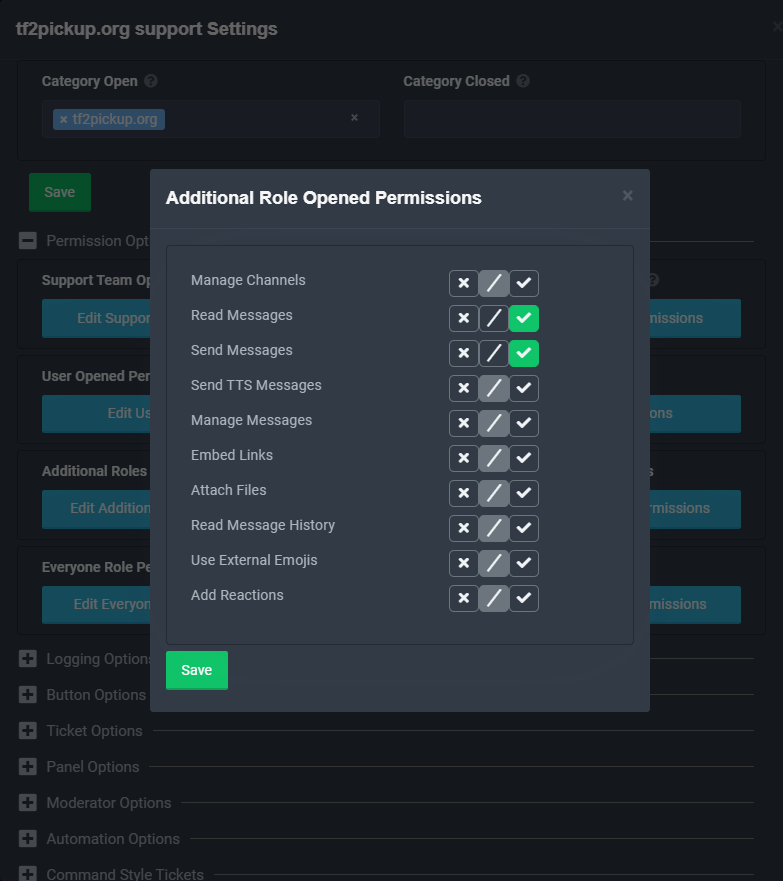

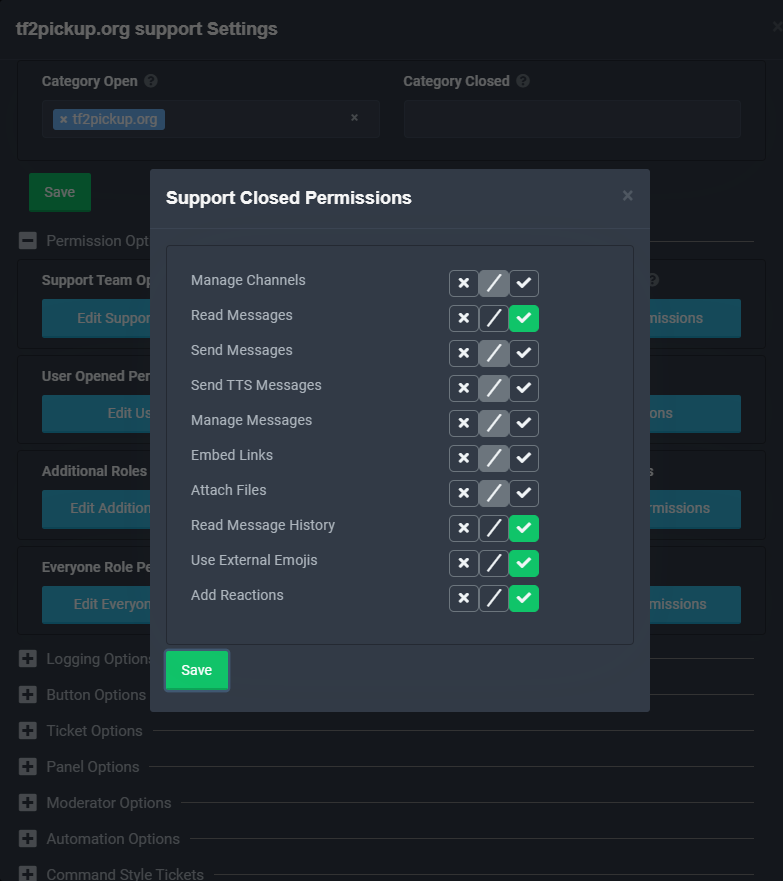
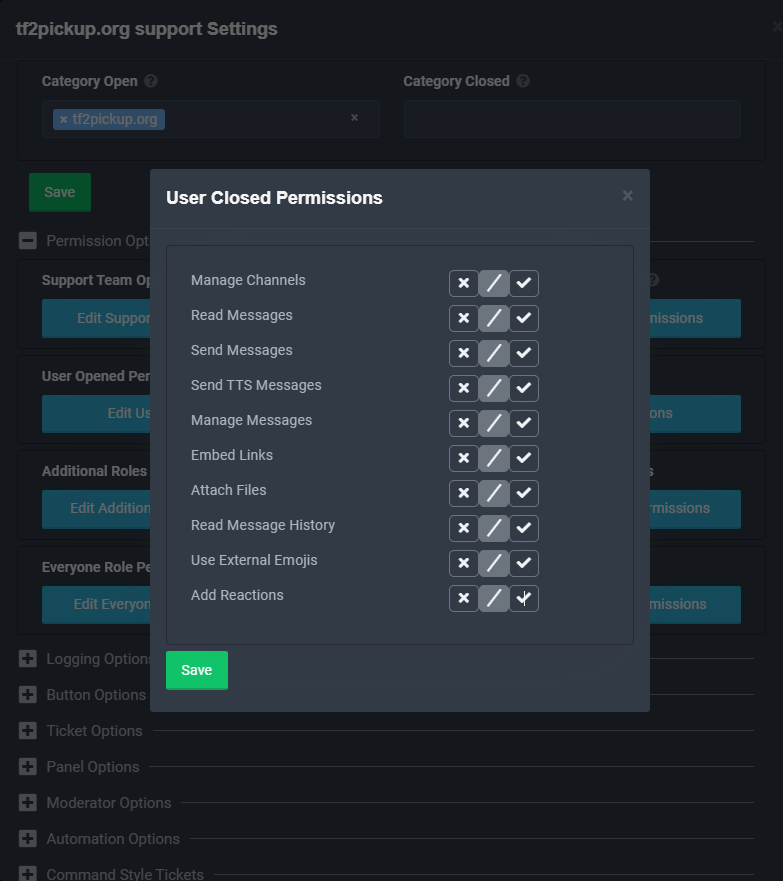
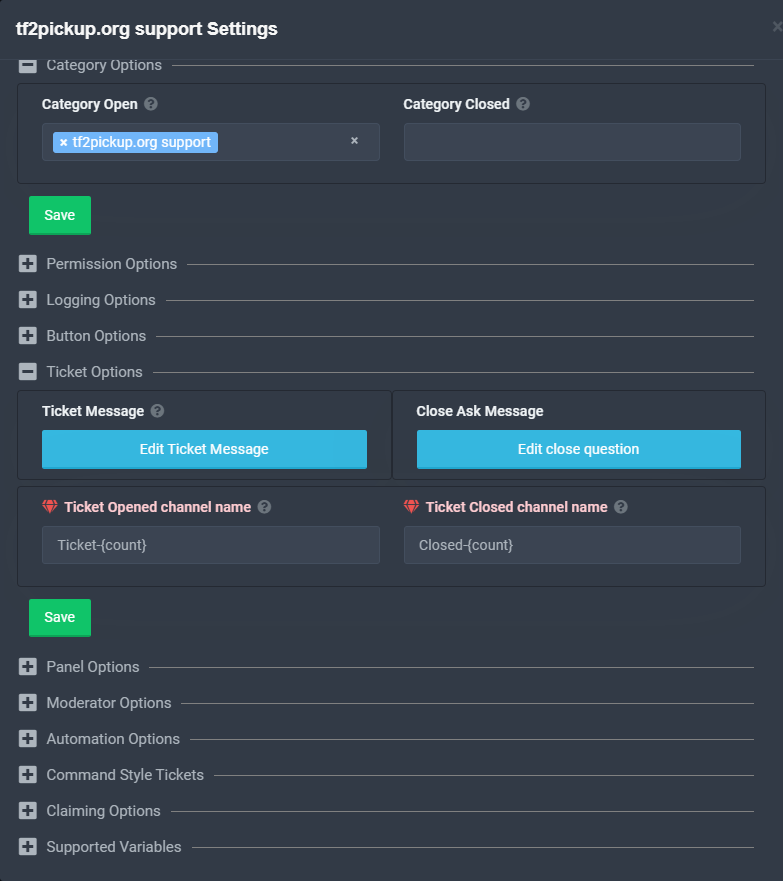
After setting all permissions, open Logging Options and choose the following options:
- Transcript Channel -
ticket-history, - Logging Channel -
ticket-history, - Ticket Created, Ticket Closed, Ticket Opened, Ticket Renamed, Ticket Deleted and Transcript Saved should be selected.

Finally, open Ticket Options and click Edit Ticket Message in order to edit it.
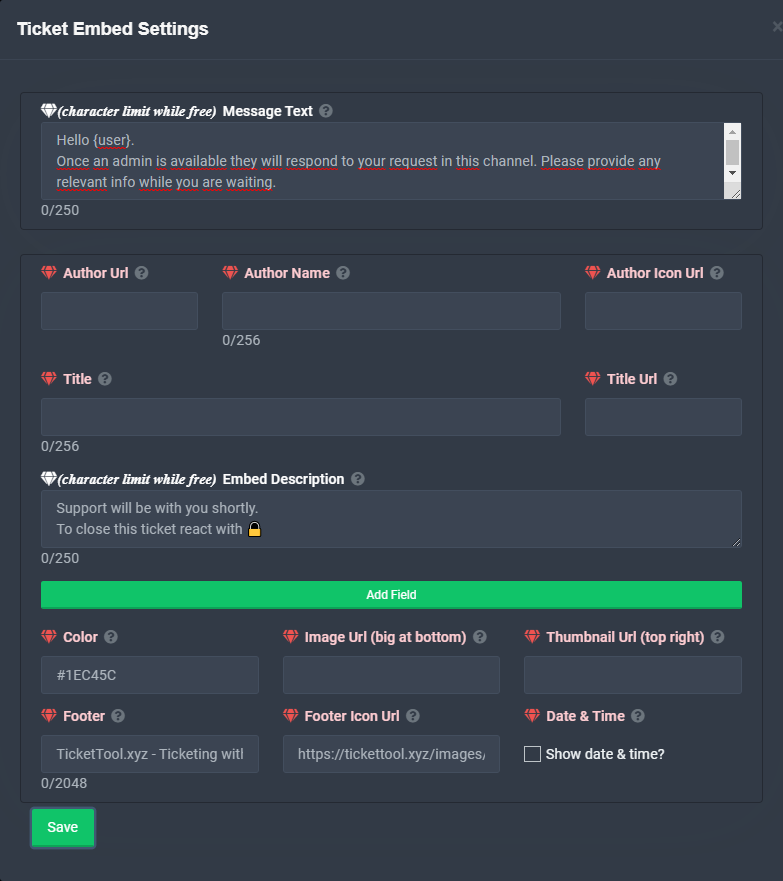
There you can set a message of your own (in the Message Text section). Here is an example you can use on your server:
Hello {user}.
Once an admin is available they will respond to your request in this channel. Please provide any relevant info while you are waiting.
After that, you will have to set up permissions on channels #ticket-history and #rules and the tf2pickup.org support channel section.
Aforementioned channels require the following permissions for the Ticket Tool role or bot account:
View Channel,Send Messages,Embed Links,Attach Files,Add Reactions,Use External Emoji,Manage Messages,Read Message History.
Moreover, tf2pickup.org support channel section requires:
View Channel,Manage Channels,Manage Permissions,Send Messages,Embed Links,Attach Files,Add Reactions,Use External Emoji,Mention @everyone, @here and All Roles,Manage Messages,Read Message History.
Finally, you can add the ticket panel to the #rules channel by selecting this channel from the Select a channel to send the panel.. dropdown list and clicking Send.
From that point, creating tickets is possible.
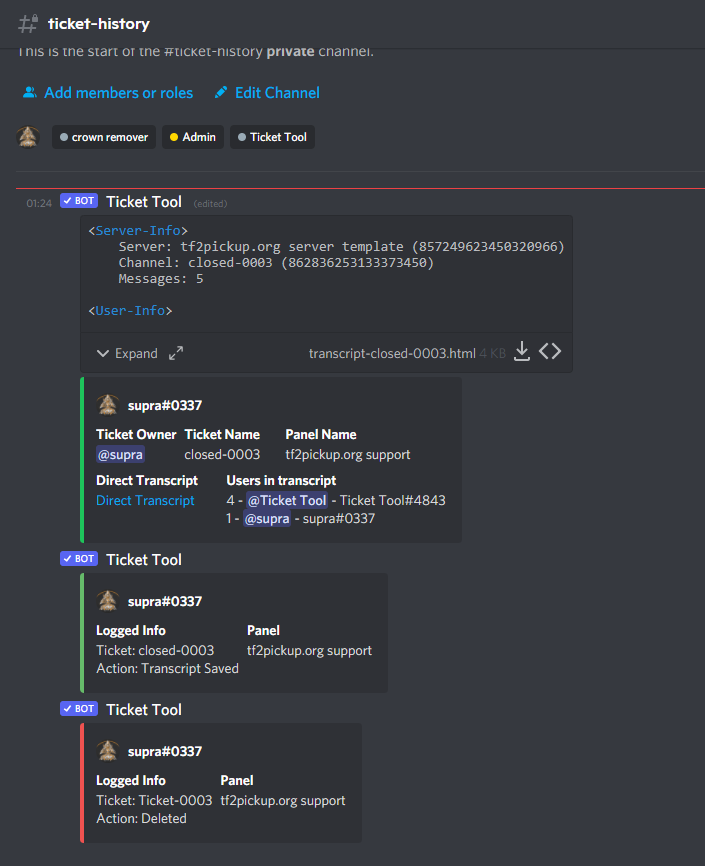
Ticket Tool usage
This is a quick overview how the admin requests looks from the admin point of view.
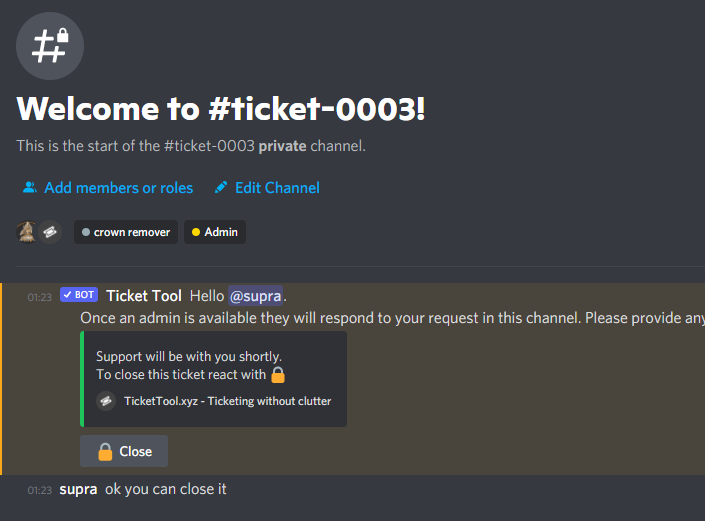
After someone creates a ticket, it always possible to close it at any moment. All you have to do is to click on the Close button.
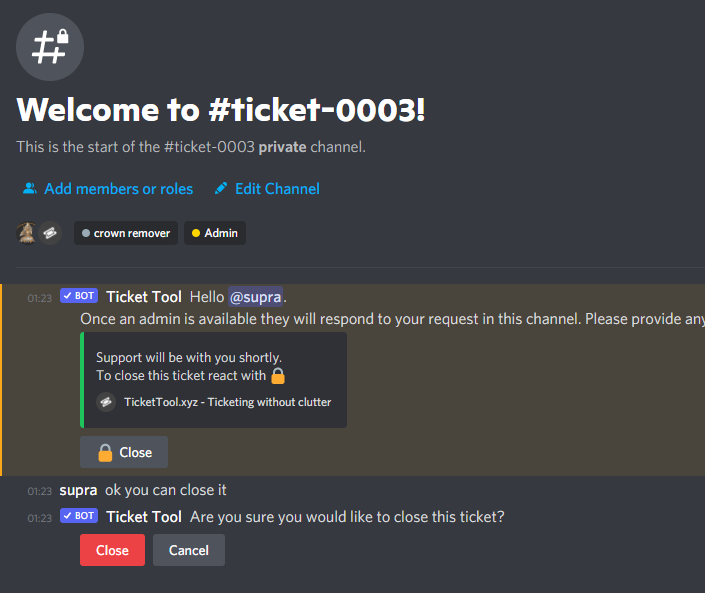
You will be asked for a close confirmation.
After closing the case, it becomes invisible for the requester. At this point you can reopen it by clicking Open, save a ticket transcript (which we recommend to do so) by clicking Transcript and remove the case by clicking Delete.
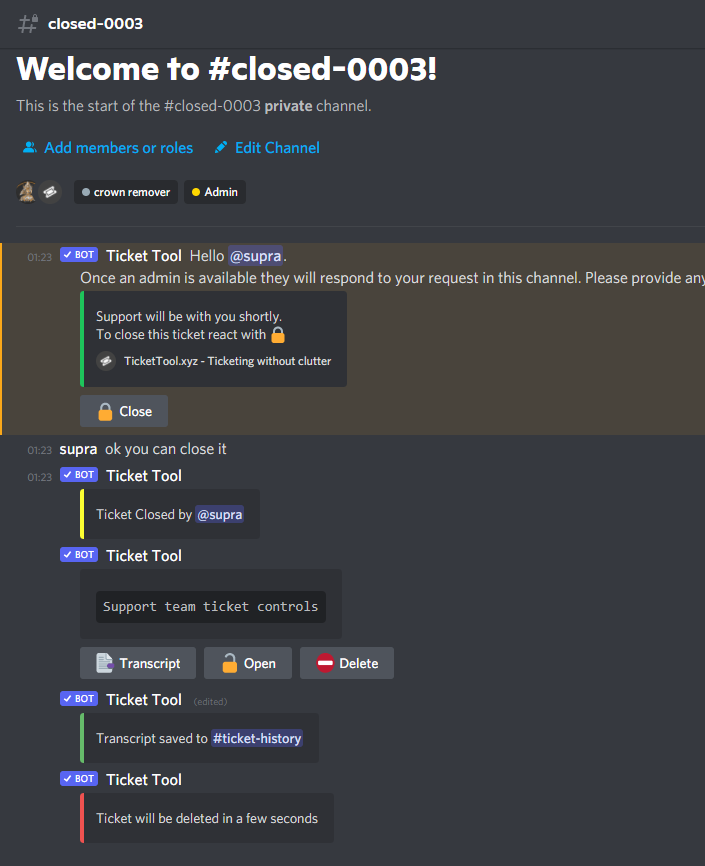
And this is how it looks like from the #ticket-history channel, where all ticket notifications and transcripts are sent:
MEE6
MEE6 is yet another general purpose Discord bot we use for the auto-moderation. It serves many options, but we are going to use the automod feature only since this bot does the job better than the Carl-bot.
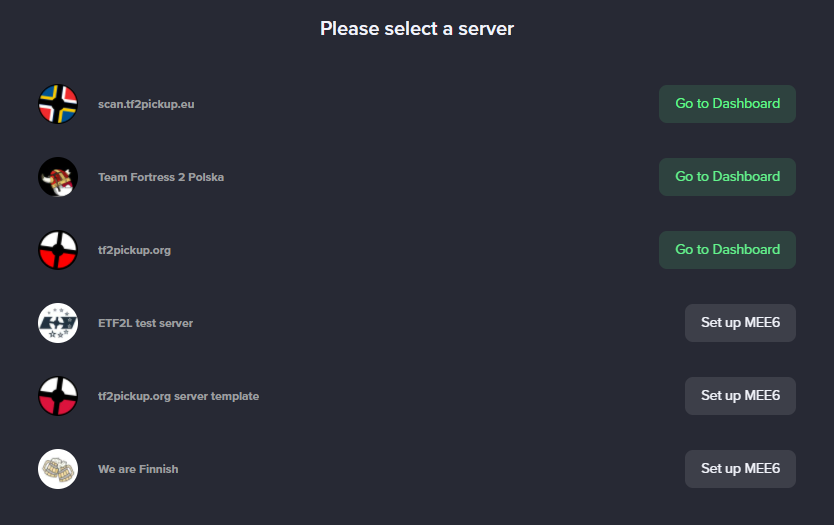
To start the bot setup, open the MEE6 website, log into your Discord account, choose tf2pickup.org server template server from the list and click Set up MEE6 next to its name.
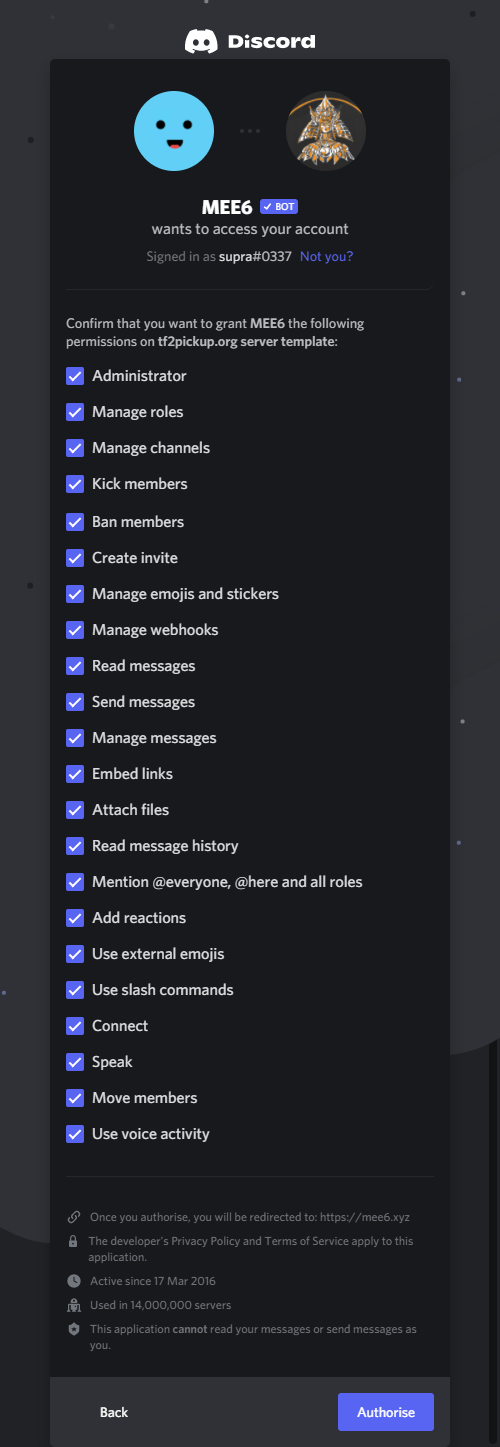
That will let you invite the bot. Leave all permissions checked.
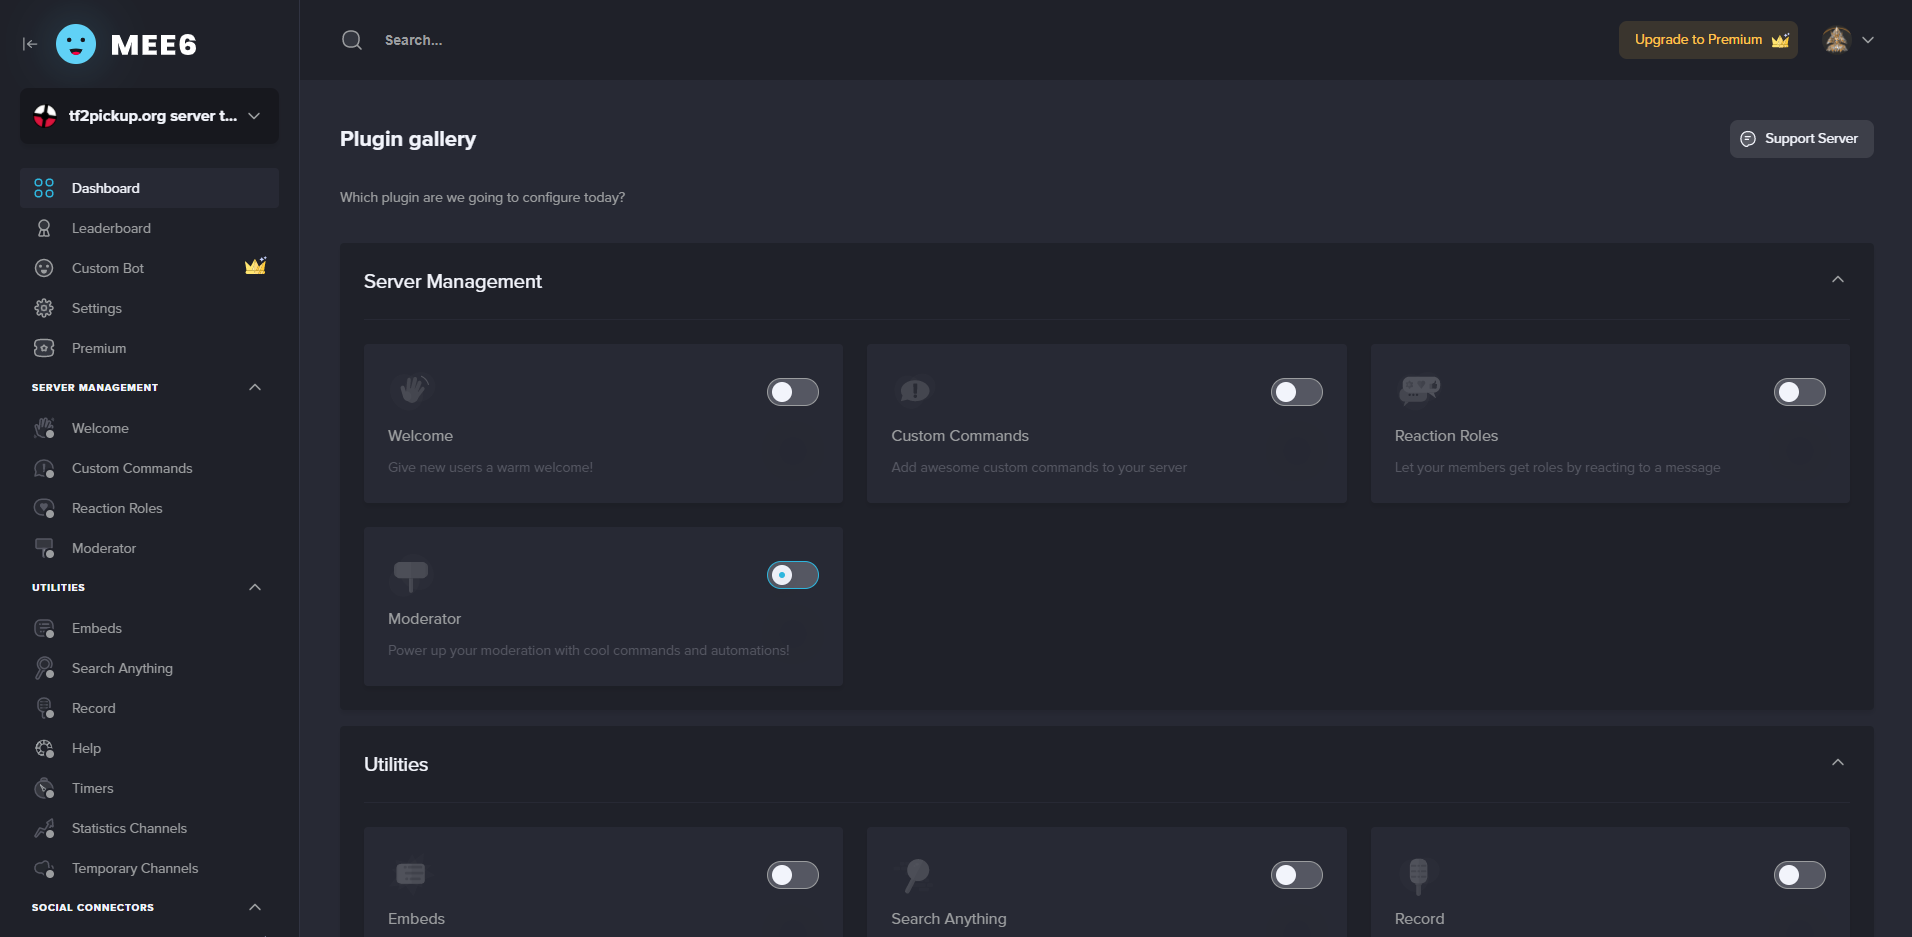
First of all, disable all features which are enabled in the bot by unselecting them.
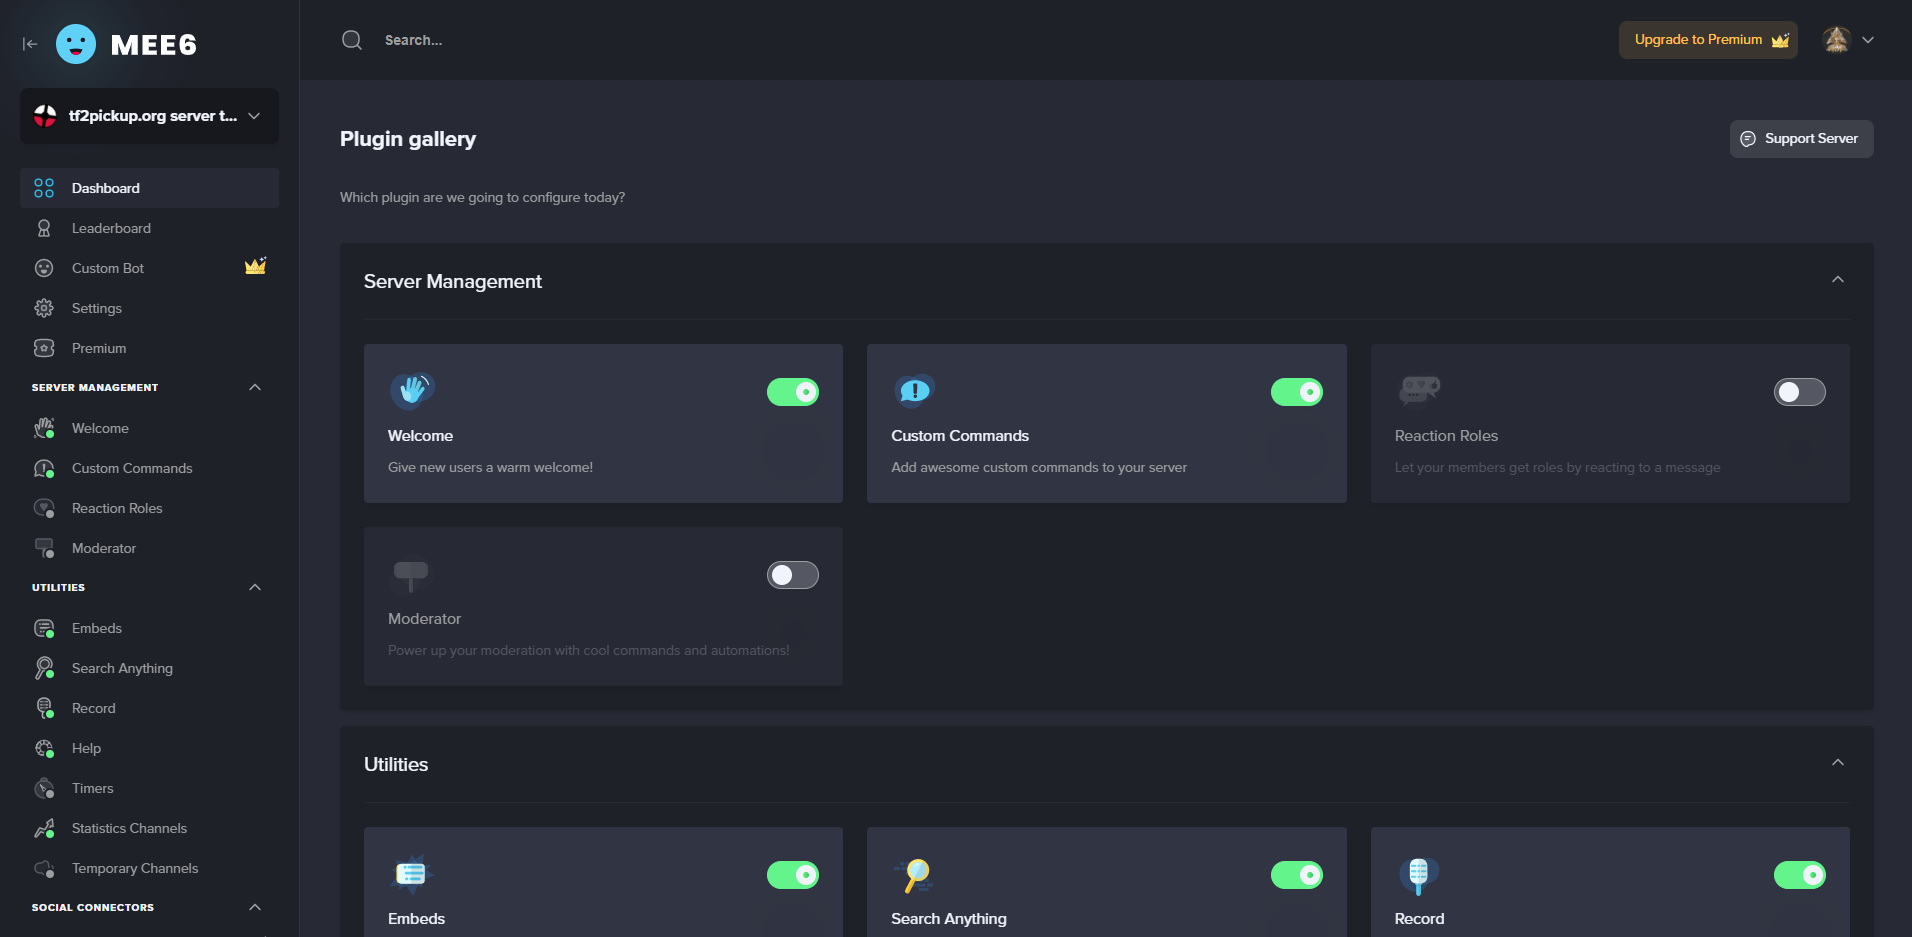
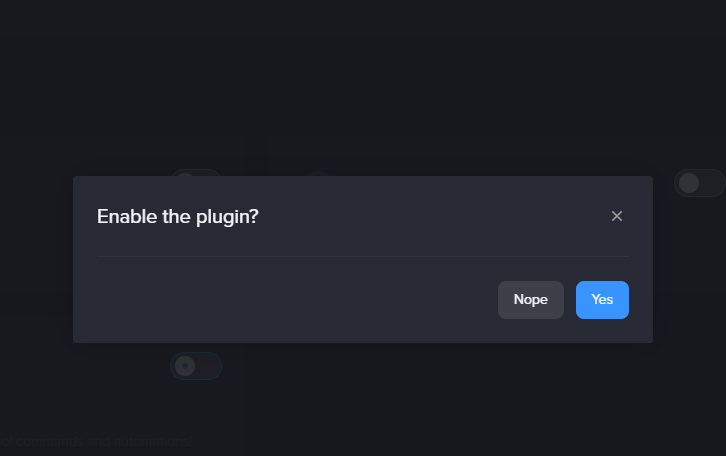
You have to confirm every single feature disable.

After that, enable the Moderator feature and confirm it.
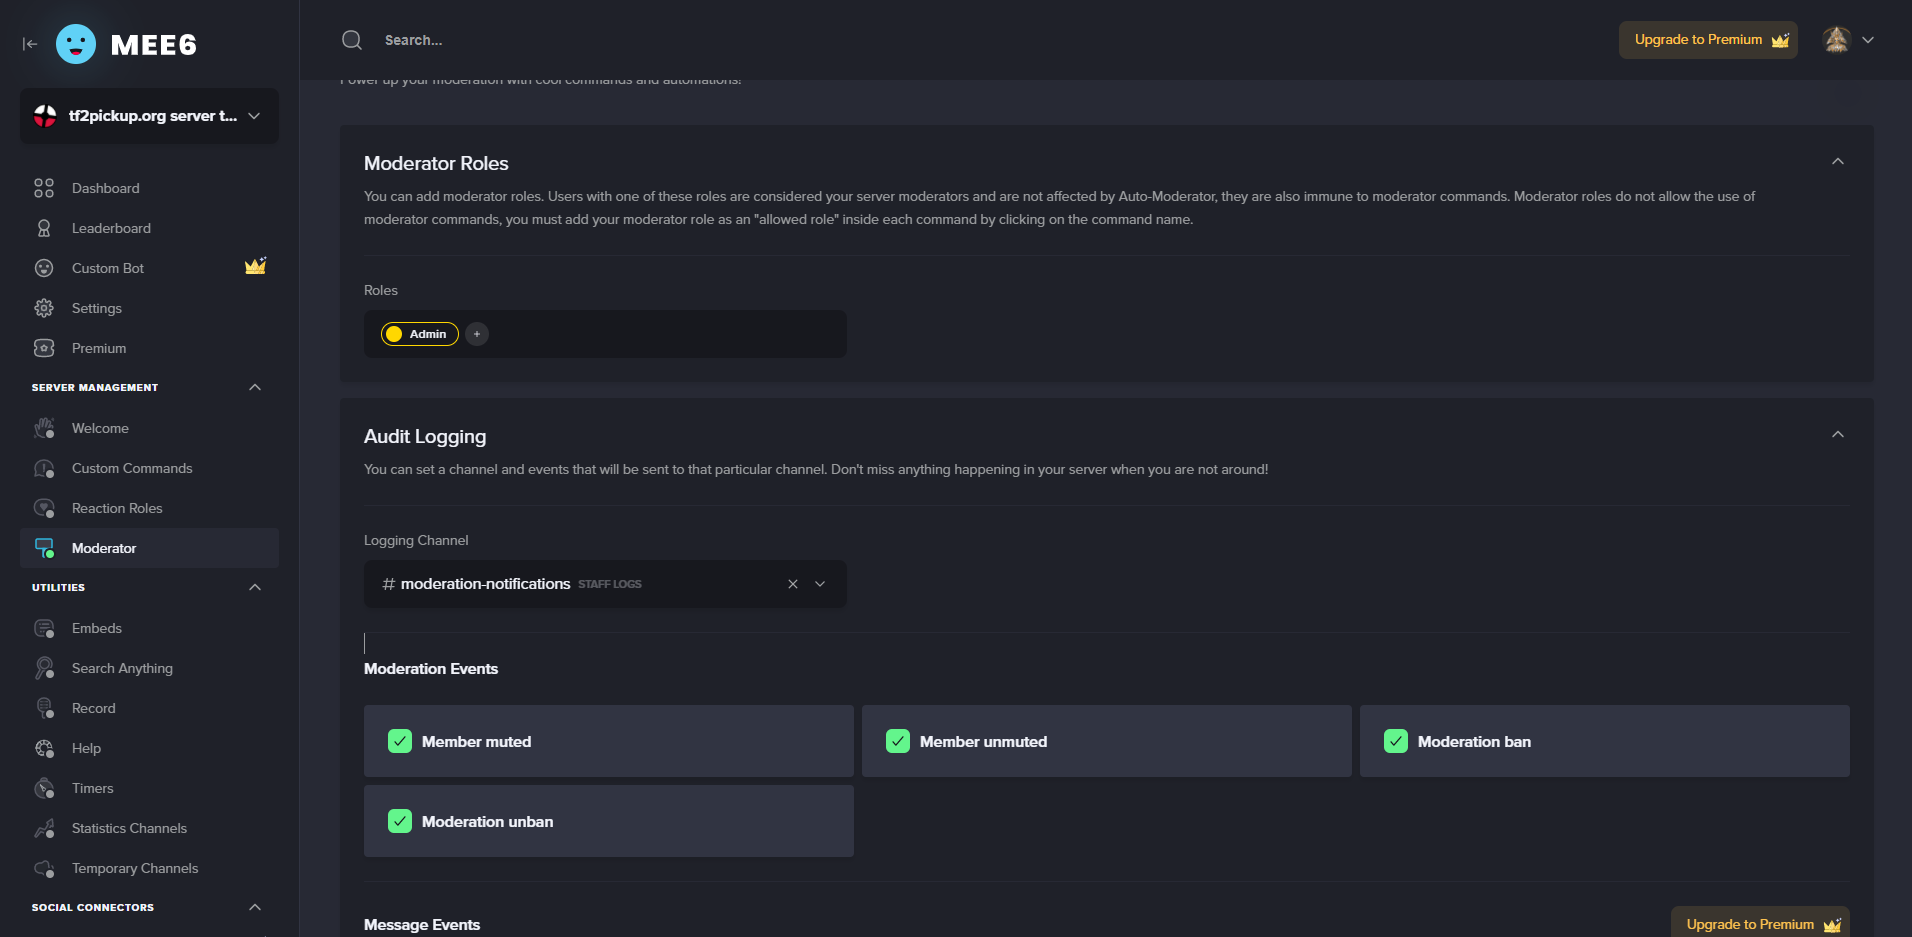
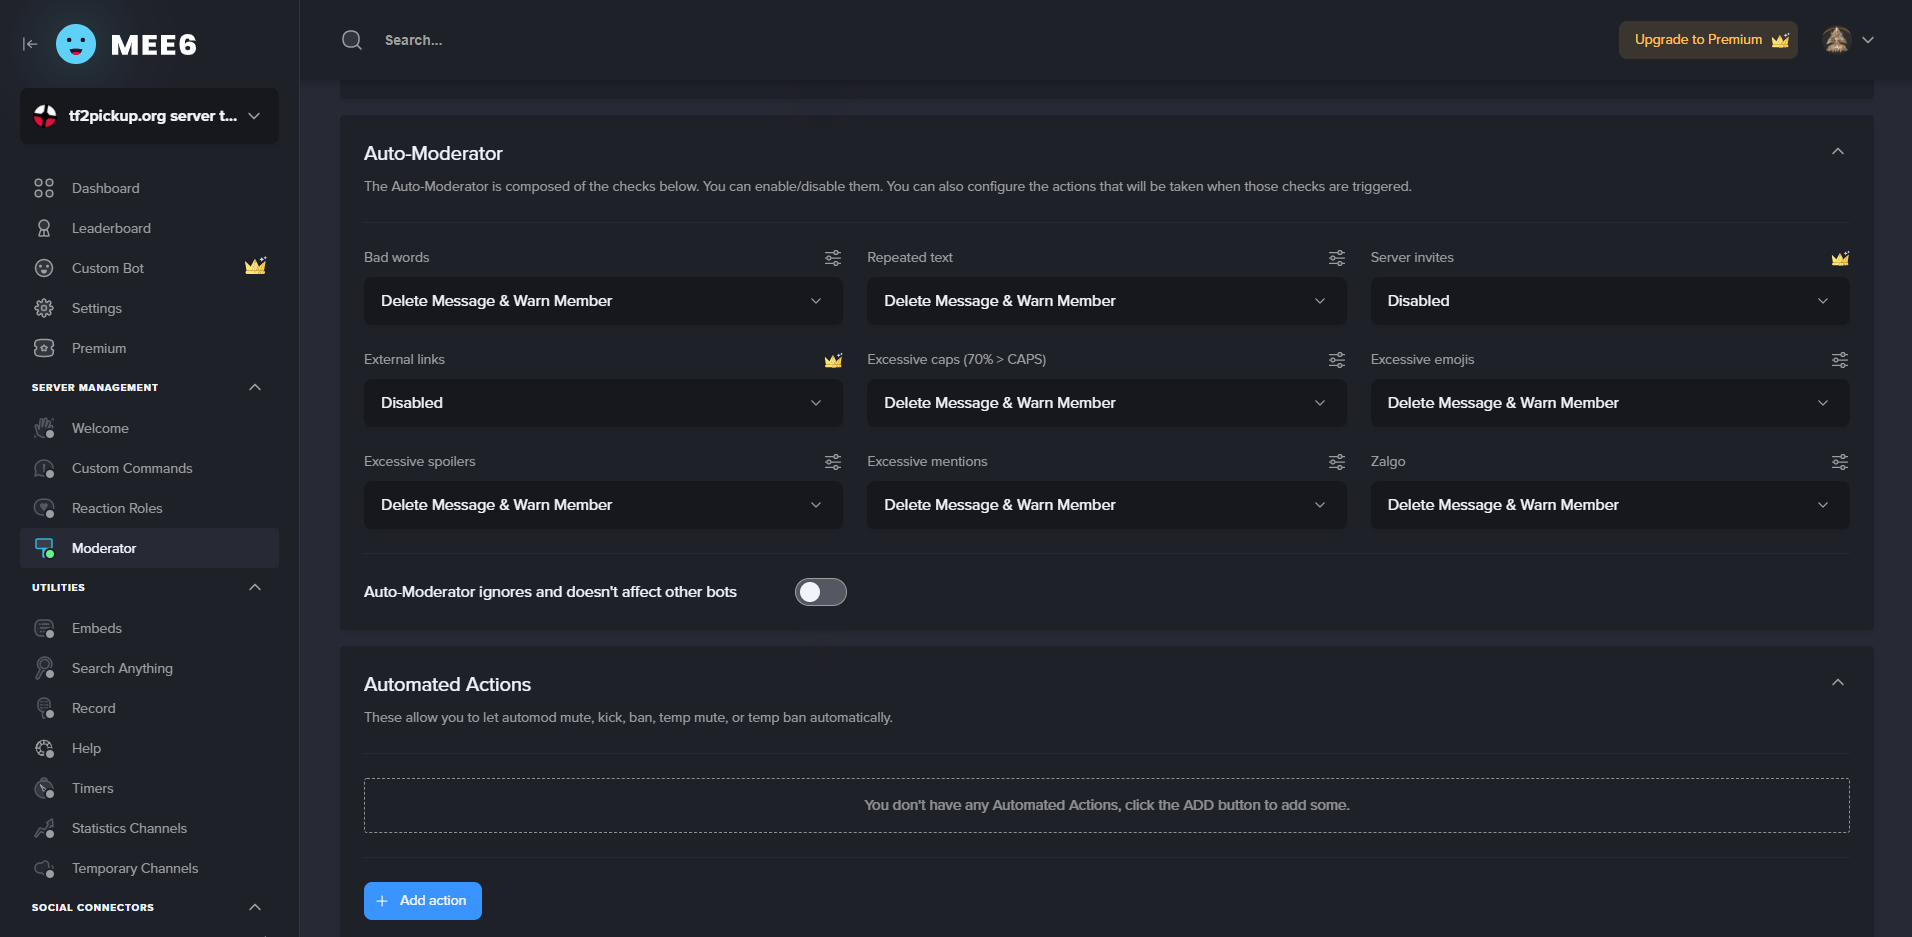
Open Moderator settings by clicking on it. There you can set all moderation and automod settings. Start from selecting an Admin role as a moderator role. In the Audit Logging set #moderation-notifications as the Logging Channel, leave all Moderation Events checked and all Message Events unchecked. This will let MEE6 post only notifications about the automod infractions, as we log different things by the Carl-bot.
In the Auto-Moderator section, choose Delete Message & Warn Member for:
- Bad words,
- Excessive spoilers,
- Repeated text,
- Excessive caps (70% > CAPS),
- Excessive mentions,
- Excessive emojis,
- Zalgo.
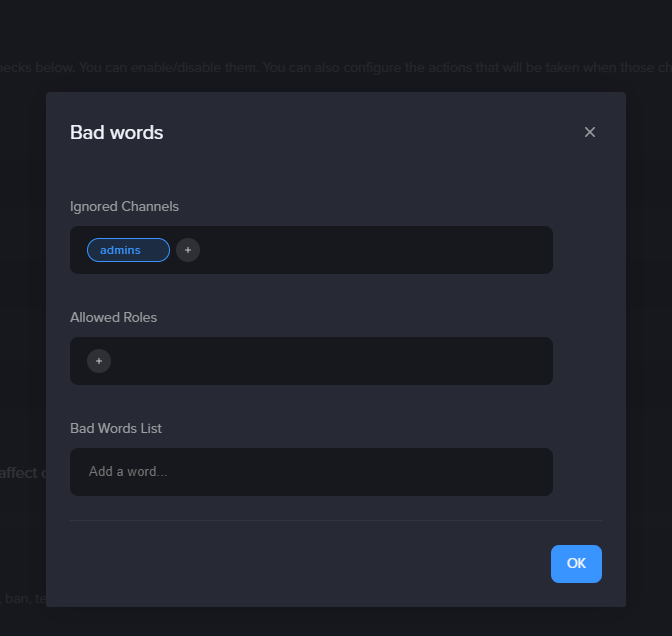
After that, click the setting icon for the Bad words option. Here you can add words you'd like to ban on the server. Also, there you can see an option to disable moderation on certain channels, as the #admins channel is here on the exclusion list. You can do so for every single automod feature.
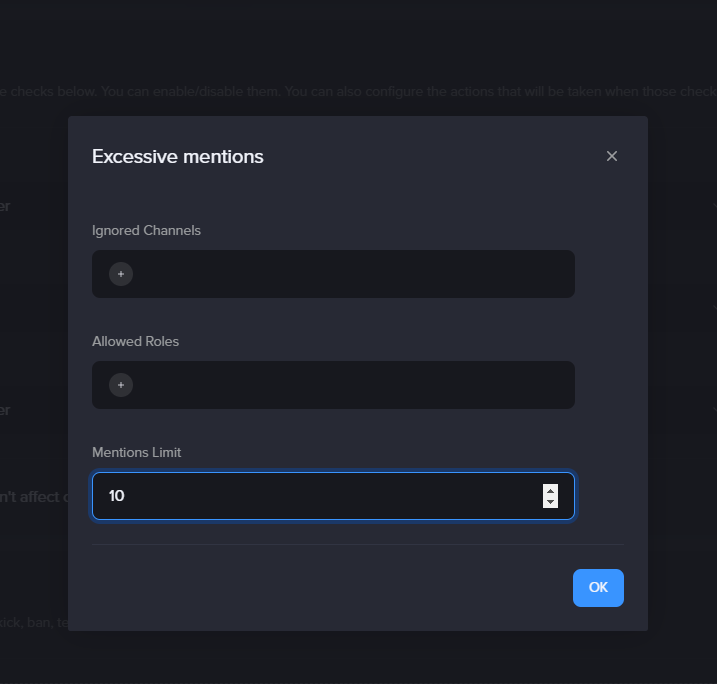
We suggest to change default Excessive mentions settings from 5 to 10, because sometimes people ping around 5-6 other users and usually this is not a spam.
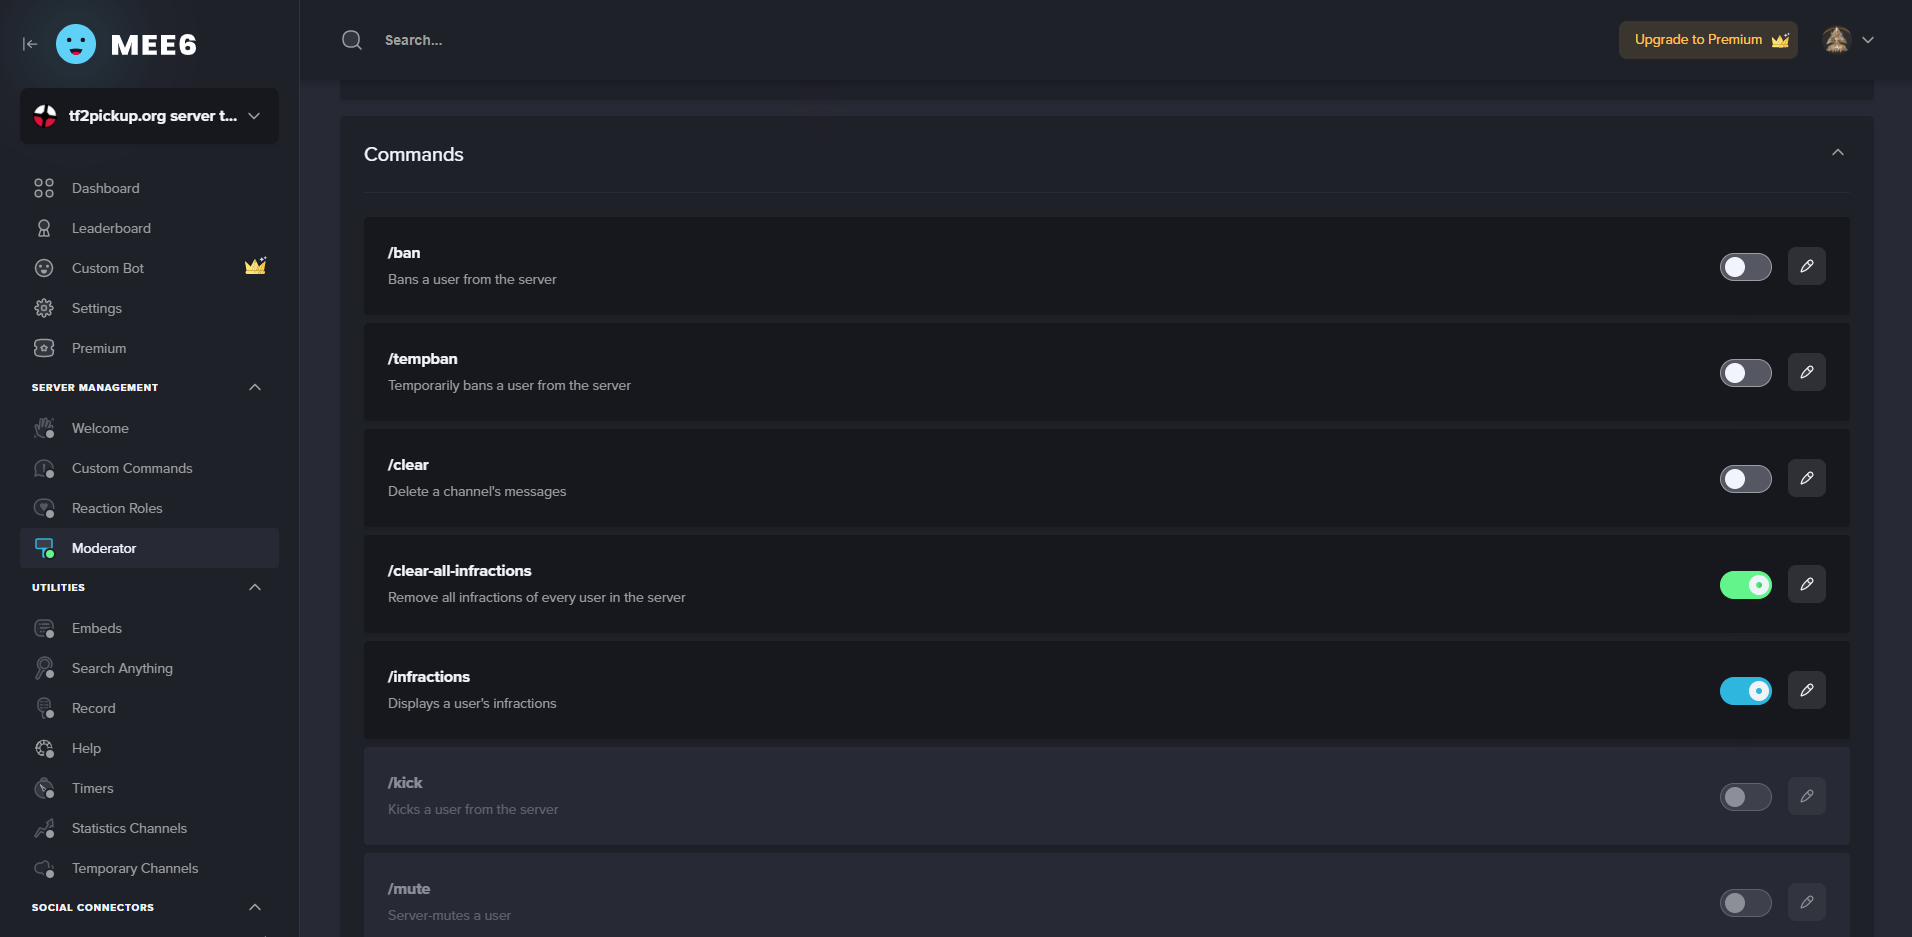
After that, scroll down to the bottom of the Moderation settings and disable all commands except /clear-all-infractions and /infractions.
The last step you could do is to add bot permissions for the #moderation-notifications channel. Since it has the Administrator permission, it does not need any permissions on any channel at all, because this role overrides all permissions, but it's a good measure to do so, so for instance if a Discord admin would like to set up Discord server more restrictively, then they could take the Administrator permission off from the bot.
The bot role should have the following permissions:
View Channel,Send Messages,Embed Links,Attach Files,Add Reactions,Use External Emoji,Manage Messages,Read Message History.
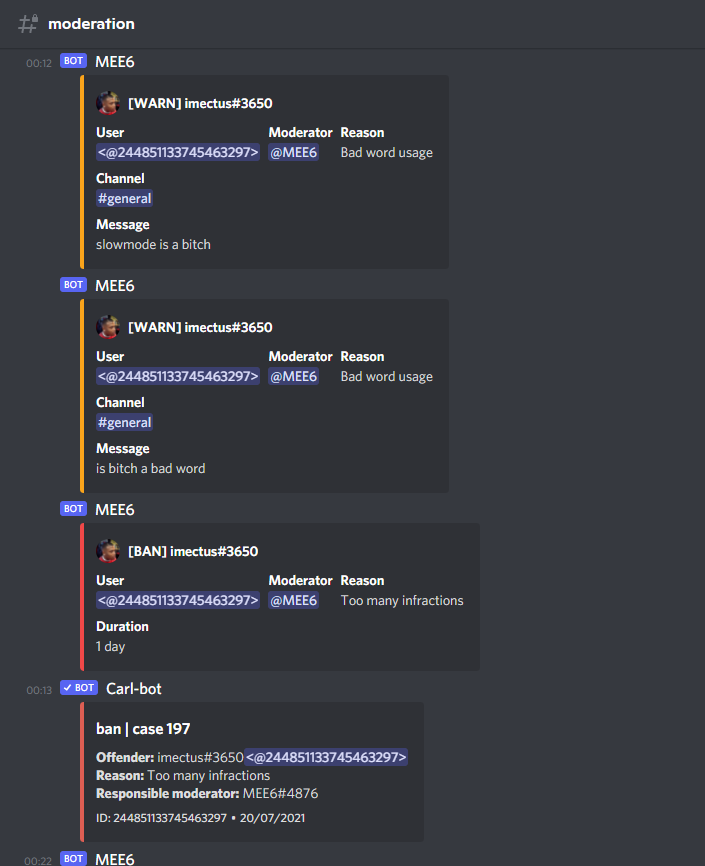
This is how the automod looks like in practice:
MonitoRSS
This bot enables automatic channel announcements based on RSS feeds. When a site you want to follow posts a news, a message about it can be sent on a chosen channel, in our case on #tf2news channel. At the moment we are aware of two popular TF2 feeds which are from ETF2L and teamfortress.tv.
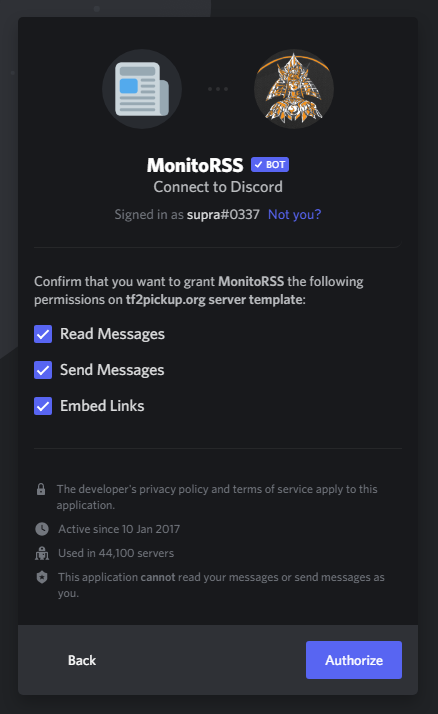
In order to add the bot to your server enter this website and click Invite Me!.

After that, choose With Role.

Leave checkboxes checked for the bot permissions, they're sufficient.
After adding the bot, set up bot permissions for the channel #tf2news for role MonitoRSS:
View Channel,Send Messages,Embed Links,Attach Files,Add Reactions,Use External Emoji,Manage Messages,Read Message History.
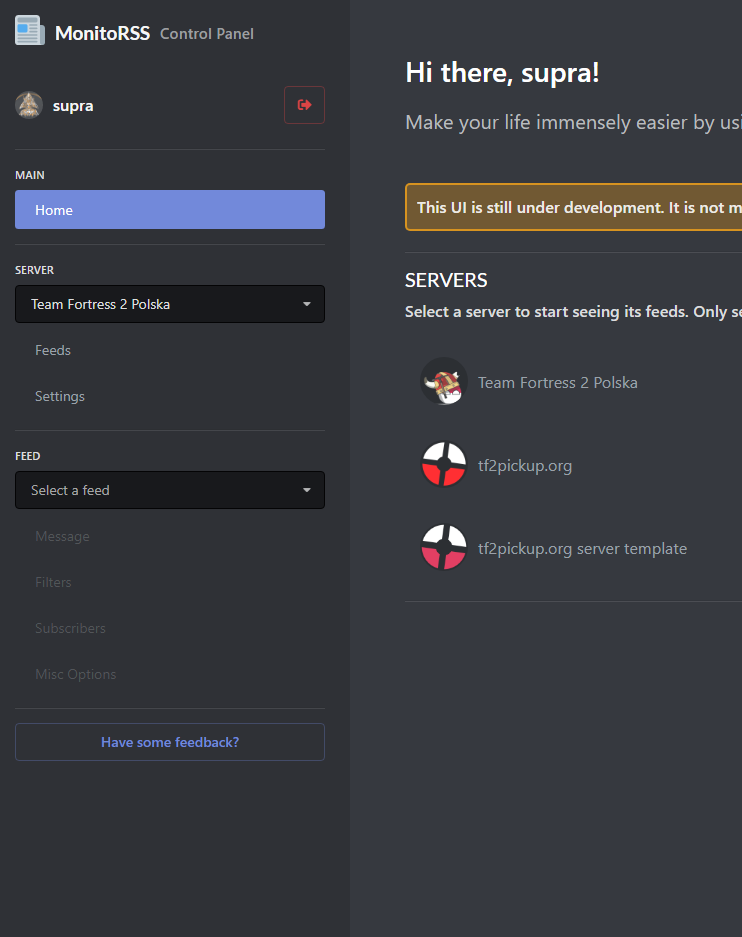
After that come back to the main page and this time choose Control Panel. Choose a server you want to set up RSS feeds for, in our case tf2pickup.org server template.
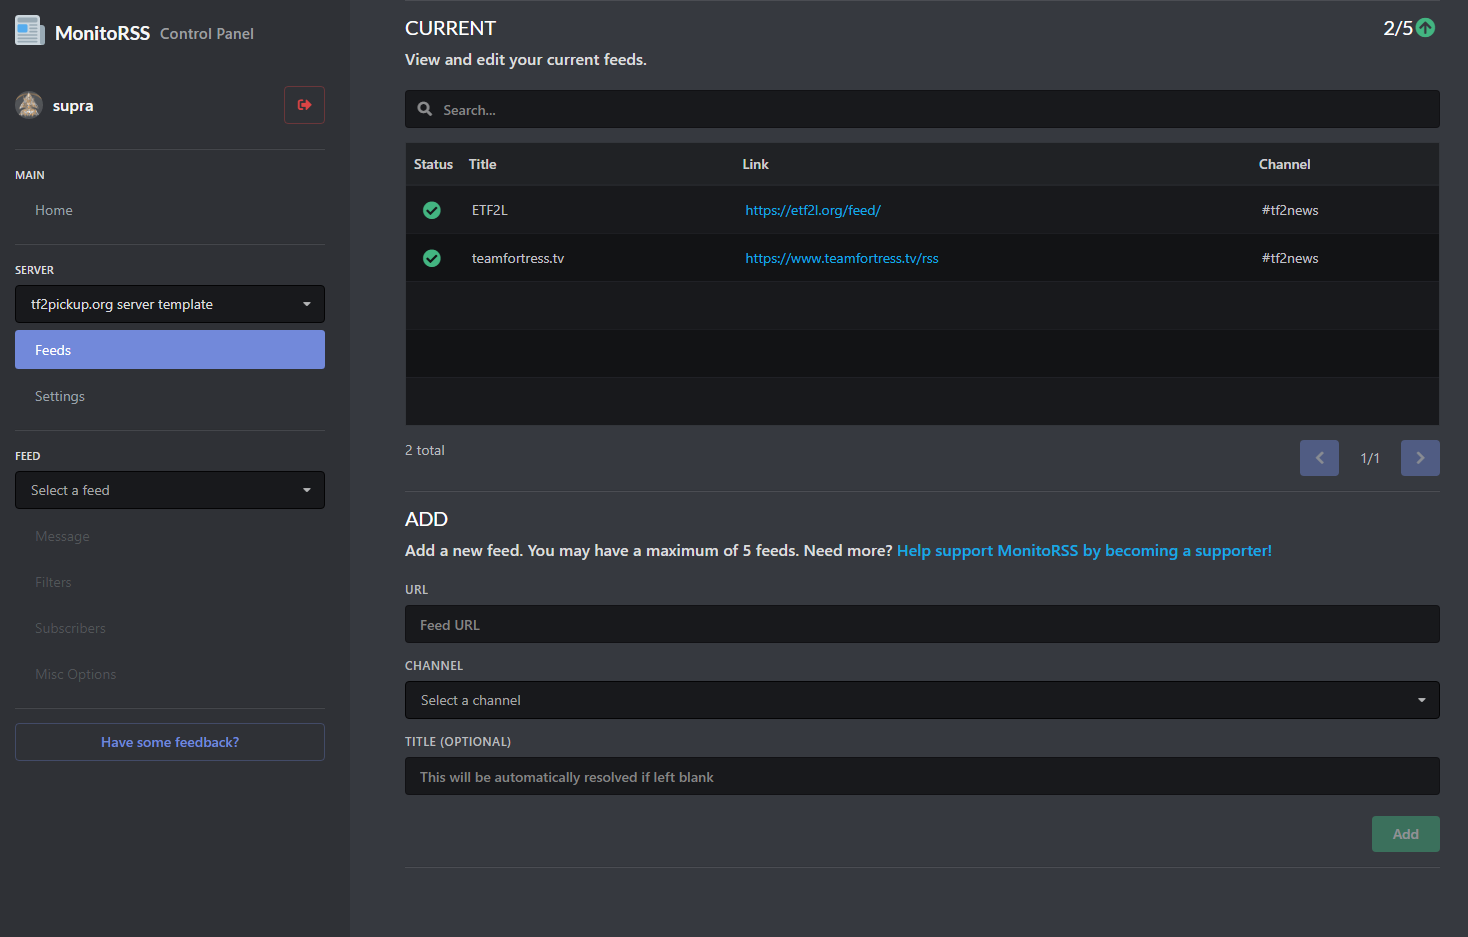
In order to add the feeds, you have to provide their name, RSS feed link and the channel the notification should go for. In our case it would be:
- ETF2L:
- URL -
https://etf2l.org/feed/ - Channel -
#tf2news - Title (optional) -
ETF2L
- URL -
- teamfortress.tv:
- URL -
https://www.teamfortress.tv/rss - Channel -
#tf2news - Title (optional) -
teamfortress.tv
- URL -
After adding the feeds, when you choose Message submenu on left, you'll be able to see preview of the last RSS feed messages and test sending them our on a specific channel. This is good, because you can test, if the bot has proper rights in order to post messages in the #tf2news channel.

Click Send Original to Discord and choose #tf2news from the dropdown list.
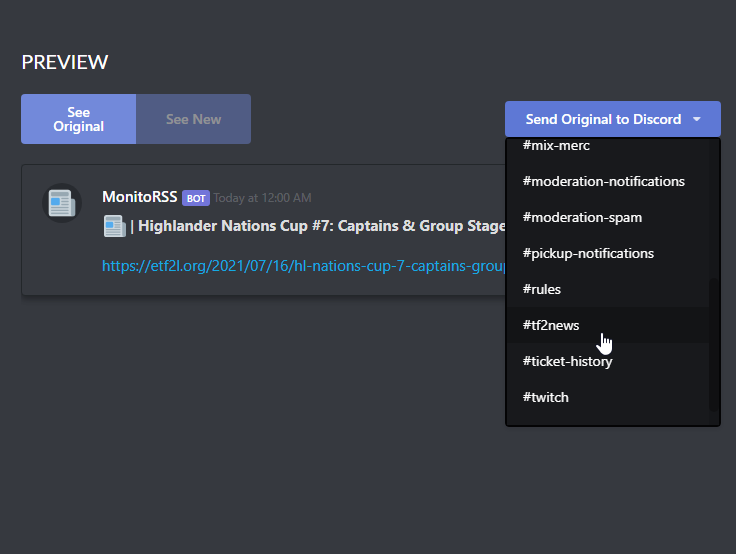
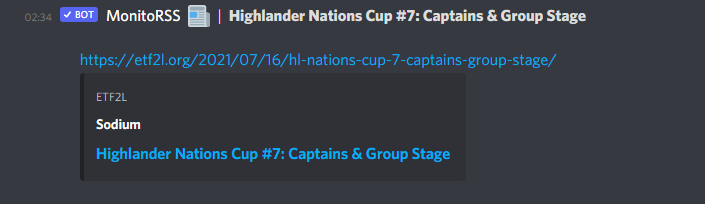
The message should appear on the aforementioned channel.
PatchBot
PatchBot is a bot sending notifications when game updates are released for many games such as League of Legends, Fortnite and many others you don't care about, because what we care about is the Team Fortress 2 which is on the supported game list. Basically after setting the bot up, every TF2 update will be announced in the #tf2news channel.
In order to start, open up PatchBot website and click Get Started. You will have to log into your Discord account.

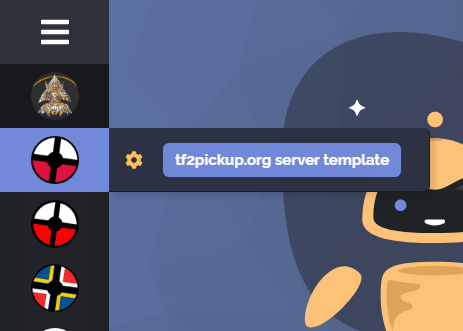
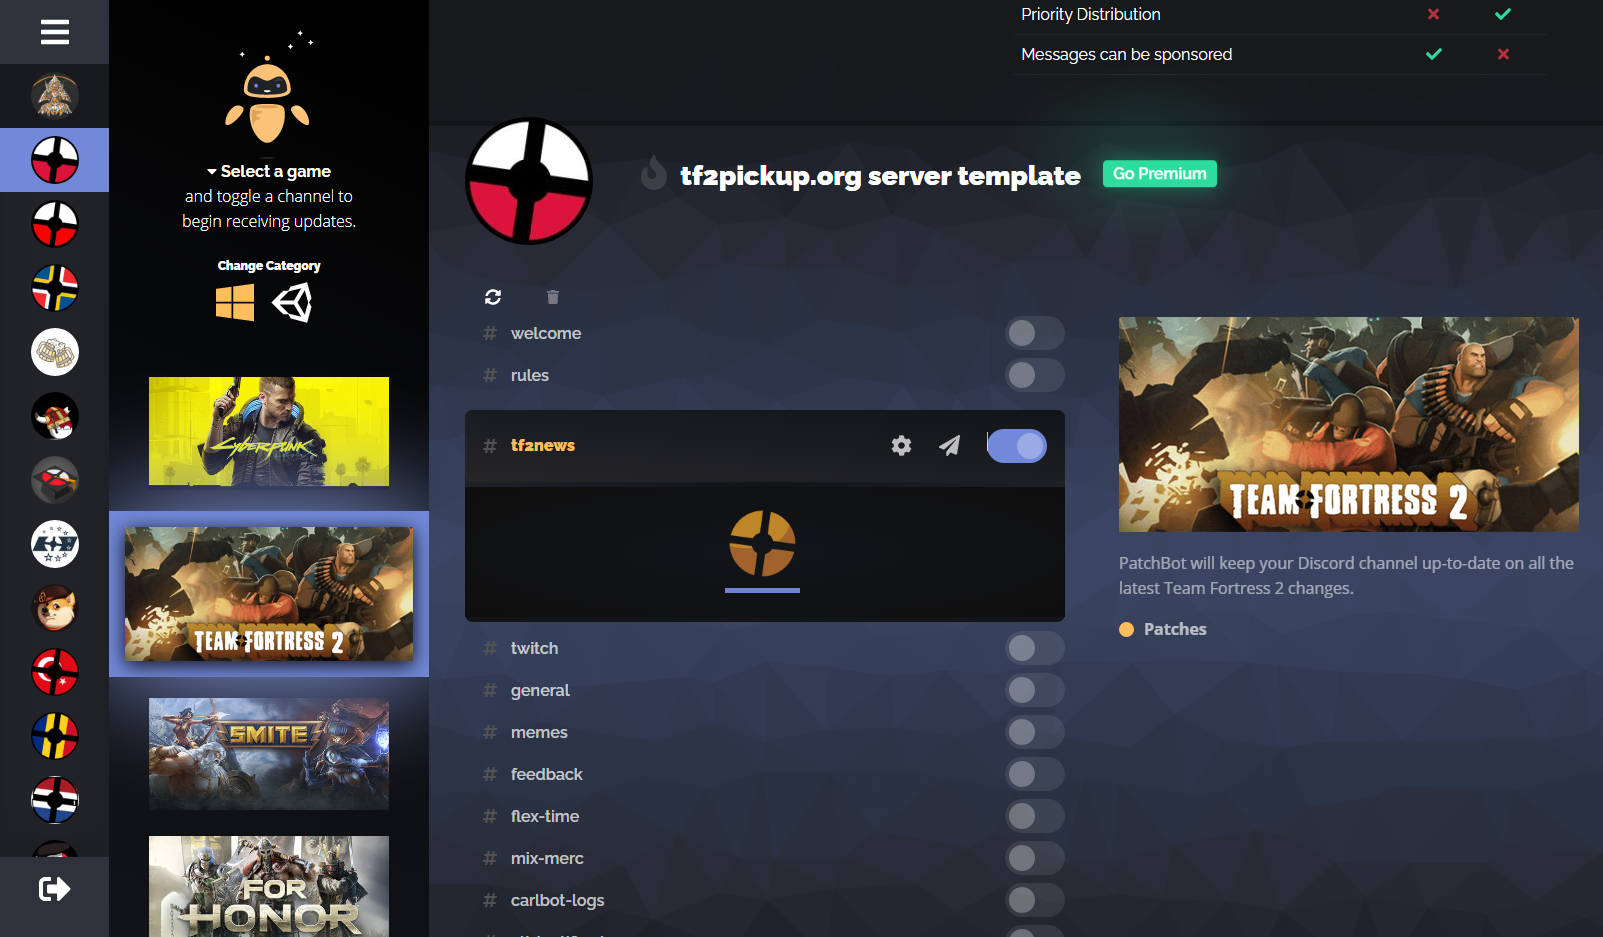
After that, your Discord server list will show up on left side of the page. Hover over the tf2pickup.org server template server logo and click on the button with its name.
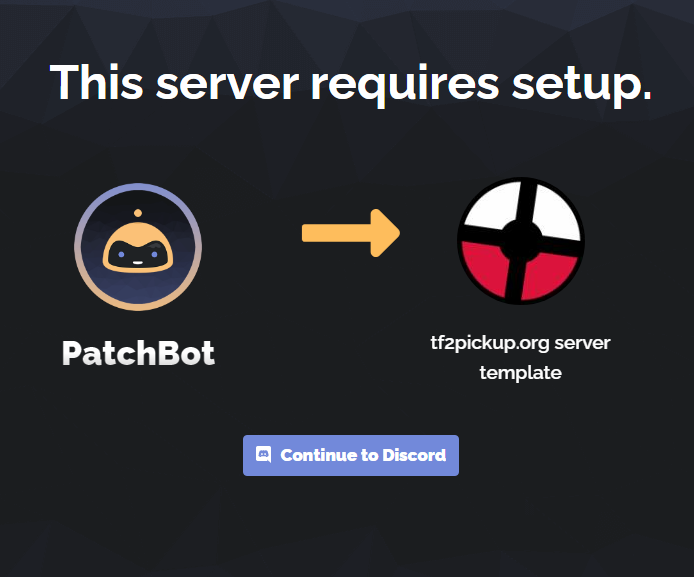
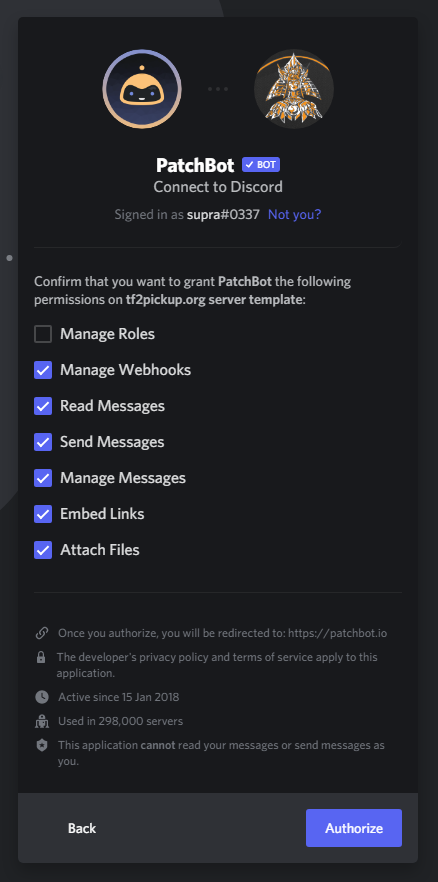
Since obviously you don't have a bot invited on the server yet, you will have to do it by clicking Continue to Discord.
Select tf2pickup.org server template server from the list, untick Manage Roles and Authorize the bot.
After that, simply scroll down on a game list on left and click on the Team Fortress 2 logo. Select the #tf2news channel from the list. After that click the paper kite icon in order to test out the channel.
You should see a notification like this:
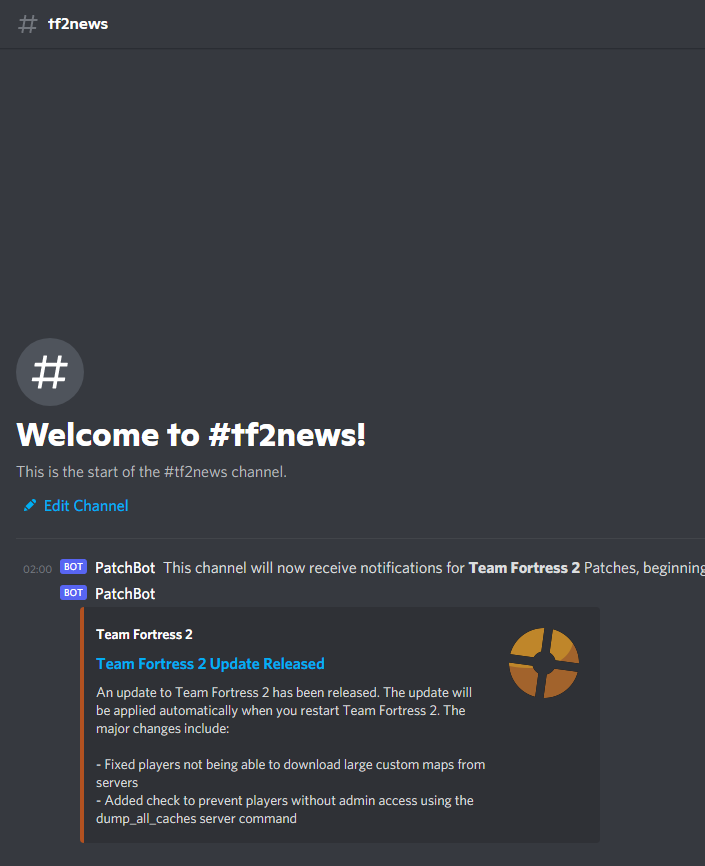
If that's the case, the PatchBot configuration is done.
Final touches
After setting up bots it's time to finalize the server setup. Here's what you can do:
Adding public announcement feed
Some of the public feeds are covered by the MonitoRSS bot, but some of them are not. This is where you can make a good use of the broadcasting channels on other popular servers. Obviously, it's up to you what channels are you going to follow, but we can imagine having a general feed from the TF2 community is a good way to keep your community informed about the things going on around. The follow example is based on teamfortress.tv's #announcements channel where all casted games and newsposts are announced when they are live.
In order to follow the channel, just open it up, click Follow on the top right corner, choose the server where you want to enable these notifications and choose the channel for it.
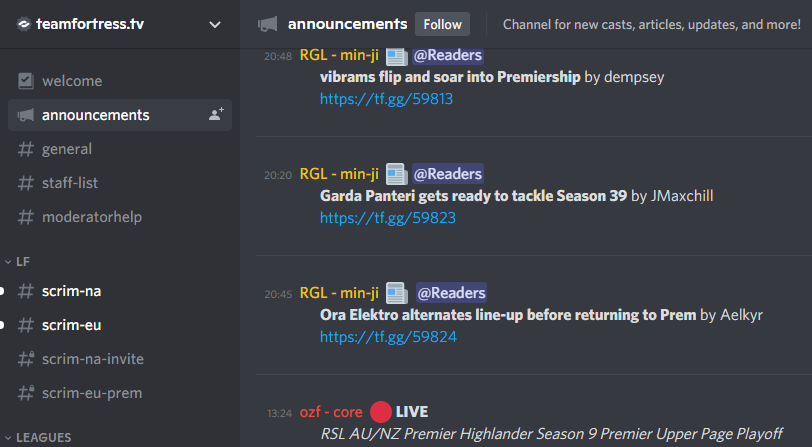
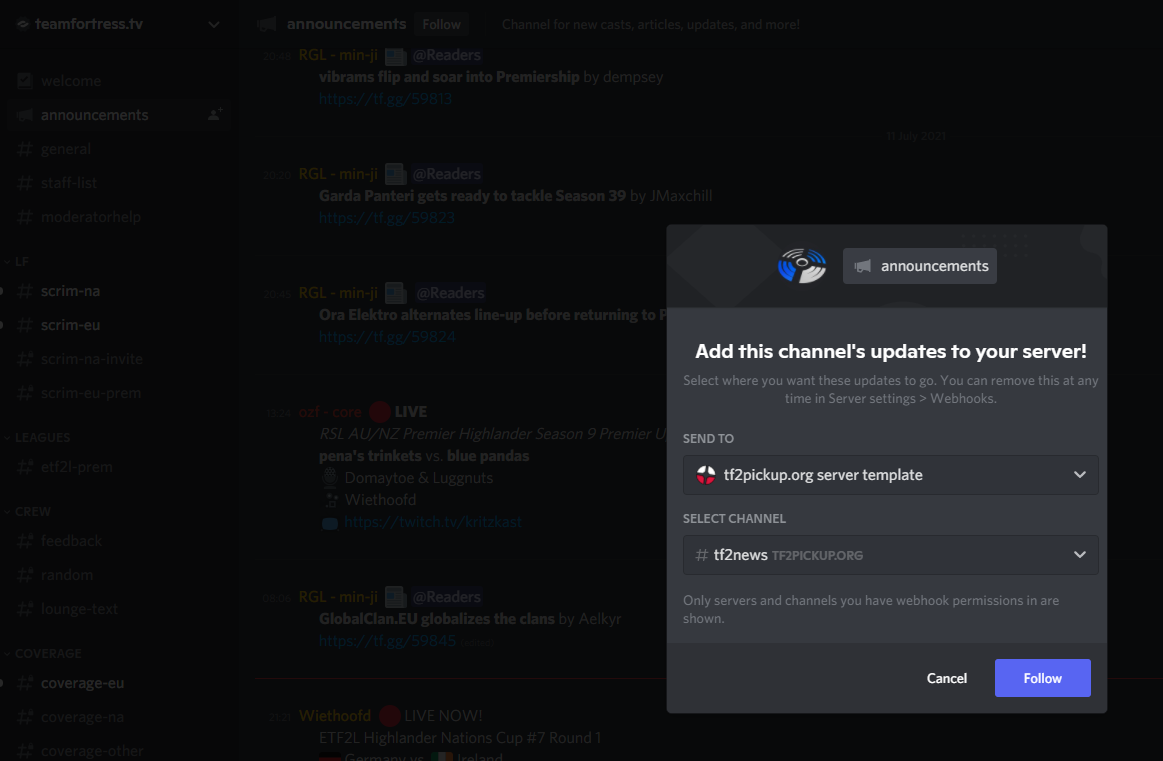
In that way we recommend to follow these channels:
#announcementson teamfortress.tv (we suggest selecting the#twitchchannel for this specific feed since there are LOADS of the annoucnements going on),#announce-kritzkaston KritzKast,#announcementson EssentialsTF,#announcementson RGL NA Official Discord,#announcementson UGC League in theTeam Fortress 2section.
Adding private moderation feed
Private moderation feed is a good things for admins/mods, because it lets them know if something is going on with the bot(s) like bot updates, maintenances, outages etc. These notifications should be sent to the #bot-notifications channel and here is the list of the channels you should follow in it:
#altdentifier-updatesin Auxim Solutions,#outagesin Carl-bot Help,#announcementsin Statbot,#announcementsand#bot-statusin Streamcord,#announcementsand#releasesin payload-neo,#status-updatesin MEE6 Support,#bot-newsin Ticket Tool Support,#downtime-updatesand#newsin MonitoRSS Support (Formerly Discord.RSS).
Setting up the server as a community type
In the end it's good to set up a community type server, because it lets you:
- have a welcome screen showing up for all users on server join,
- announcement channels made as a broadcasting channels, they are like the channels you've followed earlier,
- having a look at the server insights,
- discovery option in a Discord server browser for very big servers.
In order to start, go to your Server Settings.
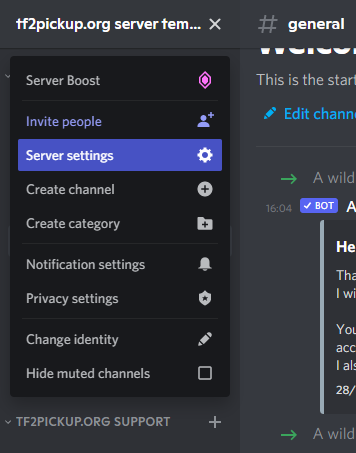
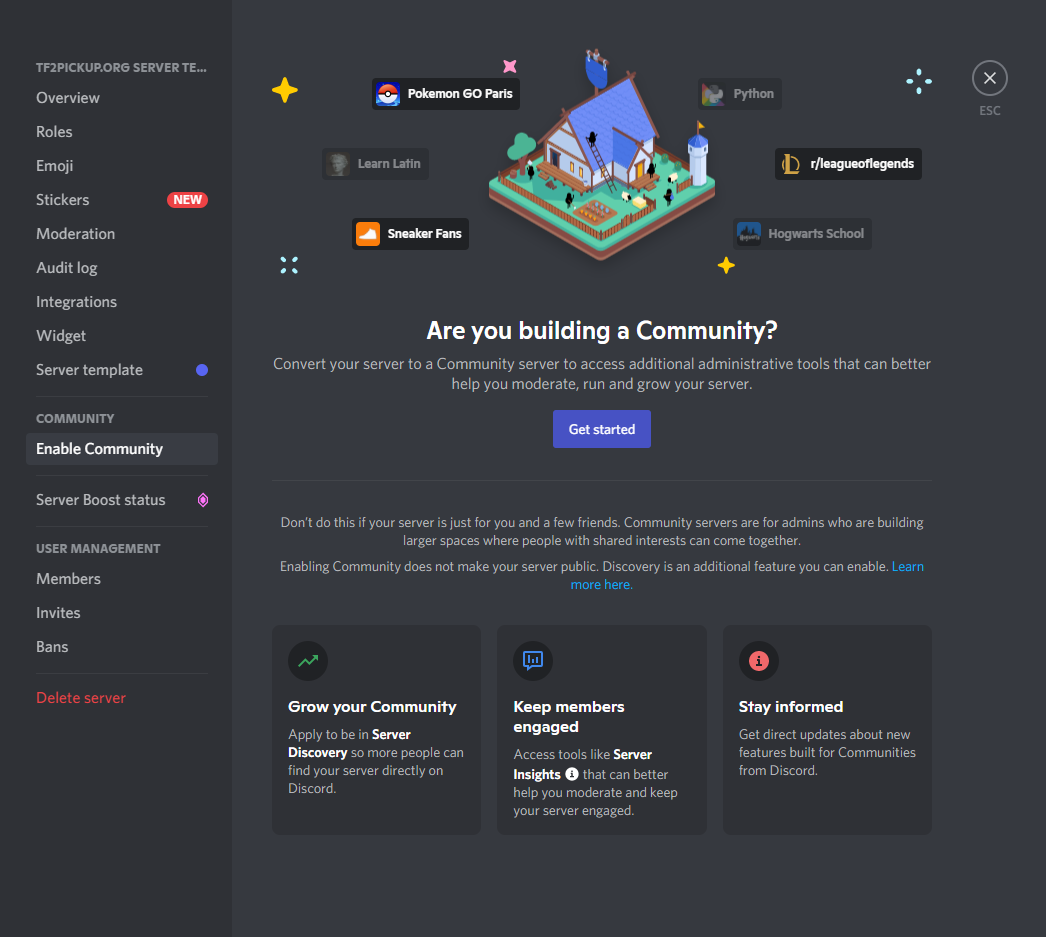
Go to the Enable Community section and click Get started.
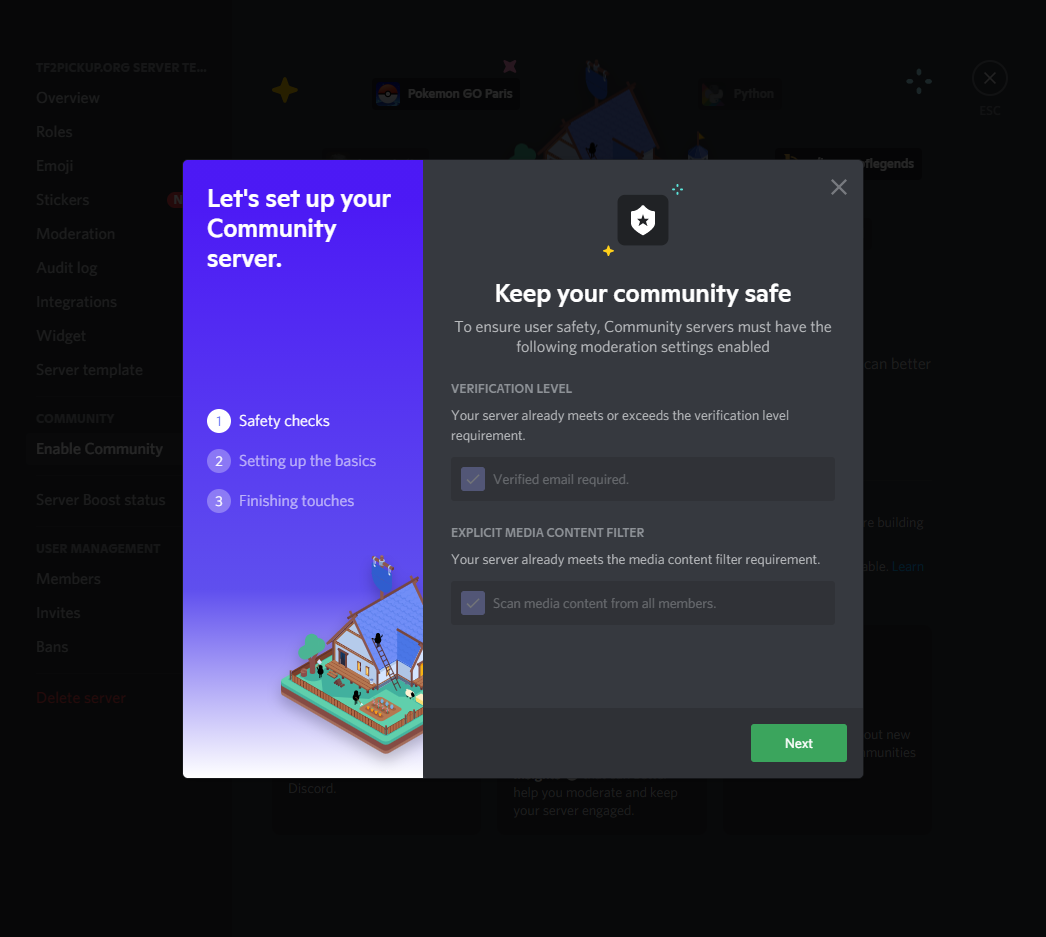
Make sure your email address is verified on your Discord account, also tick an option Scan media content from all members. In our case we had these options set already, so they were grayed out. After that, go next.
Choose channels for the rules and community updates going directly from Discord. In our case they should be #rules and #bot-notifications.

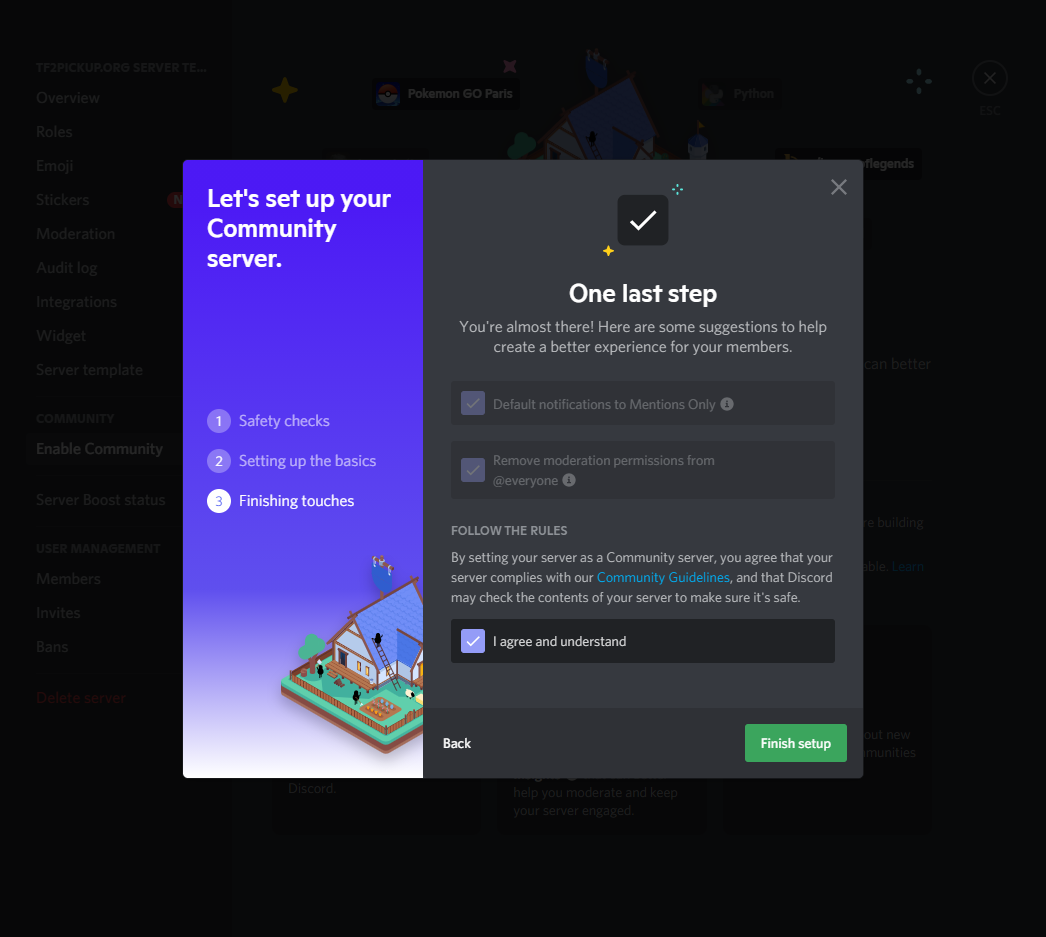
As in the first menu, the security options are ticked and the last thing we have to do is to accept the Community Guidelines and click Finish setup.
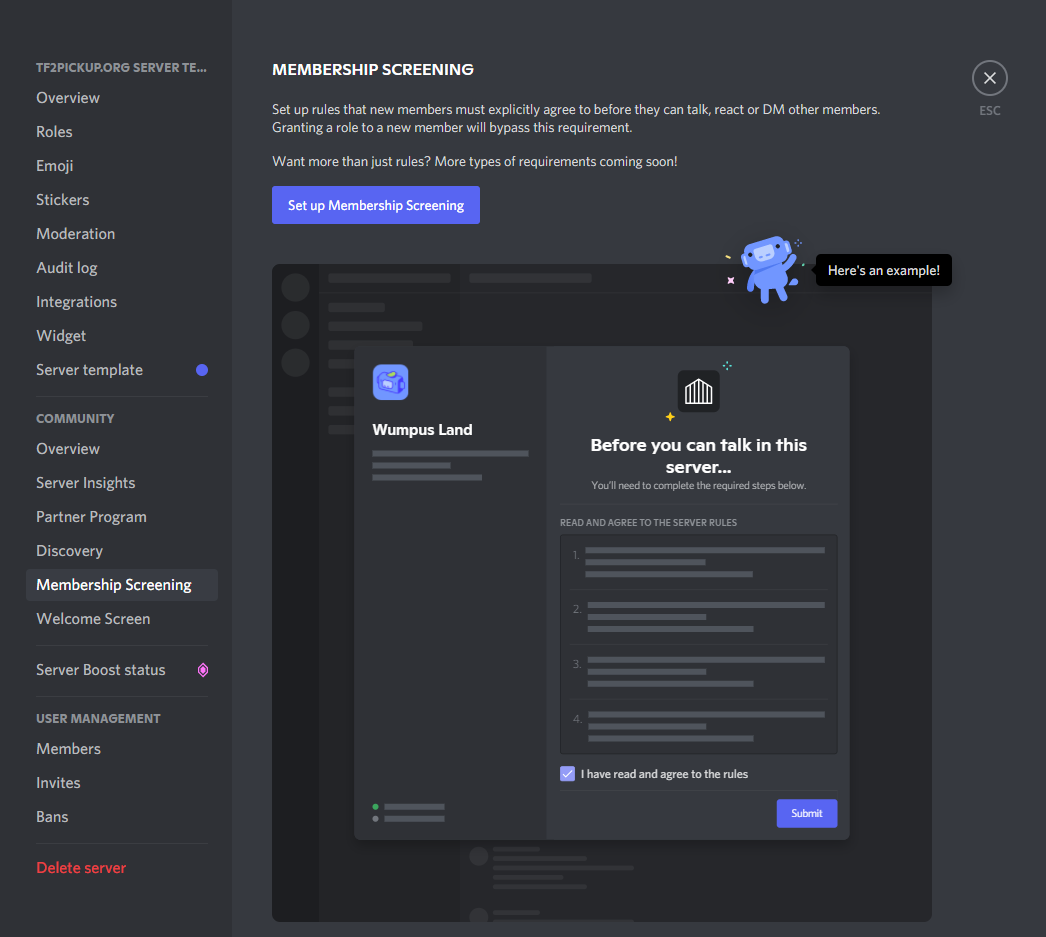
Now we can make use of the Community server features. Let's start with Membership Screening which lets you force the user to accept the rules before posting any message on the server. Click Set up Membership Screening in order to start.
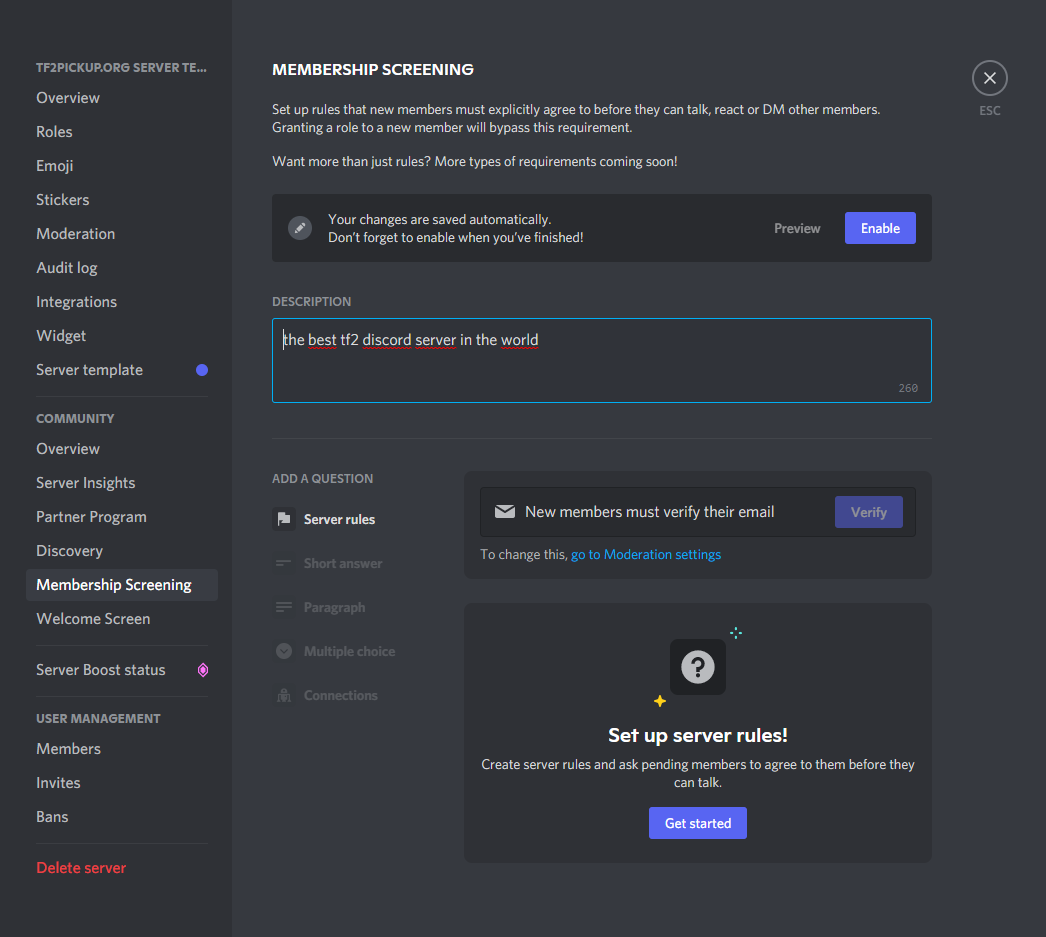
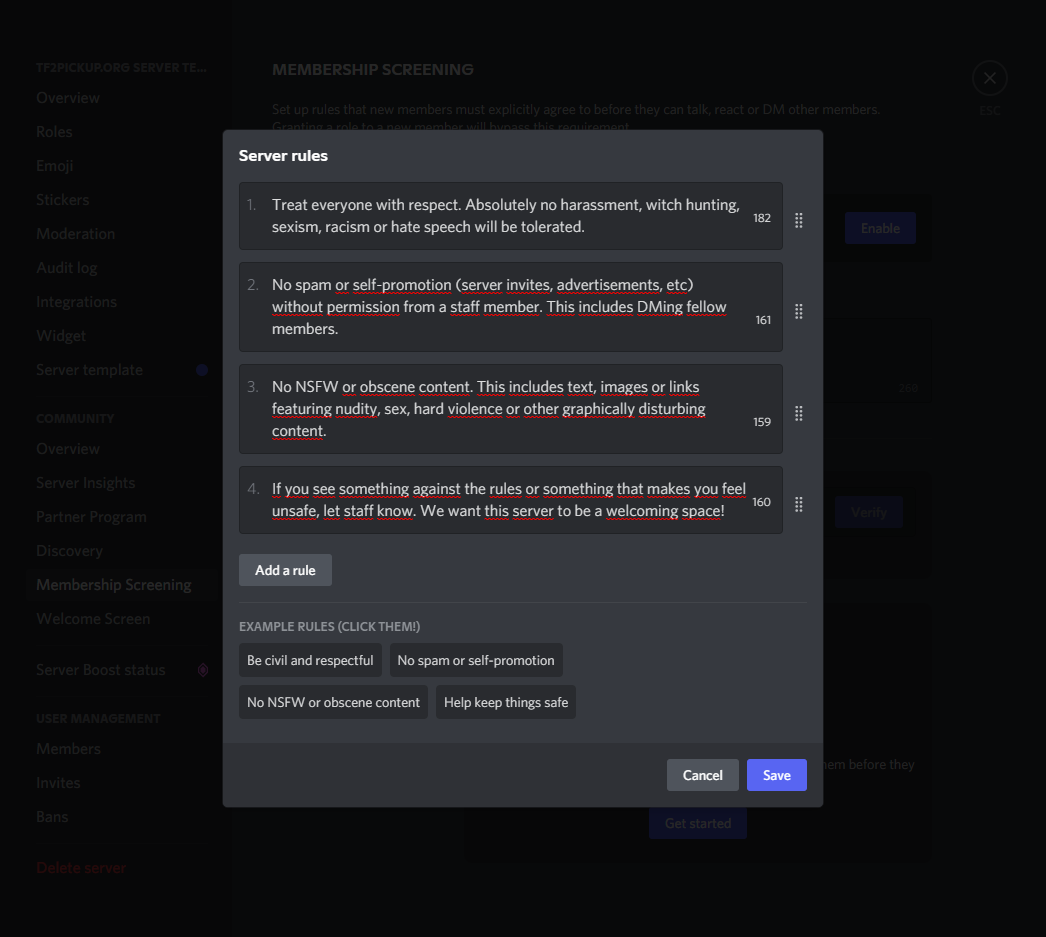
Feel free to add any description you want like we did here. In order to add rules, click Get started.
This is the place you can write the rules. Feel free to click on the buttons below the text field, so you can use predefined rules or make your own ones.
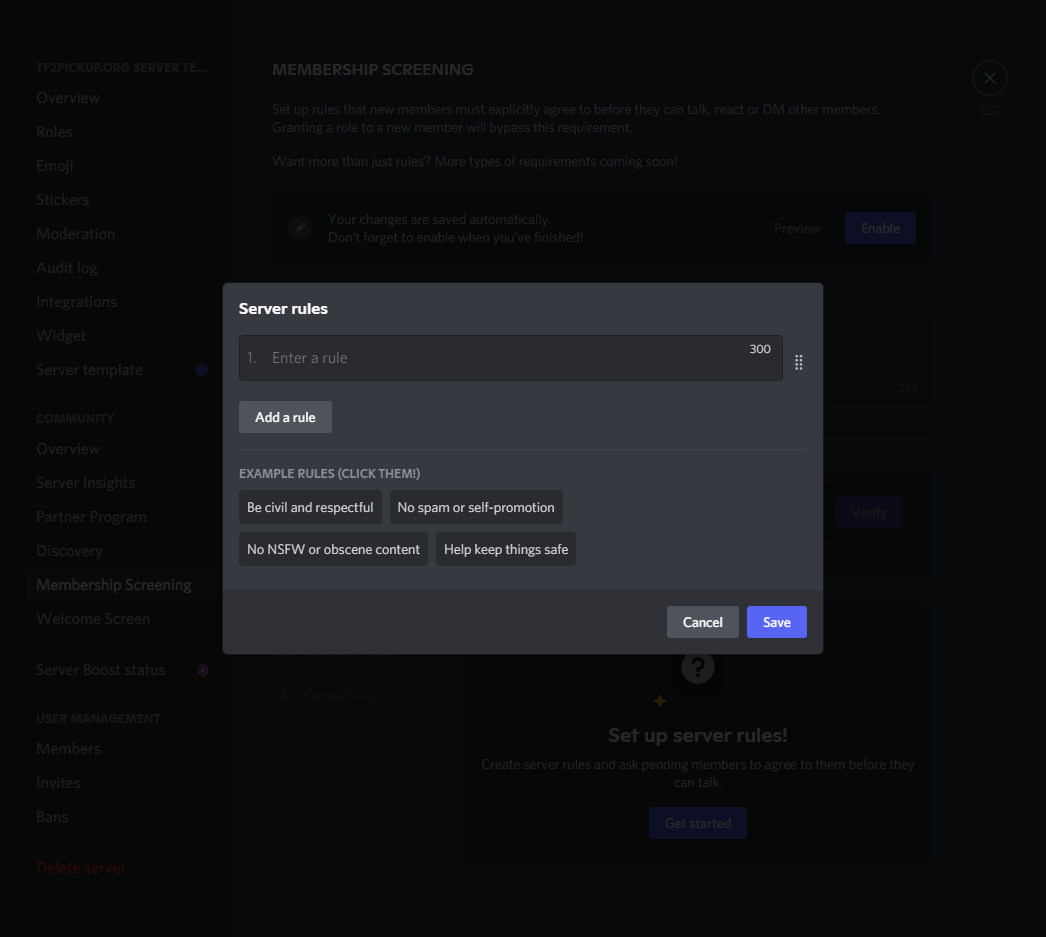
When it's done like on an example below, click Save.
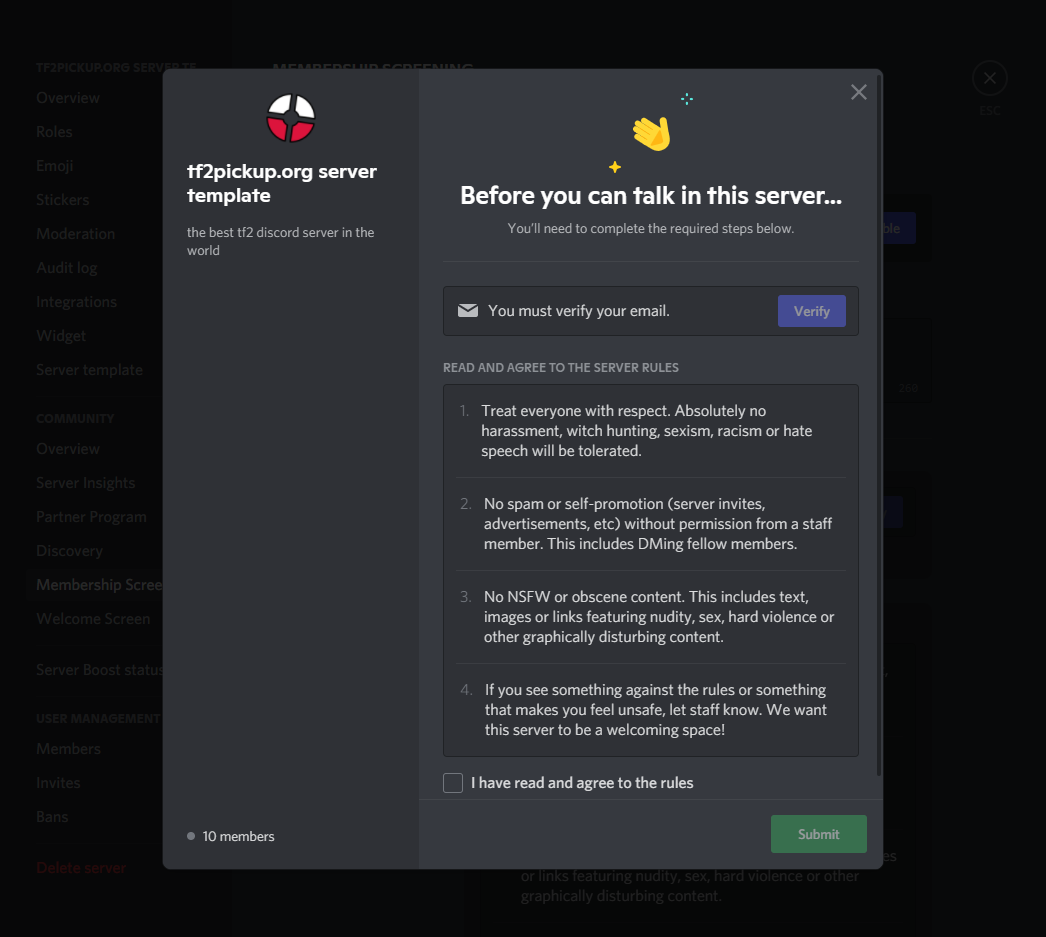
Before applying the settings you always have an option to see a rules preview. Click Preview in order to show it up.
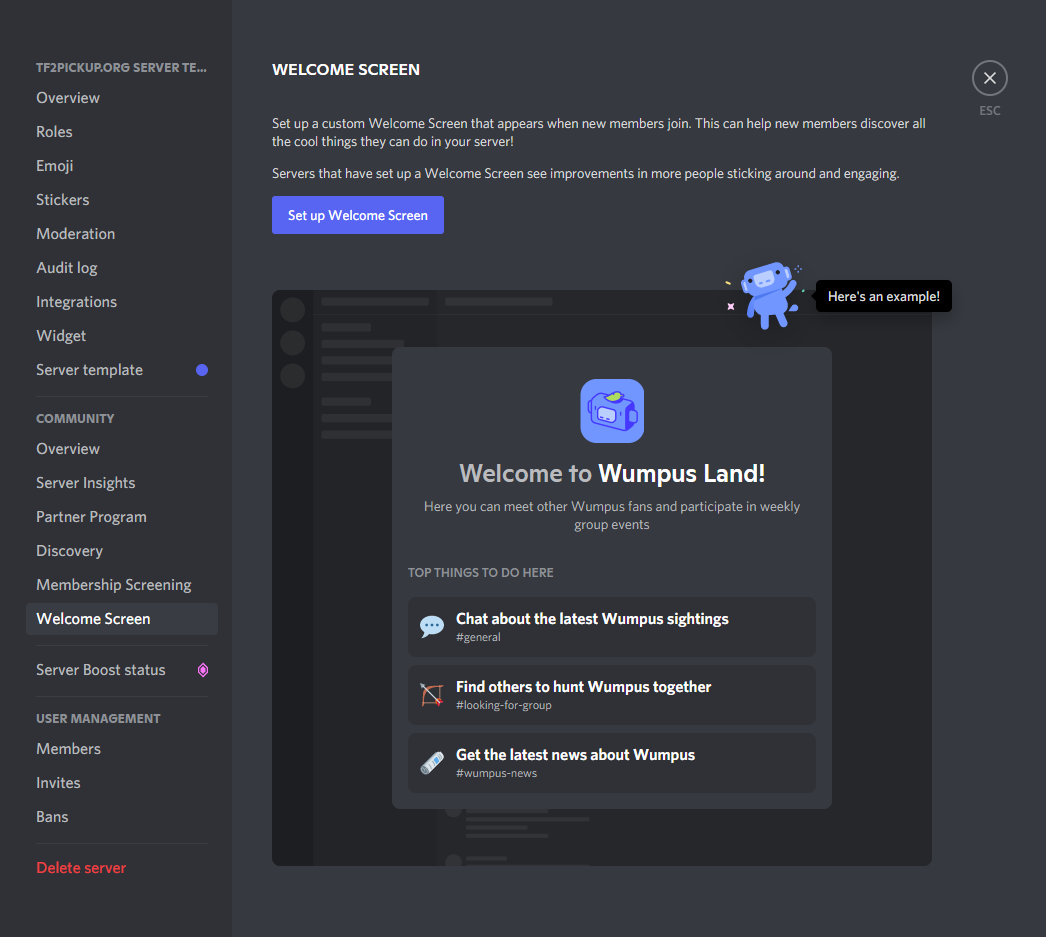
That concludes Membership Screening setup. Now let's get over to the Welcome Screen settings. Click Set up Welcome Screen to start.
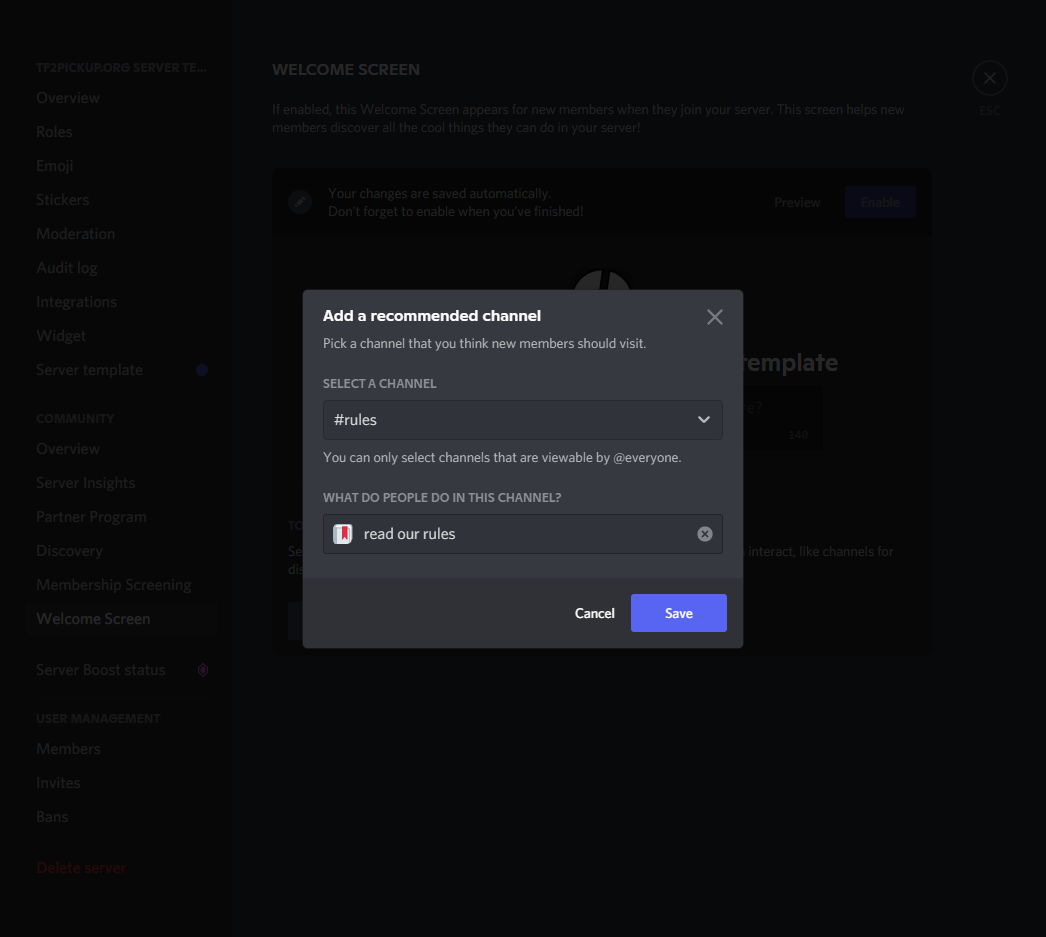
After adding a channel a popup window with its settings will show up. Select the channel, write a short description for the channel and optionally choose a matching emote to it. After that, click Save. You can add up to 5 channels to the Welcome Screen in this way.
After adding more channels, define a server description below the server name.
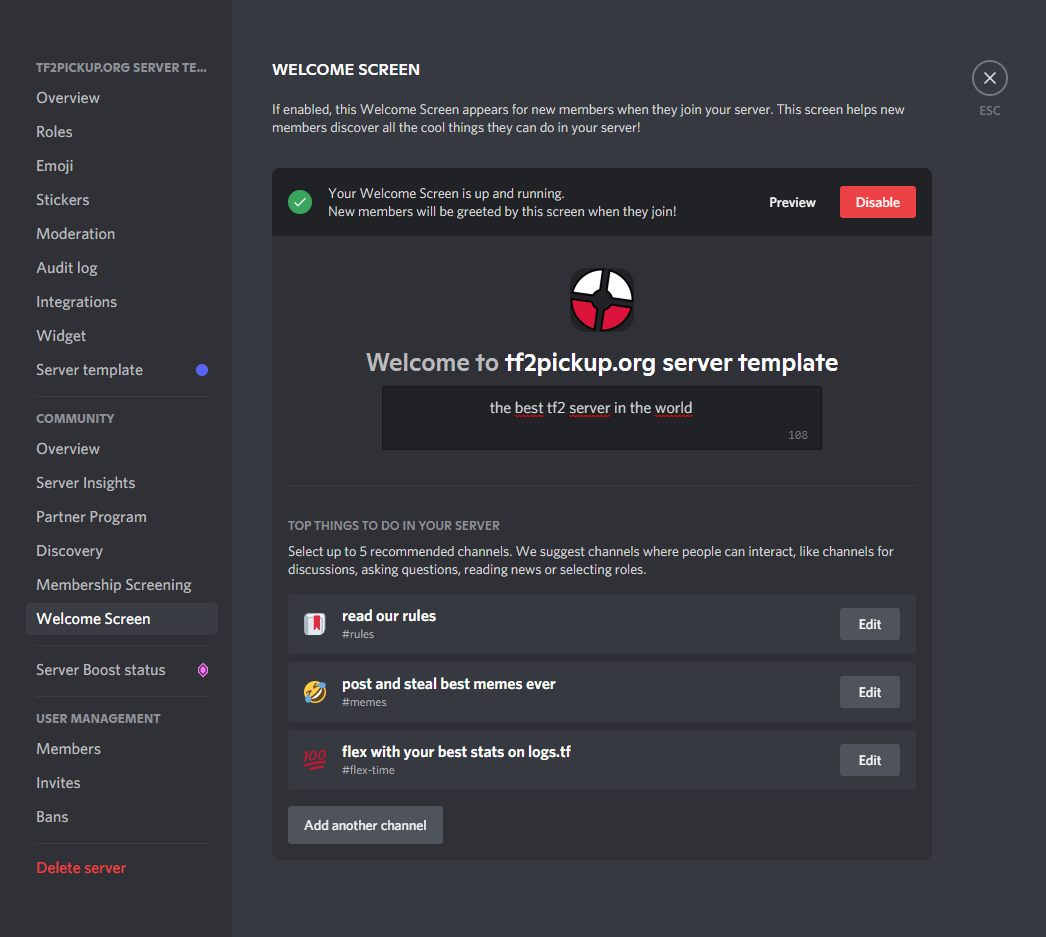
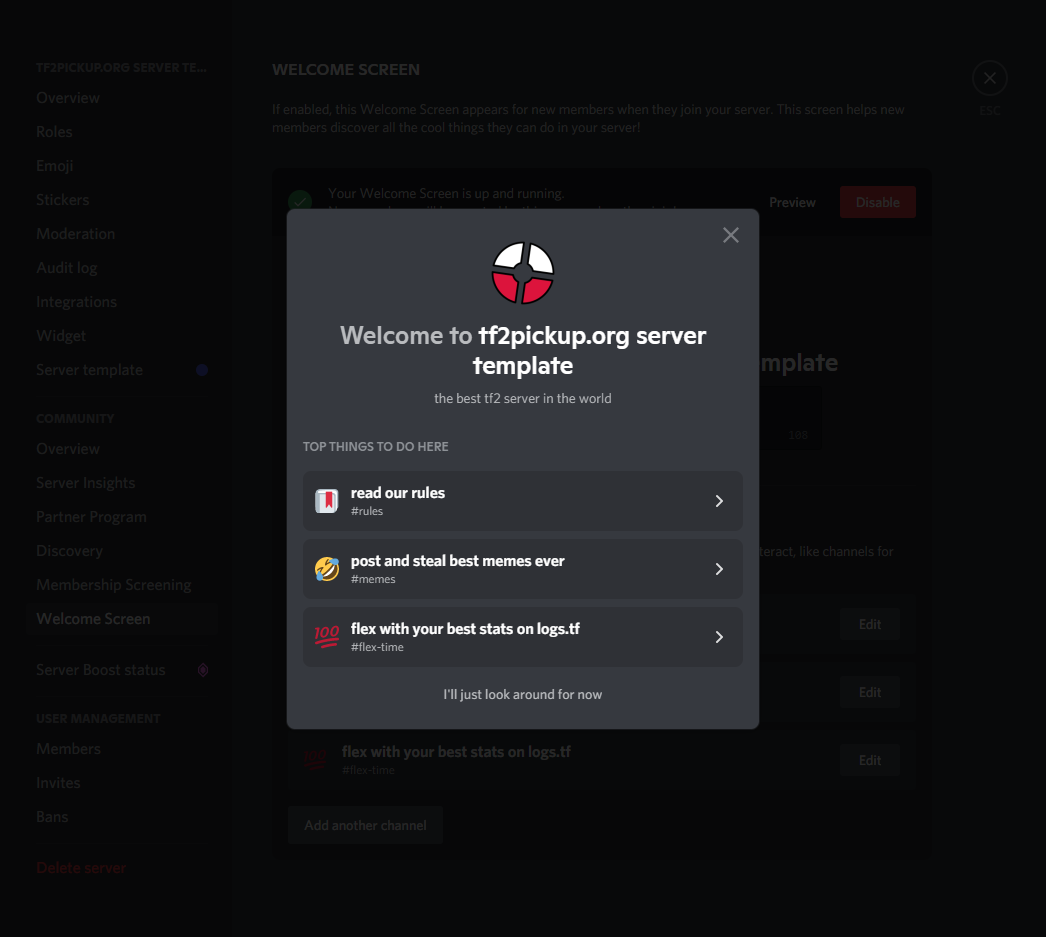
After that, before saving make sure the Welcome Screen looks like you want to. Click Preview, so you can have a look on it.
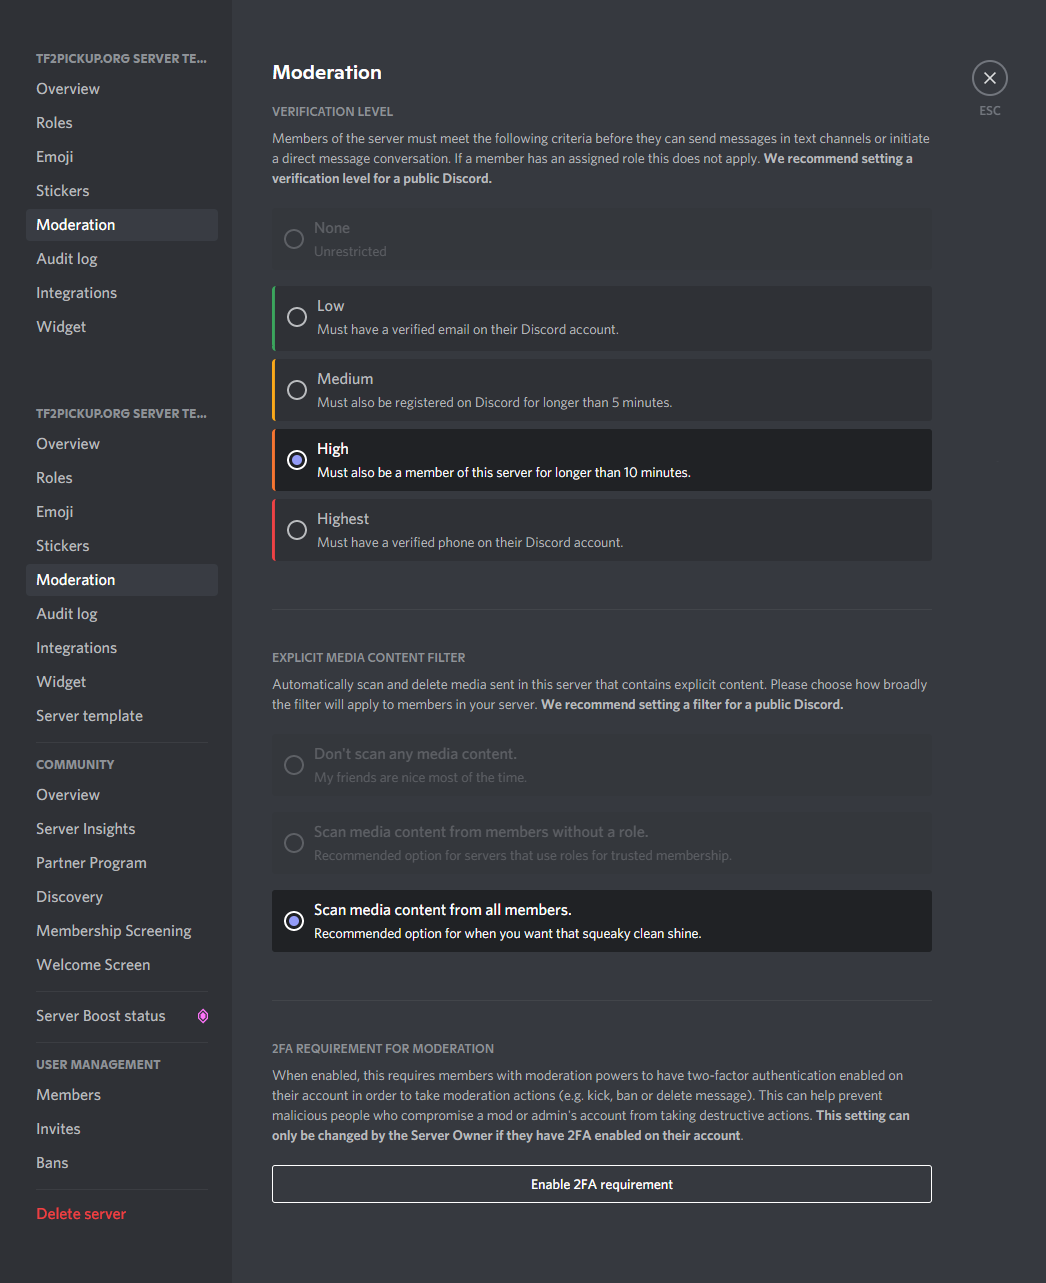
Setting general Discord server settings
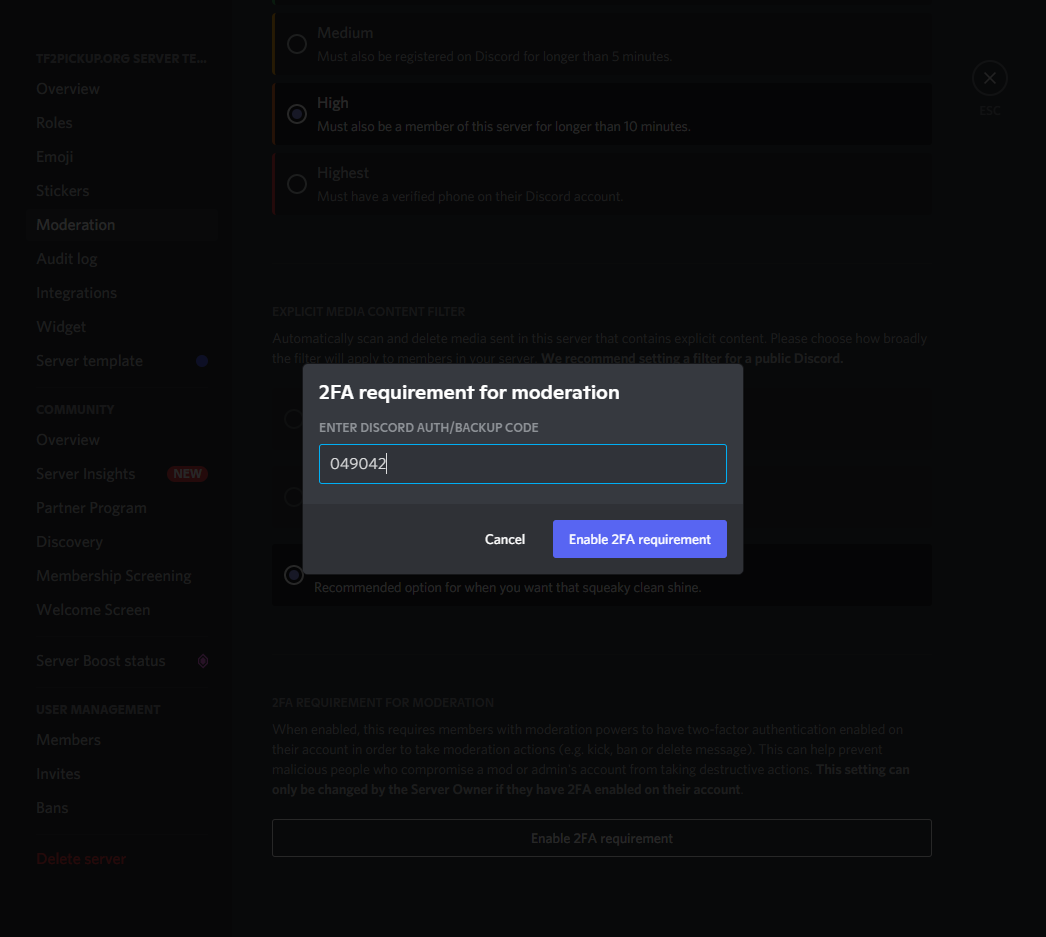
Finally, there are only a few options to set on the server in order to make it great. Start off from the Moderation section. Choose High moderation level. This is the best compromise between restrictive and safe setup. All big community servers usually set this to the Highest in order to let spammers have harder time, but we think it's not needed in small communities. Moreover, make sure to enable the 2FA (two-factor authentication) requirement for the administrators/moderators, so they could be safer meaning getting access to an account of them is even harder than usual. Click Enable 2FA requirement, type in your token and click it again.
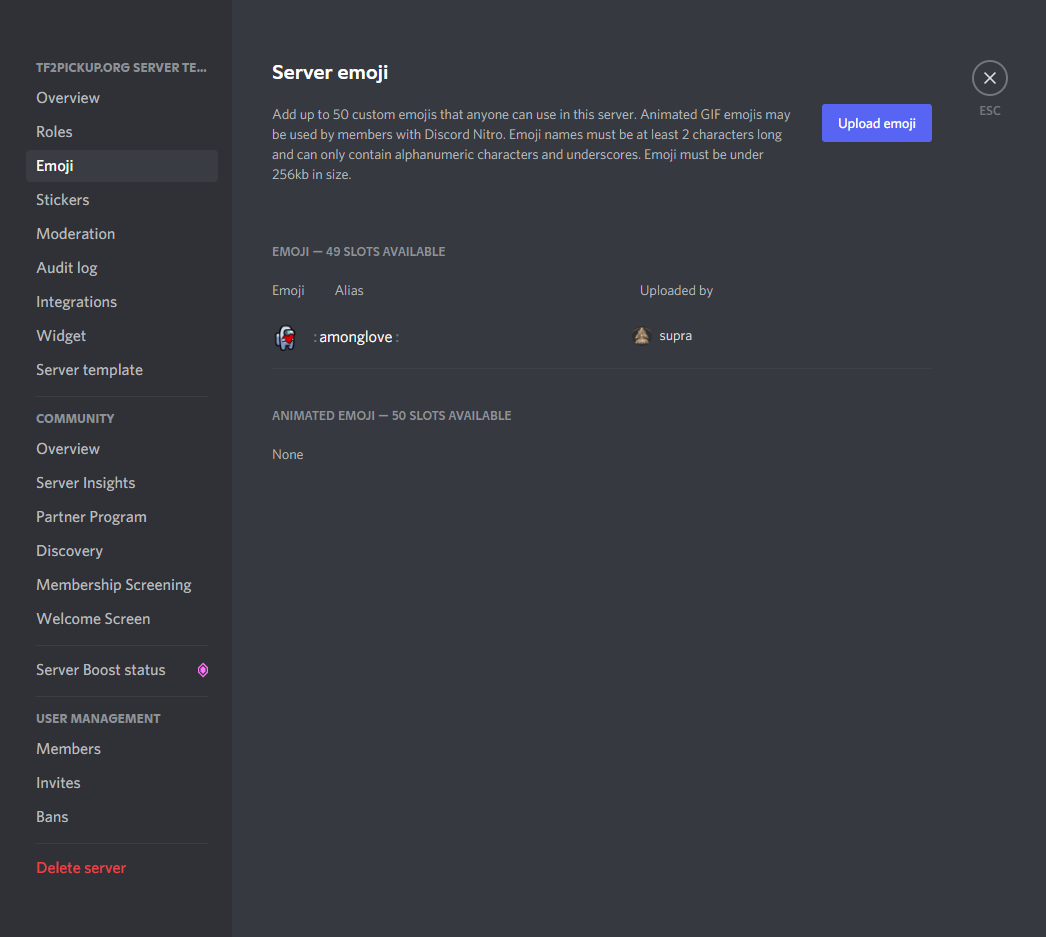
After that, it's good to have some server emojis, so people could interact in a way they want to. We recommend to add emotes with transparency in the background - these looks the best. All you need to do is to upload emojis by clicking Upload emoji, choosing emoji pictures and naming them in a way you want to let use them.
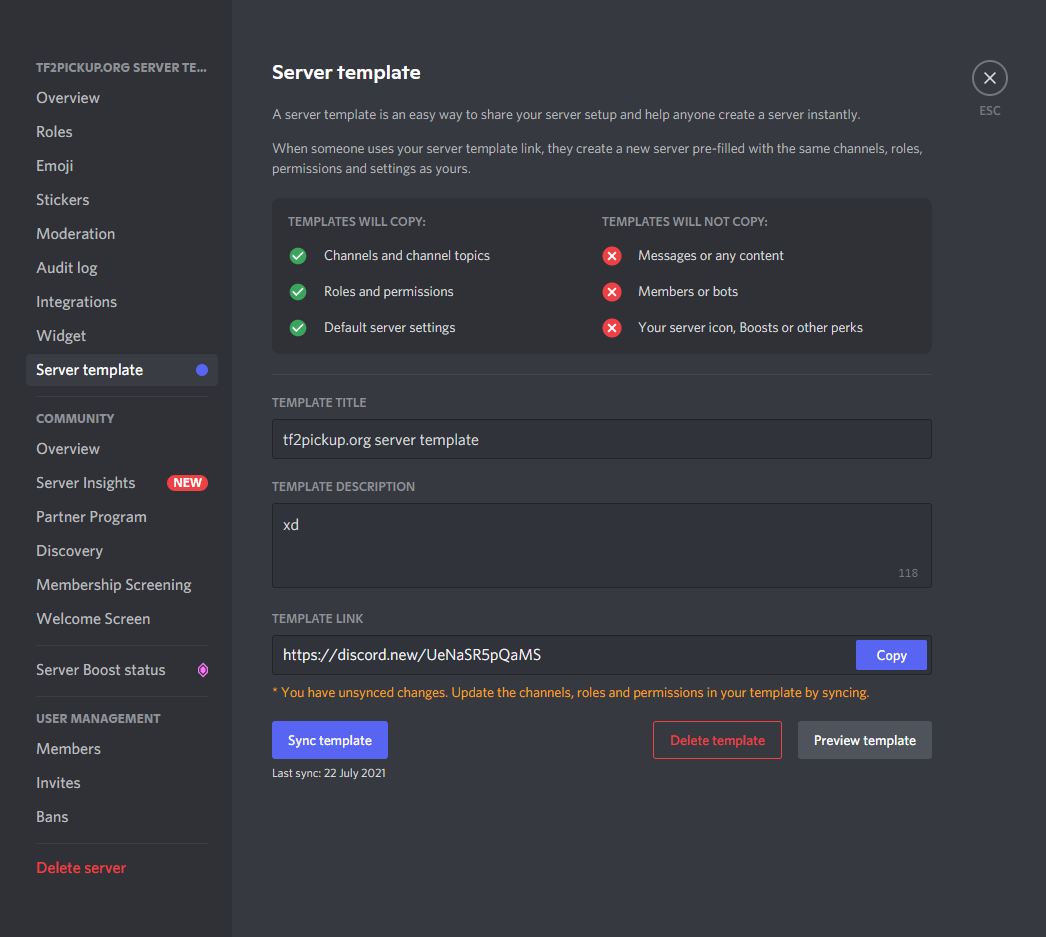
Another good thing you can do is to create your server template. This lets you create a clone of your whole server without bots, so if you'd like to make some of your own changes on the server, you can always test these first on a testing server you can make by using a template. You have to update it every single time you make a change on the server like channel permissions, role setting etc. Click Sync template in order to sync changes to a template. In that way you could use a link from this image below to make your own server based on all descriptions we made here.