Setup prerequisites
Introduction
Currently all tf2pickup.org instances use reverse proxy server configuration based on Nginx with Certbot for obtaining free certificates from Let's Encrypt. They are hosted on Debian-based distributions (Ubuntu 22.04, Debian 12), but the deployment is not limited to these Linux distributions only; we support the usage of different reverse proxies, such as Apache or Caddy or different tools for obtaining certificates such us acme.sh or even win-acme. We have confirmed the website to be working on Windows 10/11 with Docker containers using Linux Subsystem for Windows (version 2).
The following guide should be taken as an example, which is based on:
- Ubuntu 22.04 Linux distribution,
- Cloudflare as a domain API provider for DNS zone dynamic updates,
- Certbot as the certificate obtaining tool,
- Nginx as a reverse proxy,
- tf2pickup.org application hosted as a container on port TCP 3000.
Following these instructions should lead to configuration assessed as A+ in Qualsys SSL Labs and A+ in Mozilla Observatory tests. Most of the configuration examples given are based on configuration from the tf2pickup.eu website.
Host recommendations
We do not have any specific info what are the specific requirements for the whole setup, since it can be run with game servers and the application on separate hosts. However, based on our experience, we suggest to get a machine (regardless whether it is a VPS or a dedicated server) with at least 4 vCPU (virtual CPU cores, preferably dedicated cores), 8 GB of RAM and at least 80 GB of SSD-based storage. Apparently 40 GB is probably enough to run the site with 2 game servers and mumble, but in most cases that disk size or even doubled one will be bundled with previous specs in an offer. Having a static IPv4 is a must, IPv6 address is optional. There are different options for host network speed and we suggest to get an offer with 1 Gbit/s both sides. Obviously the site will run with less, but having worse networking speed such as 250 Mbit/s both sides will greatly decrease the download speed for any host updates/game server updates.
Our sites are run on different hostings, namely OVH (Strasbourg 🇫🇷, Gravelines 🇫🇷), Hetzner (Nuremberg 🇩🇪, Helsinki 🇫🇮), Netcup (Nuremberg 🇩🇪), MyDevil (Warsaw 🇵🇱) and many others.
Domain name setup
We encourage you to purchase domains in OVH since they provide an API allowing for dynamic DNS zone updates (also, since we have experience with it, we can provide help with it at some point). If a pickup domain was not purchased on OVH nor any domain registrar for which certbot DNS API plugin was made, we encourage you to park the DNS zone in Cloudflare, since they provide their domain zone management services for free and their API is pretty easy to use.
In order to move a domain zone from the current site to Cloudflare, you are supposed to create an account on Cloudflare and add the domain you own. After that, you will be asked to change the nameserver (NS) entries for servers given by the Cloudflare. There are always two entries given and they should replace current entries in the domain zone.
In that way all zone settings should be applicable from Cloudflare like on an image below:
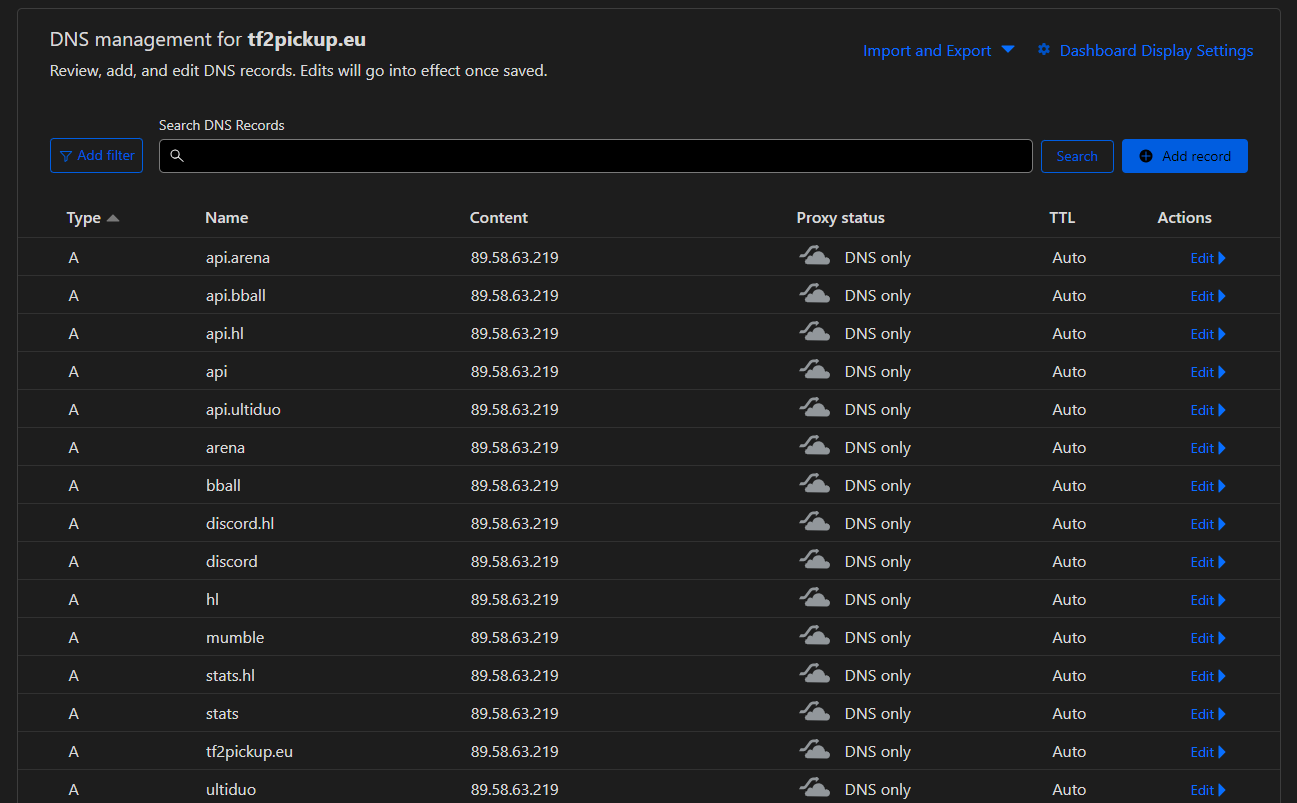
A pickup domain should contain at least one A entry, but this configuration is the most recommended:
| Entry type | Name | Content | Priority | Mandatory |
|---|---|---|---|---|
A | tf2pickup.eu | host IPv4 address | n/d | YES |
AAAA | tf2pickup.eu | host IPv6 address | n/d | NO |
CAA | tf2pickup.eu | 0 issuewild letsencrypt.org | n/d | YES |
Since version 4, tf2pickup.org no longer requires a separate api. subdomain. The application serves both the UI and the API on a single domain.
Usage of AAAA entries is optional. If you do not want to handle IPv6 on Docker, feel free to actually not use these. We encourage to use CAA entry alongside Let's Encrypt certificates. Setting up proxying for A/AAAA entries is optional; it's always safer if you want to hide your public IP address in order to take advantage of the Cloudflare Anti-DDoS protection. However, you must take on account the following matters:
- in order to maintain anonymous status of the host IP for the website, you must host Mumble/gameservers on a different server, also Mumble should be available under a different domain, like
mumble.tf2pickup.eu. Cloudflare Anti-DDoS works only for the most popular ports, unless you use Spectrum which is available in Enterprise plan only, meaning hosting Mumble/game servers on the same server, while attempting to connect to it with a proxied domain will result in timeouts. Passing access to Mumble servers/game servers on the same server where the website resides has no sense at all, as you would have to disable proxying for this DNS entry which will leak your real host IP address.
Recommended Cloudflare settings
We suggest to change the following settings in Cloudflare:
We recommend to apply HSTS settings changes after the site deployment in order to avoid accessibility issues when certificates are not used on the website yet
- SSL/TLS
- Edge Certificates
- Always use HTTPS: YES
- HTTP Strict Transport Security (HSTS)
- Status: On
- Max-Age: 12 months
- Include subdomains: On
- Preload: On
- Minimum TLS Version: TLS 1.2
- Opportunistic Encryption: YES
- TLS 1.3: YES
- Certificate Transparency Monitoring: YES
- Edge Certificates
- Network
- IPv6 Compatibility: YES
- gRPC: NO
- WebSockets: YES
- Onion Routing: YES
- Pseudo IPv4: Off
- IP Geolocation: YES
- Maxmimum Upload Size: 100 MB
- Network Error Logging: YES
SSL setup with Certbot
We discourage from using certbot version from the repository, since their versions are very old. EFF suggests downloading a binary manually or using the snap package. We encourage you to go for the latter, since it comes with automatic package updates, handled by the snapd service. At the moment of writing this guide the certbot version in the official Ubuntu repository is:
# certbot --version
certbot 0.40.0
while the snap version is:
# certbot --version
certbot 1.14.0
The certificate obtaining process is going to be based on the DNS-01 method with Cloudflare API use.
In order to install the Cerbot with Cloudflare DNS API plugin, you should execute the following commands:
# apt install snapd
# systemctl enable snapd.service
# snap install core
# snap install certbot --classic
# snap set certbot trust-plugin-with-root=ok
# snap install certbot-dns-cloudflare
Before getting certificates, a Cloudflare API token must be prepared for that based on the instructions given in a certbot-dns-cloudflare guide, with usage of the restricted API token. The next commands expect the token to be saved in the /root/.secrets/cloudflare file with file permissions of 600.
After that, certificate should be able to be created by using the command (the --agree-tos and -email parameters must be given on a first certificate):
certbot certonly --non-interactive -d 'tf2pickup.eu' --dns-cloudflare --dns-cloudflare-credentials /root/.secrets/cloudflare --rsa-key-size 4096 --must-staple --agree-tos --email your-mailbox@you-are-really-using.com
There is a special case if your domain is a subdomain of tf2pickup.org or tf2pickup.eu, for instance br.tf2pickup.org or au.tf2pickup.org which you have to use for (example given is for br.tf2pickup.org).
certbot --nginx --non-interactive -d 'br.tf2pickup.org' --rsa-key-size 4096 --must-staple --agree-tos --email your-mailbox@you-are-really-using.com
For the next certificate request you do not need to use --agree-tos and --email parameters anymore.
In case of failure most likely you:
- have invalid restricted API key,
- have Global API key with a user account email instead of the restricted API key,
- invalid file syntax,
- invalid token file permissions (not 600),
- do not have a DNS server connection working.
When the certificate is obtained, we suggest you to leave these two commands in the root crontab file (opened by a command crontab -e as root):
0  1   20 * *   certbot certonly --non-interactive -d 'tf2pickup.eu' --dns-cloudflare --dns-cloudflare-credentials /root/.secrets/cloudflare --rsa-key-size 4096 --must-staple
5  1   20 * *   systemctl restart nginx
In that manner, the certificates will renew every 20th day of the month and every 2 months at 1:05 AM server time.
Nginx setup
Nginx should be installed by the following command:
# apt install nginx
After the installation, delete all files existing in /etc/nginx/sites-available and /etc/nginx/sites-enabled and execute the command below in order to generate Diffie-Hellman service file.
# openssl dhparam -out /etc/letsencrypt/ssl-dhparams.pem 4096
After that, (re)place the following files in their respective locations. Make sure you change the domain names/SSL certificate folder names in the configuration files:
/etc/nginx/nginx.conf:
user www-data;
worker_processes auto;
pid /run/nginx.pid;
include /etc/nginx/modules-enabled/*.conf;
events {
        worker_connections 768;
        # multi_accept on;
}

http {

        ##
        # Basic Settings
        ##
        ssl_session_cache shared:ssl_session_cache:10m;
        sendfile on;
        tcp_nopush on;
        tcp_nodelay on;
        keepalive_timeout 65;
        types_hash_max_size 2048;
        server_tokens off;
        server_names_hash_bucket_size 64;
        # server_name_in_redirect off;

        include /etc/nginx/mime.types;
        default_type application/octet-stream;

        ##
        # SSL Settings
        ##
        resolver 9.9.9.9;
        ssl_protocols TLSv1.3 TLSv1.2;
        ssl_prefer_server_ciphers off;
        ssl_ciphers ECDHE-ECDSA-AES128-GCM-SHA256:ECDHE-RSA-AES128-SHA256:ECDHE-RSA-AES128-GCM-SHA256:ECDHE-ECDSA-AES256-GCM-SHA384:ECDHE-RSA-AES256-GCM-SHA384:ECDHE-ECDSA-CHACHA20-POLY1305:ECDHE-RSA-CHACHA20-POLY1305:DHE-RSA-AES128-GCM-SHA256:DHE-RSA-AES256-GCM-SHA384;
        ssl_ecdh_curve secp521r1:secp384r1;
        # Logging Settings
        ##
        access_log /var/log/nginx/access.log;
        error_log /var/log/nginx/error.log;

        ##
        # Gzip Settings
        ##

        gzip off;
        ##
        # Virtual Host Configs
        ##

        include /etc/nginx/conf.d/*.conf;
        include /etc/nginx/sites-enabled/*;
        # Security Settings

        add_header X-Frame-Options DENY;
        add_header X-Content-Type-Options nosniff;
        add_header X-XSS-Protection "1; mode=block";
}
/etc/nginx/sites-available/tf2pickup.eu:
map $http_upgrade $connection_upgrade {
        default upgrade;
        ''      close;
}
server {
        listen 80;
        #listen [::]:80; #IPv6 specific entry
        server_name tf2pickup.eu;
        return 302 https://tf2pickup.eu$request_uri;
}
server {
        access_log /var/log/nginx/tf2pickup.eu-access.log;
        error_log /var/log/nginx/tf2pickup.eu-error.log;
        listen 443 ssl http2;
        #listen [::]:443 ssl http2; #IPv6 specific entry
        server_name tf2pickup.eu;
        ssl_certificate /etc/letsencrypt/live/tf2pickup.eu/fullchain.pem;
        ssl_certificate_key /etc/letsencrypt/live/tf2pickup.eu/privkey.pem;
        ssl_dhparam /etc/letsencrypt/ssl-dhparams.pem;
        ssl_stapling on;
        ssl_stapling_verify on;
        ssl_session_cache shared:ssl_session_cache:10m;
        ssl_trusted_certificate /etc/letsencrypt/live/tf2pickup.eu/chain.pem;
        location / {
                proxy_pass http://127.0.0.1:3000;
                add_header Strict-Transport-Security "max-age=31536000; includeSubDomains; preload";
                proxy_http_version 1.1;
                proxy_set_header Upgrade $http_upgrade; # allow websockets
                proxy_set_header Connection $connection_upgrade;
                proxy_set_header X-Forwarded-For $remote_addr; # preserve client IP
                proxy_set_header X-Forwarded-Proto $scheme;
                proxy_set_header Host $host;
                }
}
After placing the file, make sure to create a symlink to it in /etc/nginx/sites-enabled:
# ln -s /etc/nginx/sites-available/tf2pickup.eu /etc/nginx/sites-enabled/tf2pickup.eu
When that is done, nginx should use these configs. Execute nginx -t in order to check if all configuration files are valid. You should expect the following output:
# nginx -t
nginx: the configuration file /etc/nginx/nginx.conf syntax is ok
nginx: configuration file /etc/nginx/nginx.conf test is successful
Otherwise, you should get a list of errors listed with file names and line numbers of the files containing the errors. Fix them and when you manage to get the test to be successful, reload the service by executing nginx -s reload and make sure the Nginx is started after every boot by executing systemctl enable nginx.service.