Final touches
Adding site rules
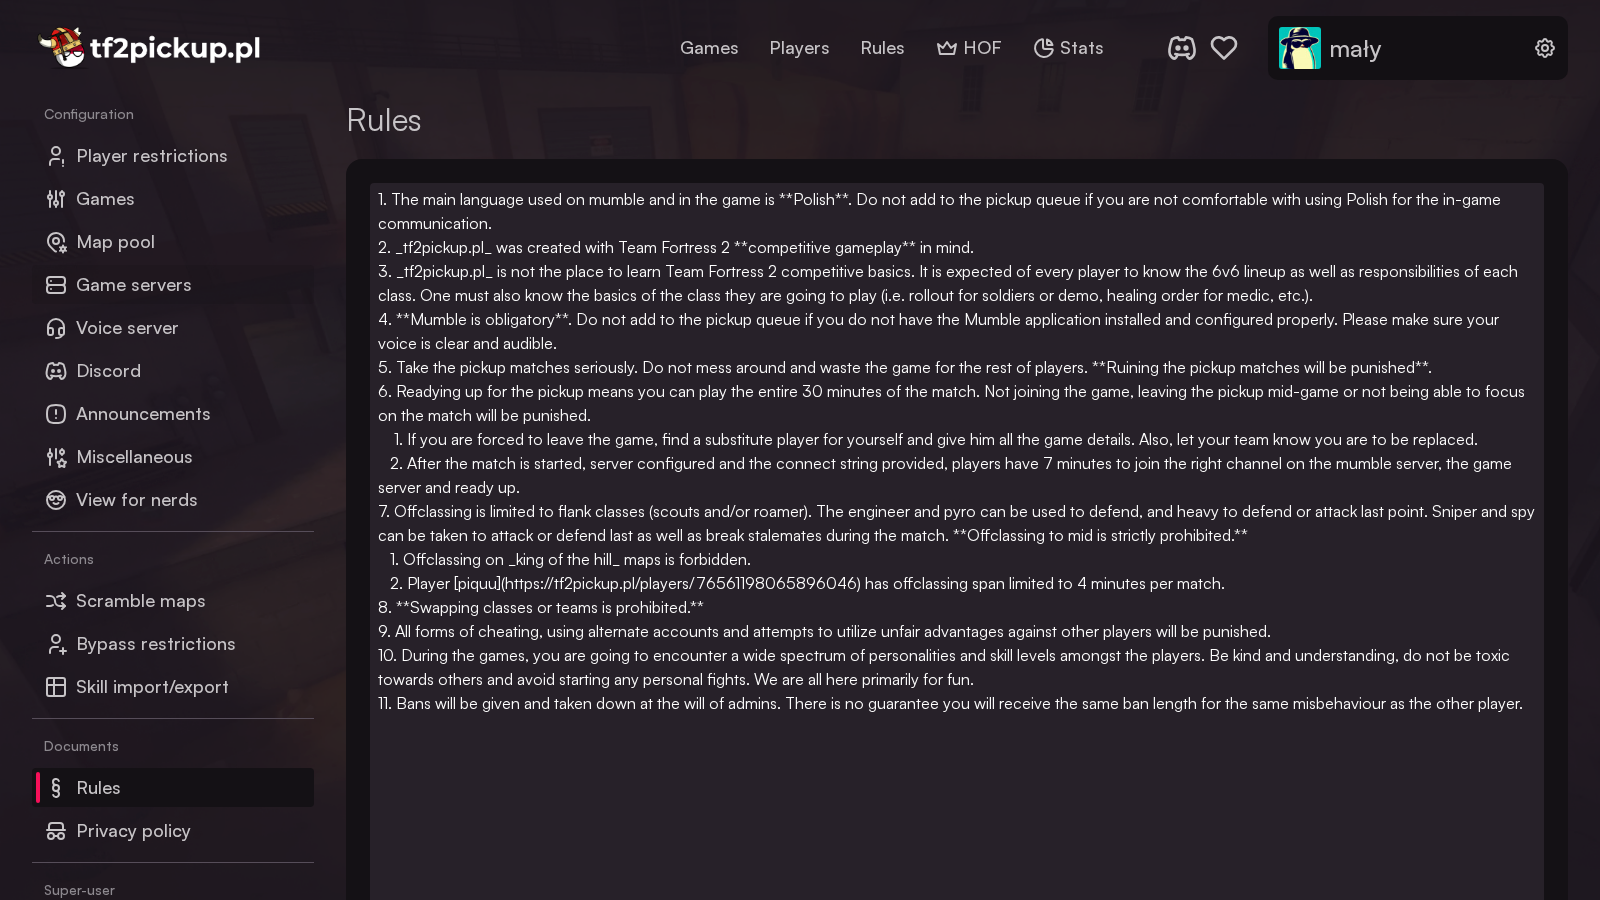
You definitely want to define what things are allowed and what not, and because of that you should define site rules. You can do so through the Admin Panel. All instructions here are written in Markdown (based on Marked.js). Edits should be done on left side of the page, right one shows up a rule page preview.
We discourage you from using inline HTML formatting, since it's buggy.
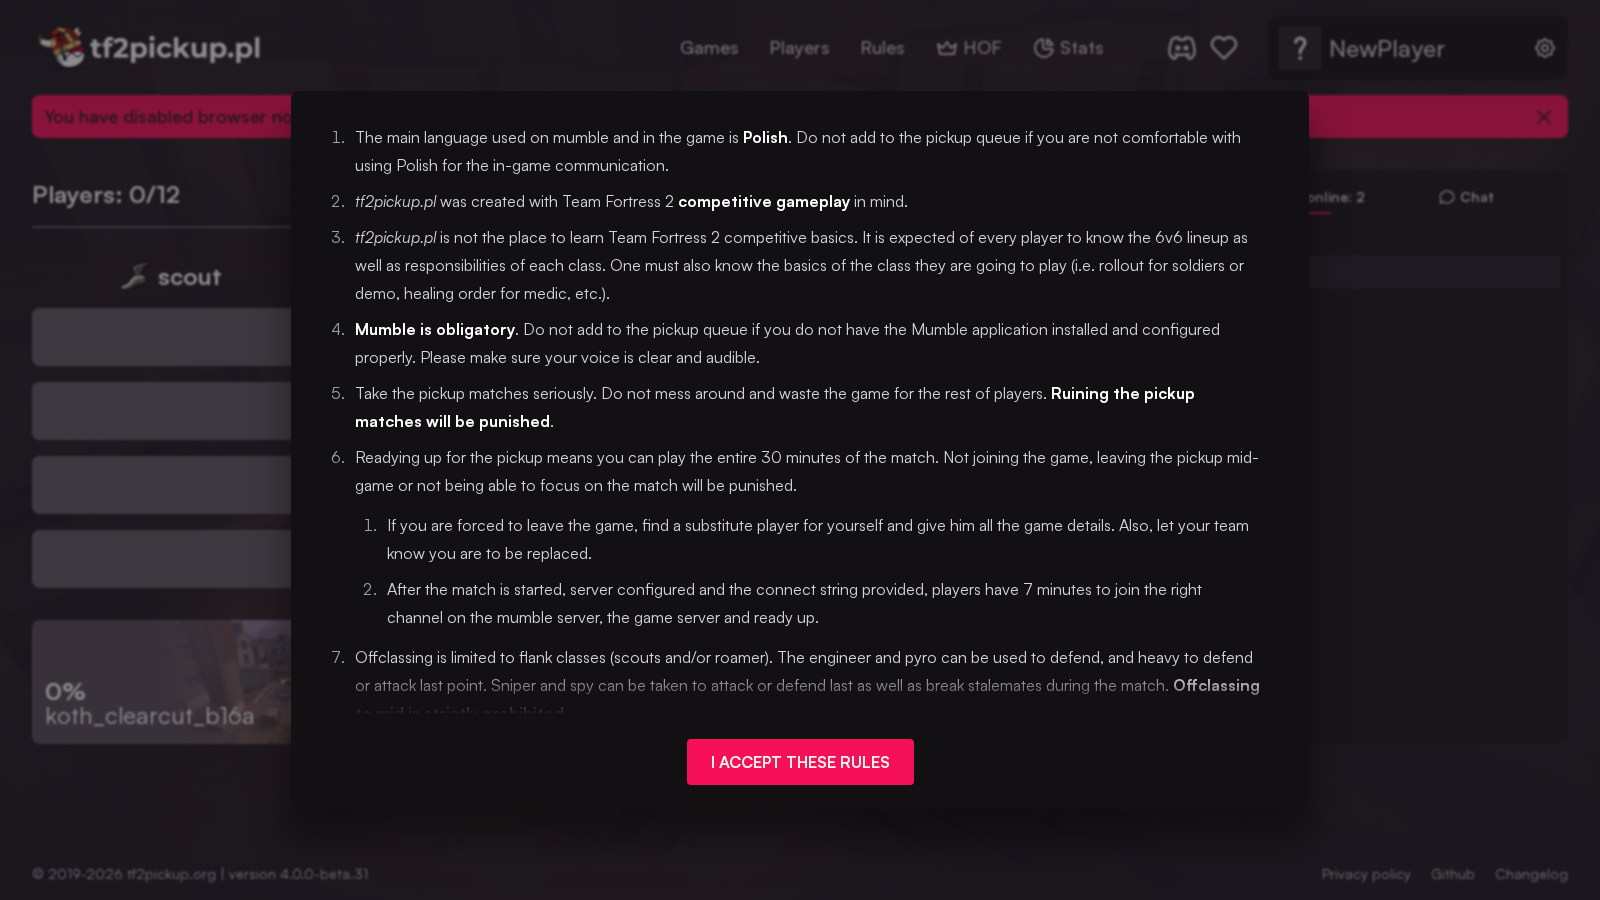
After setting up the rules, they will show up in a popup for every user joining the site for the very first time:
Reviewing the privacy policy
Please take a look at the privacy policy document; it is accessible for the users using a link at the bottom of the webpage and can be edited via the admin panel. The only thing you need to change is the link to your website, as by default it is set to tf2pickup.pl:

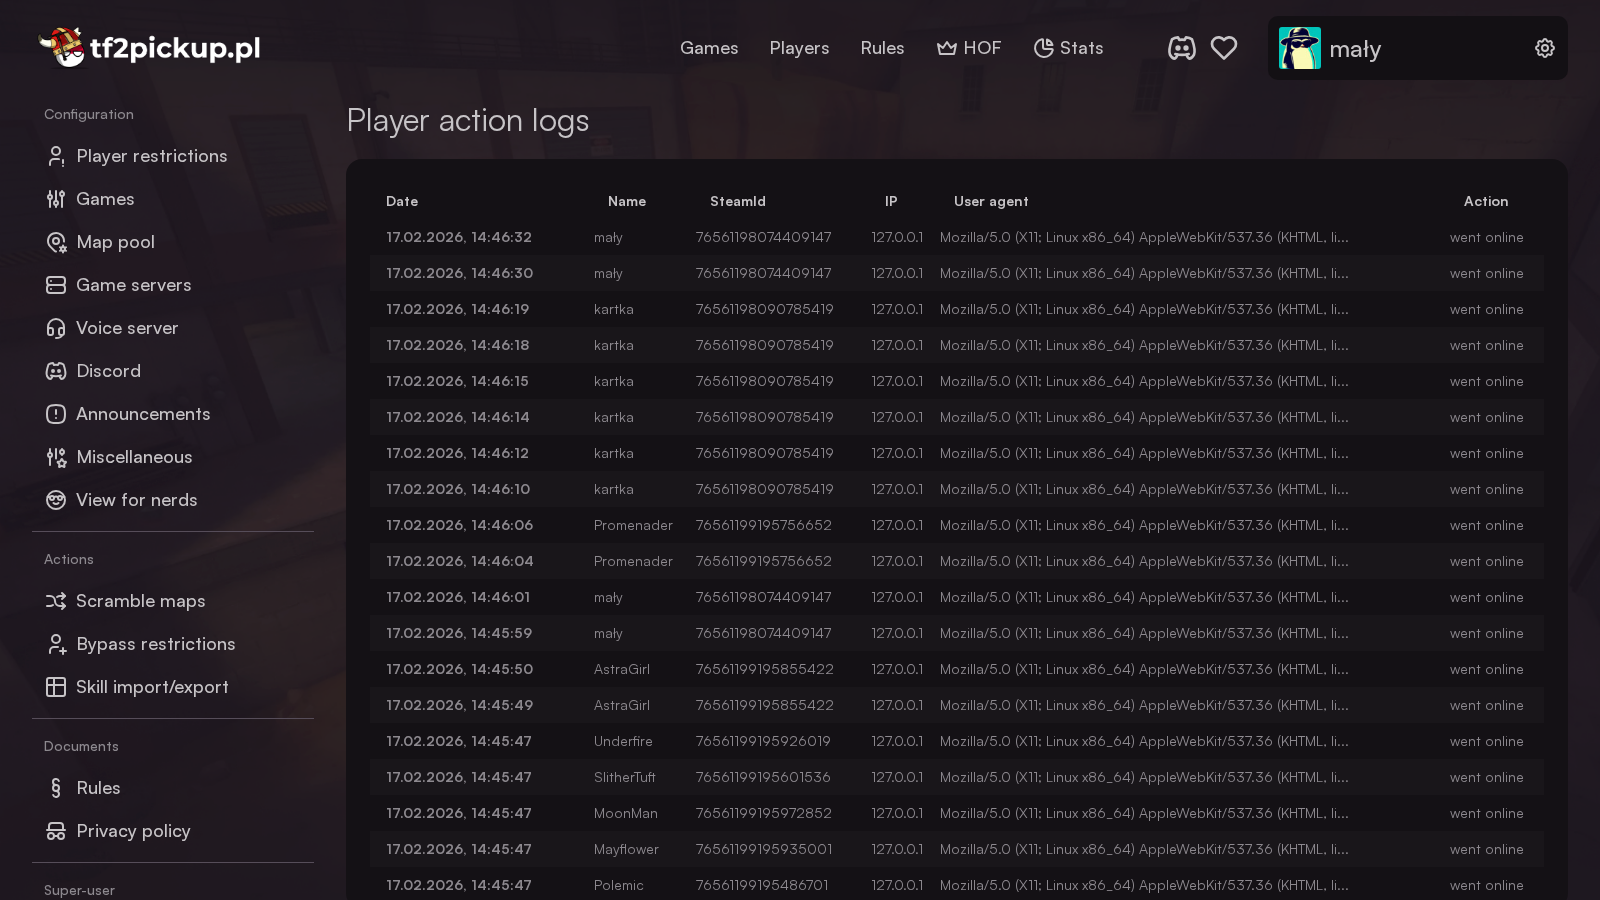
Player action log
This feature is accessible only for accounts with Superuser role set.
The player action log lets you see who accessed the website, when and what the user agent of user's browser was. It is possible to filter results by entering:
- name,
- Steam ID (SteamID64 format),
- IP address,
- User agent,
- Action (connection with the website/game server(s)).
All connections to the website and gameservers are logged.
Adding game servers to the website
Pickup games require game servers on which it can be set up. In order to do that, you have to define the same game server secret for the server (variable GAME_SERVER_SECRET in .env) and for game servers (variable TF2PICKUPORG_SECRET in gameserver_x.env or by defining sm_tf2pickuporg_secret value in game server's server.cfg configuration file). Server being behind a proxy may need an internal address value defined.
The game server setup is being done automatically. After discovering newly setup game servers, they will show up on the server list, which can be accessed through Admin Panel -> Game servers:
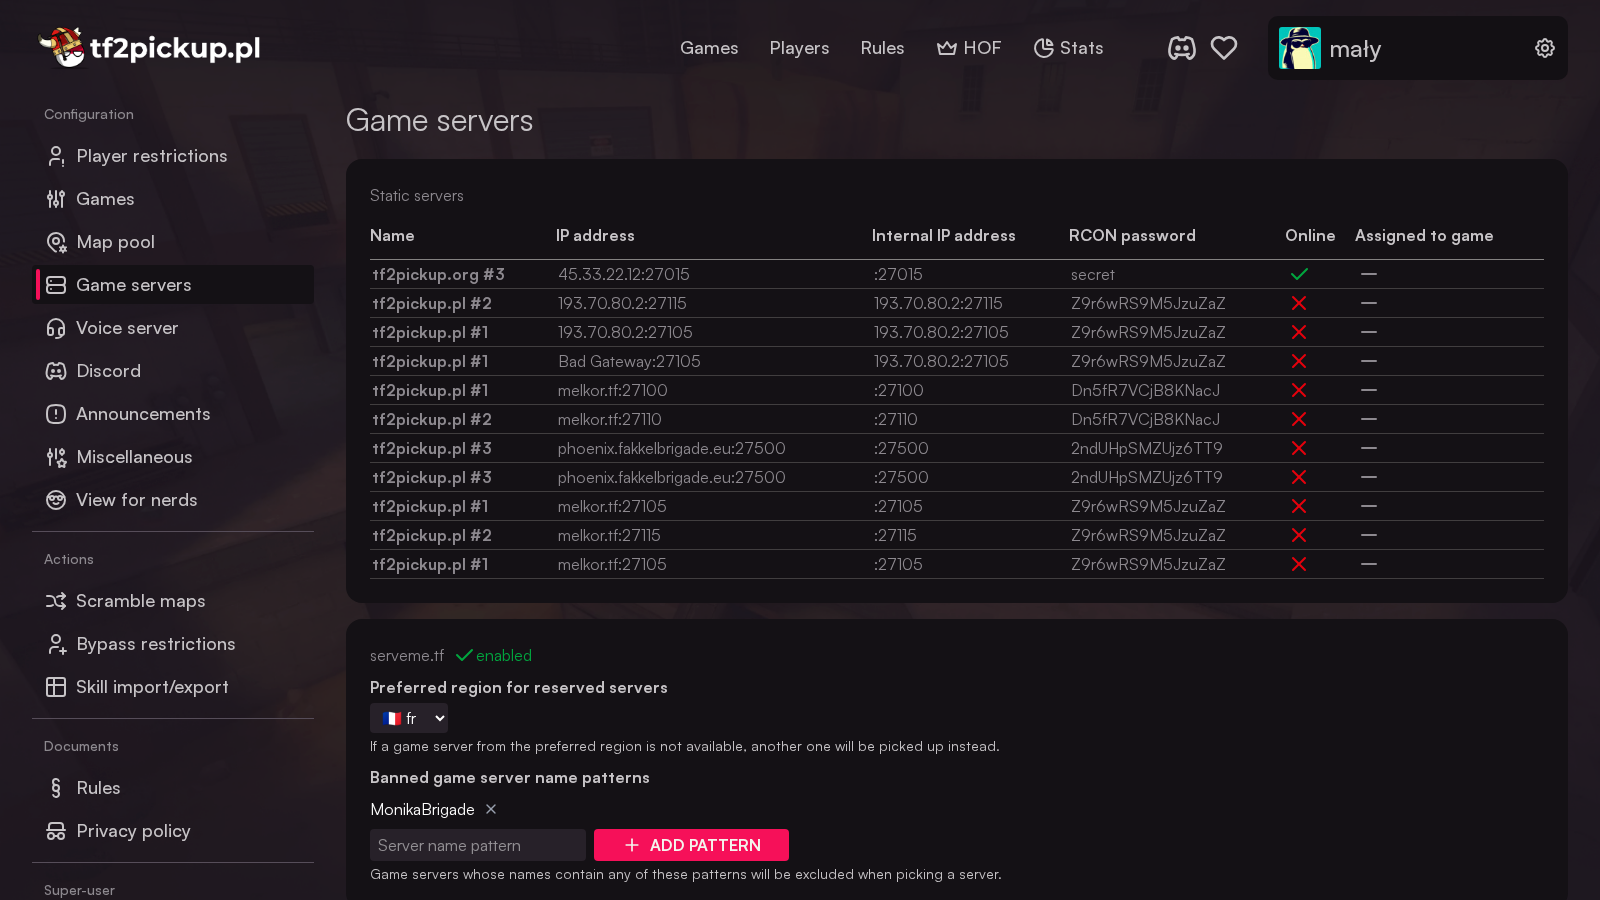
If you have any static servers, they will show up on the list.
serveme.tf integration settings
serveme.tf servers are being used in pickup games only if no static game servers are assigned to the site.
Provided you have a valid serveme.tf API key set in your .env file, serveme.tf integration settings becomes available:
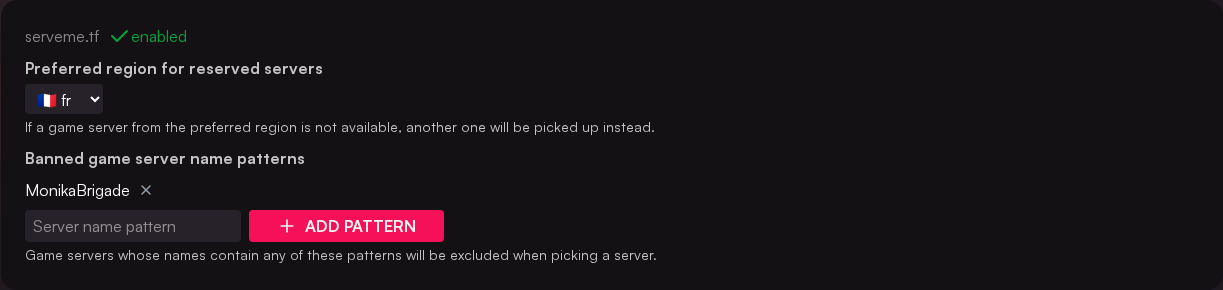
Here you can configure:
- Preferred region — pick the region closest to your players. If a server from the preferred region is not available, another one will be used instead.
- Banned game server name patterns — exclude servers whose names contain any of the listed patterns from being reserved.
tf2-quick-server integration
tf2-quick-server is a cloud-based on-demand game server service. When configured, the pickup site can request a fresh game server from the service whenever a pickup starts, without requiring any locally hosted servers.
To enable tf2-quick-server, add the following variables to your .env file:
# tf2-quick-server integration (optional)
TF2_QUICK_SERVER_CLIENT_ID=your_client_id
TF2_QUICK_SERVER_CLIENT_SECRET=your_client_secret
Contact the tf2-quick-server team to obtain credentials. Once set, the integration status is shown in Admin Panel → Game servers. When reassigning a game server to a game, the server list will include a TF2 Quick Server section. You can either select an existing quick server that is already running, or choose Create new server and pick the region closest to your players.
Available regions: São Paulo, Santiago, Bogotá, Chicago, Frankfurt, Sydney.
tf2-quick-server can be used alongside static servers and serveme.tf. The site uses whichever provider you select when assigning a server to a game.
Hiding server info from spectators
SourceTV runs on the same machine (and therefore the same IP address) as the game server, so the SourceTV connect string shown to non-participants exposes the game server's address. This can be scraped and abused for DDoS attacks. To mitigate this, Admin Panel → Game servers includes a Hide server info from spectators setting with three modes:
- never — show connect info to everyone (the previous behavior).
- auto (default) — hide connect info only for non-serveme.tf servers. serveme.tf has built-in DDoS protection, so reservations there stay visible.
- always — hide connect info for all servers.
When connect info is hidden, non-participants see hidden instead of the SourceTV connect string, and the watch stv button is removed for them.
The following always keep access to the real connect info, regardless of this setting:
- Match participants — always see the real game connect string.
- Admins (even when not playing in the game) — always see the SourceTV connect string and keep the watch stv button, since they are trusted and already have the full rcon connect string in the admin toolbox.
Because SourceTV shares the game server's IP, hiding the address from non-participants necessarily disables public SourceTV spectating for the affected servers while a game is live. There is no way to keep public STV available while still hiding the address.
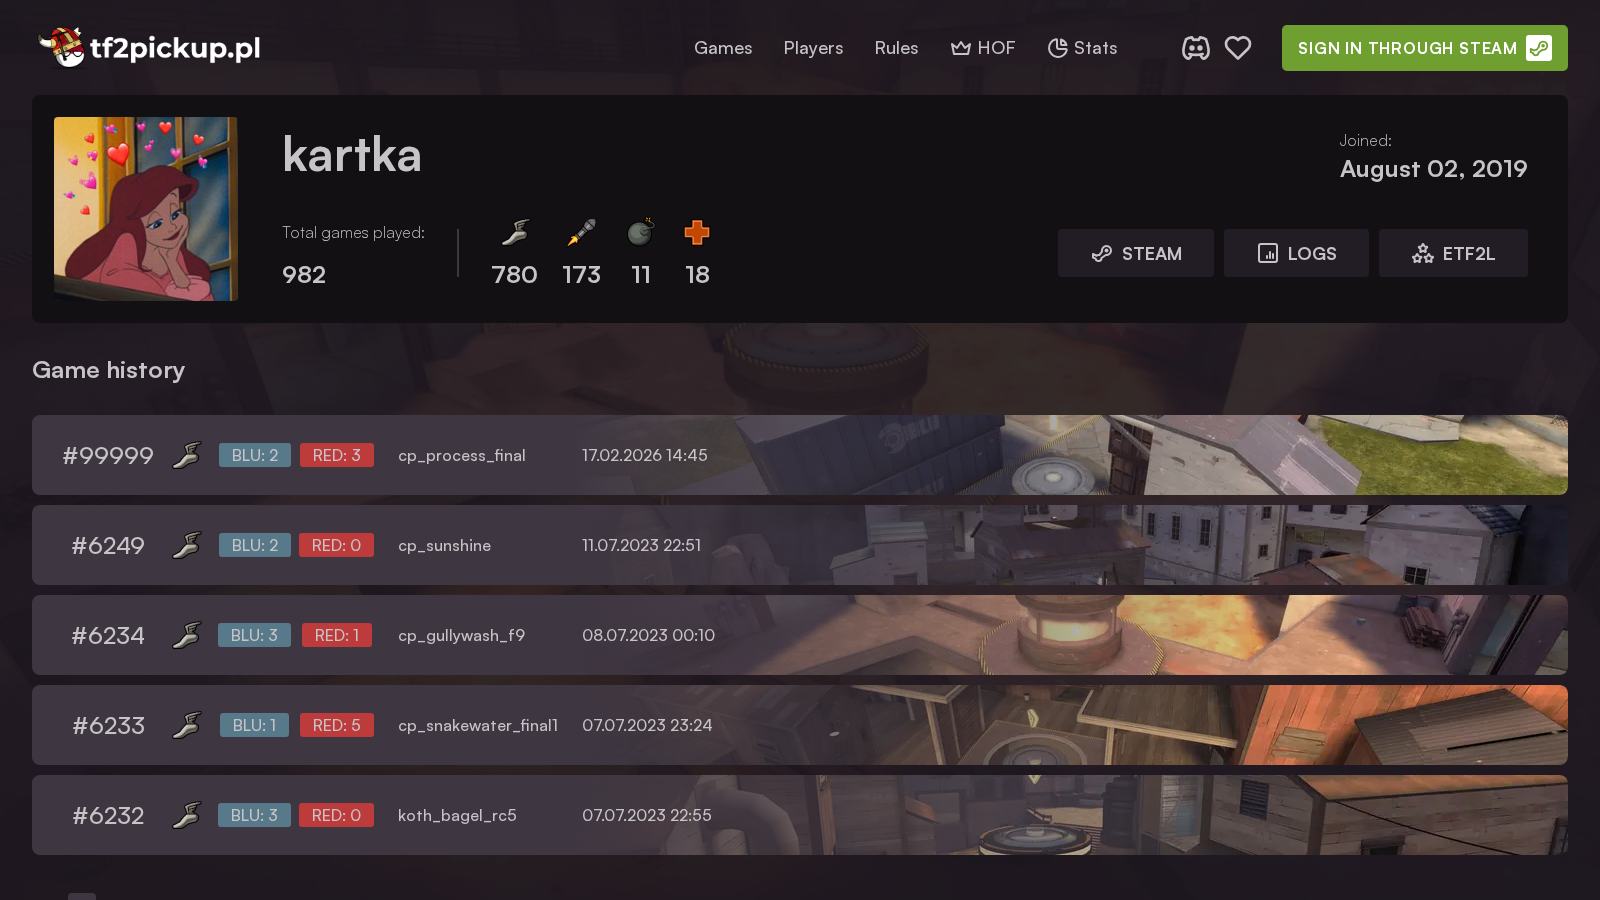
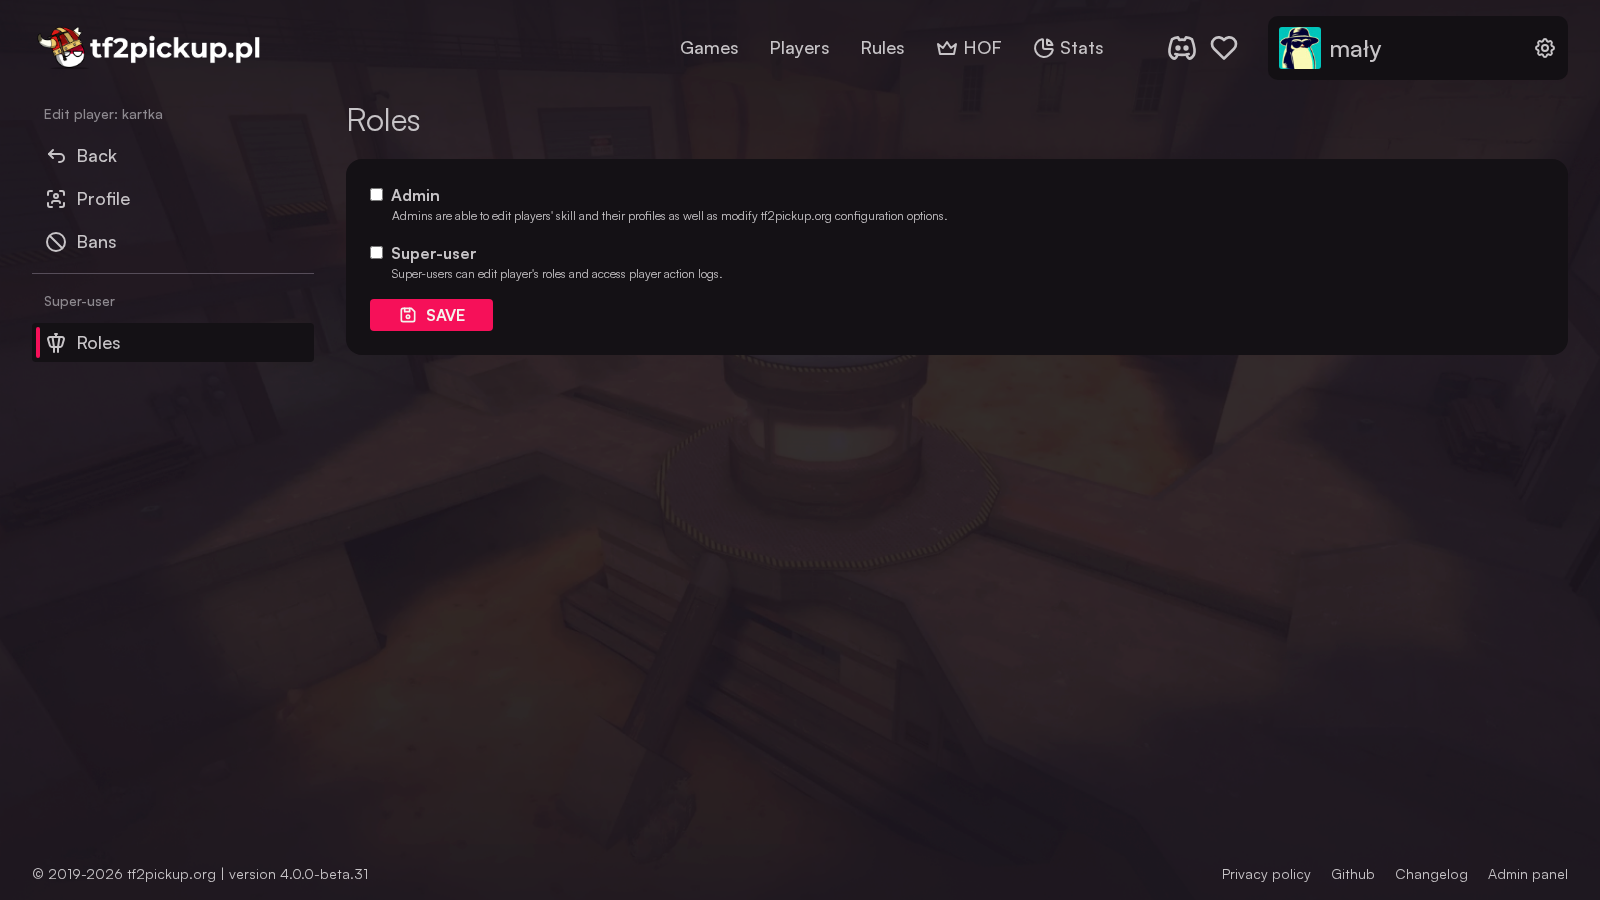
Add admins to the site, set up whitelist, maps and skills
After the site start, you may want to add admins in order to make site moderation easier and faster. To do that, you have to open up the player profile, choose roles button and choose a right role for them:
- no role - default player role, no administrative access,
- admin - lets player set up everything on the website excluding managing game servers and player roles on the site,
- super user - unlimited administrative privileges, the user defined in the
.envconfiguration has this role always assigned in.
For setting a whitelist look there, map pool settings can be seen there, and there you can look at for the skill setup.
Set up voice chat settings
These settings can be set by superusers only. There are three options to set it up:
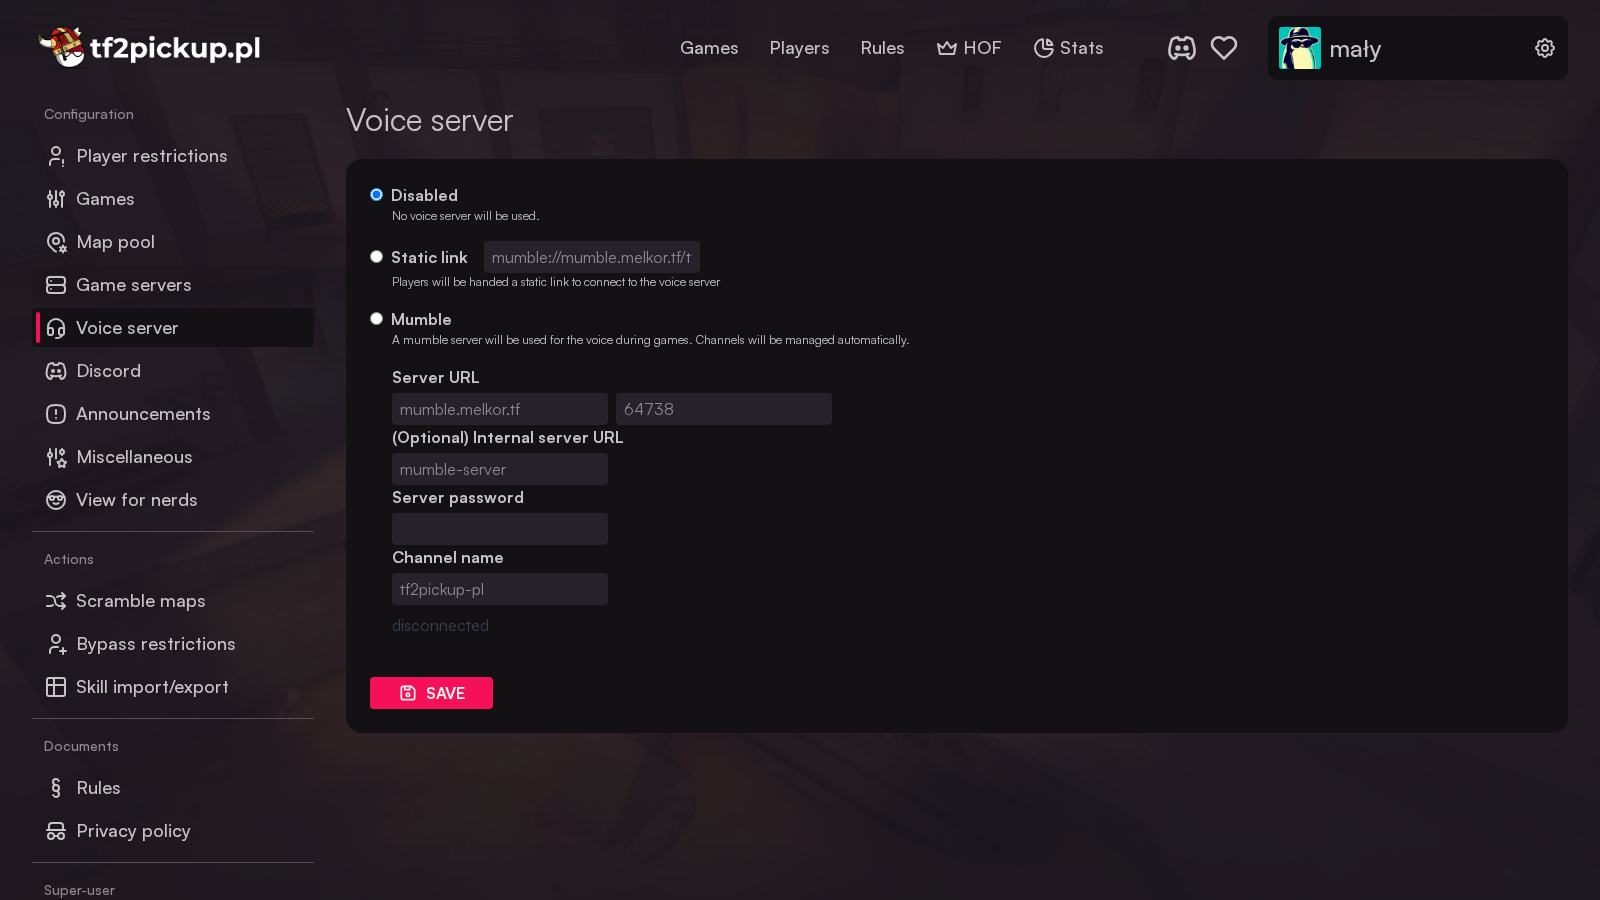
- Disabled - disables voice connect link entirely on the pickup page,
- Static link - the voice chat button redirects to the address defined in the
Static linkfield, - Mumble - allows for defining Mumble server configuration. There are three values to set:
- URL - IP/domain name address of the server
- Port - port used by the Mumble server
- Password (optional) - password needed to log onto the Mumble server
- Channel name - defines the parent channel for the pickups
For more details about Mumble bot setup, check this.
Importing skills
In order to prepare better for the site launch, you can prepare a list of players in CSV (comma separated values) containing players' Steam IDs and skills they are supposed to have. In that case, when they register on the website, they should have skills set already as values defined during the import.
CSV syntax should be as following for each gamemode:
- 9v9 (Highlander)
steamid64,scout,soldier,pyro,demoman,heavy,engineer,medic,sniper,spy
- 6v6
steamid64,scout,soldier,demoman,medic
- Ultiduo
steamid64,soldier,medic
- BBall
steamid64,soldier
An example list for Highlander is:
76561198011558250,1,2,3,4,5,6,7,8,9
76561198074409147,2,4,5,6,5,6,7,6,11
In order to avoid problems, make sure your file is saved as UTF-8 coded text file.
To import skills, open Import player skill settings, put a CSV formatted file into a proper field and click Upload.
Host system updates
Based on the Linux distribution you have (regardless if it's as a normal Linux installation or as a Windows Subsystem for Linux instance) just execute updates in a way suggested by a distribution documentation (here's an example from Ubuntu which is the same for Debian, as Ubuntu is a Debian-based distribution). In case you use Windows 10/Windows Server 2019, you may probably end up with Ubuntu too, so updating the system is being done in the same way, however upgrades between distribution versions is done by installing a new version of the Ubuntu application from Microsoft Store.
Please note that using WSL2 for hosting pickups is not recommended for the production, but it is completely fine for the development.
Pickup site updates
If you set up containers by using our docker-compose.yml sample, there are two ways of updating pickups - manual and automatic.
Manual update
By docker-compose pull
The manual way expects you to download (pull) images for your containers and then restart and replace old container images with the new ones. You can do so by executing command:
docker compose up -d --pull always
Per container upgrade
If your containers are not set up with docker-compose, you will have to pull all container images you use manually and recreate containers with the same port usage, network settings, and volume setup.
For instance, let's say you want to upgrade the tf2pickup-eu-tf2pickup-1 container. That means, in order to upgrade that single container, you will have to execute:
docker pull ghcr.io/tf2pickup-org/tf2pickup:latest
docker rename tf2pickup-eu-tf2pickup-1 tf2pickup-eu-tf2pickup-1_old
docker stop tf2pickup-eu-tf2pickup-1_old
docker run -d -p 3000:3000 -p 9871:9871/udp --name tf2pickup-eu-tf2pickup-1 --restart always --env-file ./.env ghcr.io/tf2pickup-org/tf2pickup:latest
docker rm tf2pickup-eu-tf2pickup-1_old
By one-time watchtower upgrade
You can use this approach both with docker-compose and separate container setup.
If you want to do the same thing in a way easier approach, you can use watchtower in order to do it automatically by executing:
docker run --rm \
    -v /var/run/docker.sock:/var/run/docker.sock \
    containrrr/watchtower \
    --run-once
The example above will update all containers you have on your host! If you want to update specific containers, execute:
docker run --rm \
    -v /var/run/docker.sock:/var/run/docker.sock \
    containrrr/watchtower \
    --run-once \
    tf2pickup-eu-tf2pickup-1 \
    tf2pickup-eu-gameserver1-1 \
    tf2pickup-eu-gameserver2-1 \
    tf2pickup-eu-mongodb-1
There you can see how it looks like in practice (this specific example is based on tf2pickup.cz):
tf2pickup@tf2pickup:~$ docker run --rm \
    -v /var/run/docker.sock:/var/run/docker.sock \
    containrrr/watchtower \
    --run-once
time="2021-06-23T10:48:56Z" level=info msg="Watchtower 1.3.0\nUsing no notifications\nChecking all containers (except explicitly disabled with label)\nRunning a one time update."
time="2021-06-23T10:49:05Z" level=info msg="Found new tf2pickuppl/tf2pickup.cz:latest image (586b0ef05dcd)"
time="2021-06-23T10:53:49Z" level=info msg="Found new tf2pickuppl/tf2-gameserver:latest image (7a86ac6e792a)"
time="2021-06-23T10:54:16Z" level=info msg="Found new mongo:latest image (e12d72fd1857)"
time="2021-06-23T10:54:26Z" level=info msg="Found new portainer/portainer-ce:latest image (45be17a5903a)"
time="2021-06-23T10:54:26Z" level=info msg="Stopping /portainer (087e341f7e51) with SIGTERM"
time="2021-06-23T10:55:00Z" level=info msg="Stopping /mongo (7d2f55013020) with SIGTERM"
time="2021-06-23T10:55:01Z" level=info msg="Stopping /tf2pickup-gameserver (1f7cc1e037ca) with SIGTERM"
time="2021-06-23T10:55:12Z" level=info msg="Stopping /tf2pickup-cz-frontend (8af1b342f0a4) with SIGTERM"
time="2021-06-23T10:55:13Z" level=info msg="Creating /tf2pickup-cz-frontend"
time="2021-06-23T10:55:17Z" level=info msg="Creating /tf2pickup-gameserver"
time="2021-06-23T10:55:17Z" level=info msg="Creating /mongo"
time="2021-06-23T10:55:19Z" level=info msg="Creating /portainer"
tf2pickup@tf2pickup:~$ docker ps -a
CONTAINER ID   IMAGE                               COMMAND                  CREATED          STATUS          PORTS                                            NAMES
dc4d44148848   portainer/portainer-ce:latest       "/portainer"             11 minutes ago   Up 11 minutes   0.0.0.0:8000->8000/tcp, 0.0.0.0:9000->9000/tcp   portainer
58d79c0eae41   mongo:latest                        "docker-entrypoint.s…"   11 minutes ago   Up 11 minutes   0.0.0.0:44999->27017/tcp                         mongo
0ac50282f207   tf2pickuppl/tf2-gameserver:latest   "./entrypoint.sh +sv…"   11 minutes ago   Up 11 minutes                                                    tf2pickup-gameserver
532925f38b93   tf2pickuppl/tf2pickup.cz:latest     "/docker-entrypoint.…"   11 minutes ago   Up 11 minutes   0.0.0.0:5309->80/tcp                             tf2pickup-cz-frontend
8bf4a113b4f9   tf2pickuppl/server:latest           "docker-entrypoint.s…"   2 months ago     Up 7 weeks                                                       tf2pickup-server
a292297b593f   cc6b1ab35b7b                        "./entrypoint.sh +sv…"   3 months ago     Up 2 months                                                      tf2pickup-gameserver-2
tf2pickup@tf2pickup:~$ docker run --rm     -v /var/run/docker.sock:/var/run/docker.sock     containrrr/watchtower     --run-once
time="2021-06-23T11:13:26Z" level=info msg="Watchtower 1.3.0\nUsing no notifications\nChecking all containers (except explicitly disabled with label)\nRunning a one time update."
time="2021-06-23T11:13:35Z" level=info msg="Found new tf2pickuppl/tf2-gameserver:latest image (7a86ac6e792a)"
time="2021-06-23T11:13:35Z" level=info msg="Stopping /tf2pickup-gameserver-2 (a292297b593f) with SIGTERM"
time="2021-06-23T11:13:45Z" level=info msg="Creating /tf2pickup-gameserver-2"
tf2pickup@tf2pickup:~$ docker ps -a
CONTAINER ID   IMAGE                               COMMAND                  CREATED          STATUS          PORTS                                            NAMES
cb236f93943e   tf2pickuppl/tf2-gameserver:latest   "./entrypoint.sh +sv…"   5 seconds ago    Up 4 seconds                                                     tf2pickup-gameserver-2
dc4d44148848   portainer/portainer-ce:latest       "/portainer"             18 minutes ago   Up 18 minutes   0.0.0.0:8000->8000/tcp, 0.0.0.0:9000->9000/tcp   portainer
58d79c0eae41   mongo:latest                        "docker-entrypoint.s…"   18 minutes ago   Up 18 minutes   0.0.0.0:44999->27017/tcp                         mongo
0ac50282f207   tf2pickuppl/tf2-gameserver:latest   "./entrypoint.sh +sv…"   18 minutes ago   Up 18 minutes                                                    tf2pickup-gameserver
532925f38b93   tf2pickuppl/tf2pickup.cz:latest     "/docker-entrypoint.…"   18 minutes ago   Up 18 minutes   0.0.0.0:5309->80/tcp                             tf2pickup-cz-frontend
8bf4a113b4f9   tf2pickuppl/server:latest           "docker-entrypoint.s…"   2 months ago     Up 7 weeks
Automatic update
Alternatively, you can use a Watchtower container which can update all/specific containers automatically with a schedule. All you need to do is to deploy it with proper parameters (the one in example will execute upgrades everyday at 5:00 AM):
docker-compose.yml
version: '3.8'
services:
  watchtower:
    image: containrrr/watchtower:latest
    volumes:
      - /var/run/docker.sock:/var/run/docker.sock
      - /home/supra/.docker/config.json:/config.json
    restart: always
    env_file: .env
.env
WATCHTOWER_CLEANUP=true
WATCHTOWER_INCLUDE_STOPPED=true
WATCHTOWER_INCLUDE_RESTARTING=true
WATCHTOWER_SCHEDULE="0 0 5 * * *"
WATCHTOWER_ROLLING_RESTART=true
TZ="Europe/Warsaw"
# optional arguments when you want to set notifications to a Discord webhook
WATCHTOWER_NOTIFICATIONS_LEVEL="info"
WATCHTOWER_NOTIFICATIONS_HOSTNAME="tf2pickup.eu"
WATCHTOWER_NOTIFICATION_TITLE_TAG="[tf2pickup.eu] "
# format: discord://token@channel
# https://discord.com/api/webhooks/1234567890123456789/XDXDXDXDXDXDXDXDXDXDXDXDXDXDXDXDXDXDXDXDXDXDXDXDXDXDXDXDXDXDXDXDXDXD
# where the channel is 1234567890123456789 and the token is XDXDXDXDXDXDXDXDXDXDXDXDXDXDXDXDXDXDXDXDXDXDXDXDXDXDXDXDXDXDXDXDXDXD
WATCHTOWER_NOTIFICATION_URL="discord://XDXDXDXDXDXDXDXDXDXDXDXDXDXDXDXDXDXDXDXDXDXDXDXDXDXDXDXDXDXDXDXDXDXD@1234567890123456789"
Watchtower will pull images and replace container images automatically. It also deletes old images after being replaced by the new ones, so it will not waste your disk space.
Blocking automatic updates when using watchtower
In some unusual cases you may want to prevent your website from updating. In order to do so, you must change the image tag in docker-compose.yml to a specific version (by default the tag used is latest even if it's undefined). For example:
services:
  tf2pickup:
    depends_on:
      - mongodb
    image: ghcr.io/tf2pickup-org/tf2pickup:latest
    restart: always
    ports:
    - '3000:3000'
    - '9871:9871/udp'
    env_file:
    - ./.env
Can be switched to:
services:
  tf2pickup:
    depends_on:
      - mongodb
    image: ghcr.io/tf2pickup-org/tf2pickup:4.0.0
    restart: always
    ports:
    - '3000:3000'
    - '9871:9871/udp'
    env_file:
    - ./.env
After that, you must restart all containers. You can do this by executing the following commands while being in a tf2pickup-eu folder containing both the .env and docker-compose.yml file:
docker compose up -d
Game server updates
There are two ways how you can update the game servers:
- by restarting the game server container(s),
- by updating the game server container(s) (if the container update is available).
In most cases you'd rather to restart the container. Container has all game server files inside and if a Team Fortress 2 update comes out, the container will try to update game files every time on start. After updating the game files inside the container it will just start normally and its status will become green on server status on the server tab on the pickup site.
In rare cases, you may need to update the container (for instance if a game update is going to crash the container). In this case you have to update it in the same way as you do with the pickup containers.
Backups
The best backup policy would be to:
- make full host backups (especially easy if you own a VPS, since your VPS provider can provide backups (even on automatic basis!), like OVH or Hetzner do), weekly basis are really fine already,
- store configuration files copy somewhere outside the server in case of armageddon,
- execute daily MongoDB backups and copy those on external storage, so if your server dies, you will be able to access those database dumps somehow.
Here's a backup script you can use for the backups:
#!/bin/bash
export PATH=/bin:/usr/bin:/usr/local/bin
TODAY=`date +"%d%b%Y"`
################################################################
################## Update below values  ########################

export LC_ALL=C
DB_BACKUP_PATH='/home/tf2pickup/tf2pickup-eu/backup' ## Make sure you create this folder before script execution
MONGODB_CONTAINER_NAME='tf2pickup-eu_mongodb_1' # MongoDB container name in the tf2pickup stack
MONGODB_DATABASE='tf2pickup' # MongoDB database name passed in the .env file
MONGODB_USERNAME='tf2pickup' # MongoDB username passed in the .env file
MONGODB_PASSWORD='yoursuperfunnypassword' # MongoDB password passed in the .env file
BACKUP_RETAIN_DAYS=7   ## Number of days to keep local backup copy

#################################################################

mkdir -p ${DB_BACKUP_PATH}/${TODAY}

/usr/bin/docker exec -i ${MONGODB_CONTAINER_NAME} /bin/bash -c "mongodump \
        --quiet \
        --archive \
        -u ${MONGODB_USERNAME} \
        -p ${MONGODB_PASSWORD} \
        --authenticationDatabase ${MONGODB_DATABASE} \
        --db ${MONGODB_DATABASE} \
        --gzip" > ${DB_BACKUP_PATH}/${TODAY}/tf2pickup-${TODAY}.dump.gz

if [ $? -eq 0 ]; then
  echo "tf2pickup Database backup successfully completed"
else
  echo "Error found during tf2pickup backup"
  exit 1
fi

##### Remove backups older than {BACKUP_RETAIN_DAYS} days  #####
find ${DB_BACKUP_PATH} -daystart -mtime +${BACKUP_RETAIN_DAYS} -delete
These backups are done by a tf2pickup user, the same on which the config files and the backup folder is owned by. Make sure the tf2pickup is in the docker group, so it could execute commands against docker. Don't forget to add execution permission for the script by using chmod o+x pickup-backup.sh assuming pickup-backup.sh is a script filename. Then, you can also add a cronjob for the tf2pickup user by executing crontab -e as this user and adding a line with absolute path to the script:
0 3 * * * bash /home/tf2pickup/tf2pickup.eu/pickup-backup.sh
This will let the script execute everyday at 3:00 AM as the user tf2pickup.
Lastly, you have to replicate those backups on external storage. You can do it manually or automatize it. It is really up to you how are you going to deal with it. You can order some FTP storage for the replication and just sync backup/ folder contents with it, you can use NFS shares to do so, you can download files through SSH from your local machine - there are many ways and you are the one who is going to choose it.
If you have a local Linux host and you are able to set up a cronjob, you can use this command as the command syncing files from remote folder to your local one (assuming location /home/mylocaluser/tf2pickup-backups exist):
rsync -a -e "ssh -p 22" "tf2pickup@tf2pickup.eu:/home/tf2pickup/tf2pickup-eu/backup/" "/home/mylocaluser/tf2pickup-backups" --info=progress2
This is probably the easiest way to replicate backups and it's called rsync over SSH.
Restore
In order to restore backups, you have to choose the dump you would like to restore. Let's assume the filename of the backup archive is tf2pickup-2023-05-01.dump.gz. In that case you need to execute:
docker exec tf2pickup-eu_mongodb_1 '/bin/bash' -c \
    "mongorestore \
    -u tf2pickup \
    -p yoursuperfunnypassword \
    --authenticationDatabase tf2pickup \
    --db tf2pickup \
    --archive  --gzip --drop" < tf2pickup-2023-05-01.dump.gz
Firewall settings
In general you should let connection pass through for:
- tf2pickup application:
- from/to the container to the host, so reverse proxy can let access it,
- from/to the container to the outside, in this case it's port UDP 9871 and it's used for retrieving logs from the game servers,
- mumble:
- from/to the container/service to the outside, both UDP/TCP,
- local services:
- SSH port from/to the service to the outside,
- HTTP(S) ports from/to the service to the outside,
- game servers:
- all game server ports from/to the container to the outside.
You can find an example configuration for IPtables (IPv4/IPv6) of the host below:
IPv4:
Chain INPUT (policy DROP)
target     prot opt source               destination
ACCEPT     all  --  anywhere             anywhere
ACCEPT     icmp --  anywhere             anywhere
ACCEPT     all  --  anywhere             anywhere             state RELATED,ESTABLISHED
ACCEPT     tcp  --  anywhere             anywhere             multiport dports https,http state NEW,ESTABLISHED
ACCEPT     tcp  --  anywhere             anywhere             tcp dpt:22 state NEW,ESTABLISHED
ACCEPT     udp  --  anywhere             anywhere             multiport dports 27014:27130
ACCEPT     tcp  --  anywhere             anywhere             multiport dports 27014:27130
ACCEPT     udp  --  anywhere             anywhere             udp dpt:9871
ACCEPT     udp  --  anywhere             anywhere             udp dpt:64738
ACCEPT     udp  --  anywhere             anywhere             udp spt:64738
ACCEPT     tcp  --  anywhere             anywhere             tcp dpt:64738
ACCEPT     tcp  --  anywhere             anywhere             tcp spt:64738

Chain FORWARD (policy DROP)
target     prot opt source               destination
DOCKER-USER  all  --  anywhere             anywhere
DOCKER-ISOLATION-STAGE-1  all  --  anywhere             anywhere
ACCEPT     all  --  anywhere             anywhere             ctstate RELATED,ESTABLISHED
DOCKER     all  --  anywhere             anywhere
ACCEPT     all  --  anywhere             anywhere
ACCEPT     all  --  anywhere             anywhere
ACCEPT     all  --  anywhere             anywhere             ctstate RELATED,ESTABLISHED
DOCKER     all  --  anywhere             anywhere
ACCEPT     all  --  anywhere             anywhere
ACCEPT     all  --  anywhere             anywhere

Chain OUTPUT (policy ACCEPT)
target     prot opt source               destination

Chain DOCKER (2 references)
target     prot opt source               destination
ACCEPT     tcp  --  anywhere             172.17.0.2           tcp dpt:9000
ACCEPT     tcp  --  anywhere             172.17.0.2           tcp dpt:8000
ACCEPT     tcp  --  anywhere             172.16.238.3         tcp dpt:http
ACCEPT     tcp  --  anywhere             172.16.238.2         tcp dpt:27017

Chain DOCKER-ISOLATION-STAGE-1 (1 references)
target     prot opt source               destination
DOCKER-ISOLATION-STAGE-2  all  --  anywhere             anywhere
DOCKER-ISOLATION-STAGE-2  all  --  anywhere             anywhere
RETURN     all  --  anywhere             anywhere

Chain DOCKER-ISOLATION-STAGE-2 (2 references)
target     prot opt source               destination
DROP       all  --  anywhere             anywhere
DROP       all  --  anywhere             anywhere
RETURN     all  --  anywhere             anywhere

Chain DOCKER-USER (1 references)
target     prot opt source               destination
RETURN     all  --  anywhere             anywhere
IPv6:
Chain INPUT (policy DROP)
target     prot opt source               destination
ACCEPT     all  --  anywhere             anywhere
ACCEPT     icmp --  anywhere             anywhere
ACCEPT     all  --  anywhere             anywhere             state RELATED,ESTABLISHED
ACCEPT     tcp  --  anywhere             anywhere             multiport dports https,http state NEW,ESTABLISHED
ACCEPT     tcp  --  anywhere             anywhere             tcp dpt:22 state NEW,ESTABLISHED
ACCEPT     udp  --  anywhere             anywhere             multiport dports 27014:27130
ACCEPT     tcp  --  anywhere             anywhere             multiport dports 27014:27130
ACCEPT     udp  --  anywhere             anywhere             udp dpt:9871
ACCEPT     udp  --  anywhere             anywhere             udp dpt:64738
ACCEPT     udp  --  anywhere             anywhere             udp spt:64738
ACCEPT     tcp  --  anywhere             anywhere             tcp dpt:64738
ACCEPT     tcp  --  anywhere             anywhere             tcp spt:64738

Chain FORWARD (policy DROP)
target     prot opt source               destination
DOCKER-USER  all  --  anywhere             anywhere
DOCKER-ISOLATION-STAGE-1  all  --  anywhere             anywhere
ACCEPT     all  --  anywhere             anywhere             ctstate RELATED,ESTABLISHED
DOCKER     all  --  anywhere             anywhere
ACCEPT     all  --  anywhere             anywhere
ACCEPT     all  --  anywhere             anywhere
ACCEPT     all  --  anywhere             anywhere             ctstate RELATED,ESTABLISHED
DOCKER     all  --  anywhere             anywhere
ACCEPT     all  --  anywhere             anywhere
ACCEPT     all  --  anywhere             anywhere

Chain OUTPUT (policy ACCEPT)
target     prot opt source               destination

Chain DOCKER (2 references)
target     prot opt source               destination
ACCEPT     tcp  --  anywhere             172.17.0.2           tcp dpt:9000
ACCEPT     tcp  --  anywhere             172.17.0.2           tcp dpt:8000
ACCEPT     tcp  --  anywhere             172.16.238.3         tcp dpt:http
ACCEPT     tcp  --  anywhere             172.16.238.2         tcp dpt:27017

Chain DOCKER-ISOLATION-STAGE-1 (1 references)
target     prot opt source               destination
DOCKER-ISOLATION-STAGE-2  all  --  anywhere             anywhere
DOCKER-ISOLATION-STAGE-2  all  --  anywhere             anywhere
RETURN     all  --  anywhere             anywhere

Chain DOCKER-ISOLATION-STAGE-2 (2 references)
target     prot opt source               destination
DROP       all  --  anywhere             anywhere
DROP       all  --  anywhere             anywhere
RETURN     all  --  anywhere             anywhere

Chain DOCKER-USER (1 references)
target     prot opt source               destination
RETURN     all  --  anywhere             anywhere
root@tf2pickup:~# ip6tables -L
Chain INPUT (policy ACCEPT)
target     prot opt source               destination

Chain FORWARD (policy ACCEPT)
target     prot opt source               destination

Chain OUTPUT (policy ACCEPT)
target     prot opt source               destination
Securing SSH access to the host
Since most of the setups are based on Linux installations, their hosts can be controlled through the SSH. There are a few things which you should do in order to make access to the server shell more secure:
- use public key authentication only,
- do not allow logging in by root in any case (you can jump to the root account after logging into a standard one),
- use the latest version of your SSH server (whilst the most popular one is the OpenSSH) alongside with OpenSSL,
- use custom SSH port in order to not get scanned by the botnets very often,
- use Fail2Ban for blocking potential attackers,
- use port knocking in order to limit access to your SSH port per IP address or even setup OpenVPN or Wireguard server and let admin(s) connect to the SSH through the VPN connection only,
- use recommended and secure SSH server settings, such as proposed by the Mozilla Observatory.
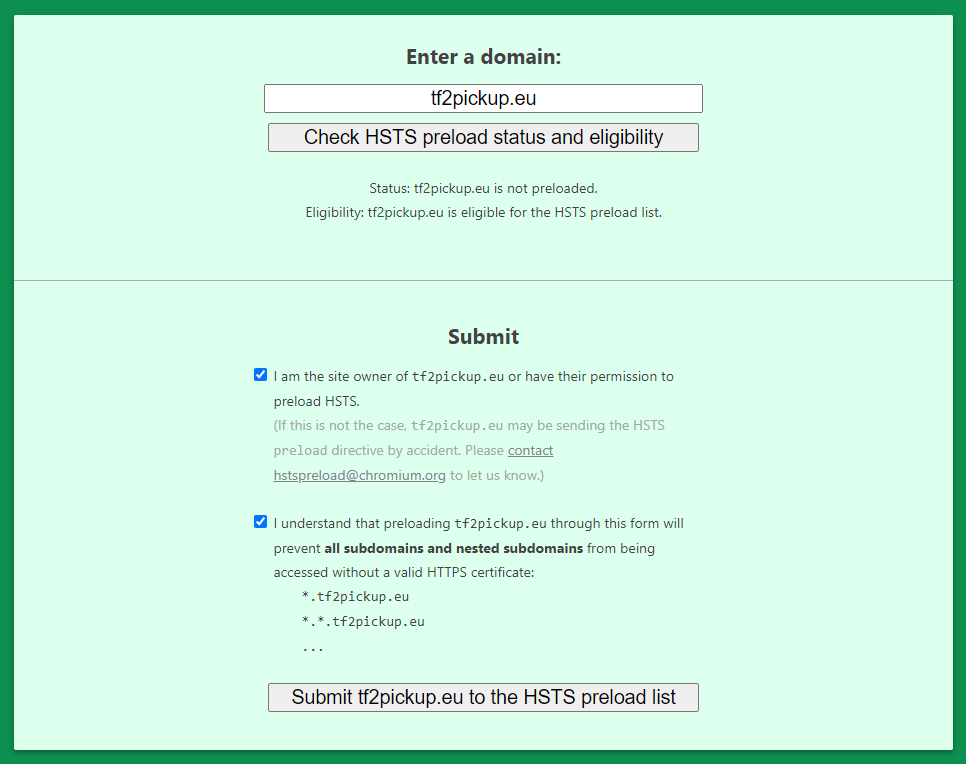
HSTS Preload
In order to get the highest score in the site configuration tests, HSTS Preload should be configured for the domain. The Nginx configuration files meet the requirements for it and most of the browsers add the domains to their preload list automatically, but this is not the case for Chromium-based browsers, such as Google Chrome. For them, you are supposed to register the site. The process is straightforward - you just have to enter the domain name, check boxes approving your domain ownership and accepting the service terms. After doing so, the website will check if your domain is eligible for the submission on the list and if yes, your domain will be added in a matter of a few days.