Site components deployment
In order to allow for a quick site setup, we make use of Docker containers. That lets us set up the website with its database, gameservers and optionally a Mumble server. In order to start looking into deploying your own tf2pickup.org instance, you have to have all files specified below. Examples are based on tf2pickup.eu website, domain and their Discord server.
Prerequisites
- have everything mentioned in the reverse proxy deployment set up,
- have modern Docker and docker-compose version installed in your system, for docker-compose use this guide and for Docker feel free to use guides for:
- prepare the following files in a separate folder, name it
tf2pickup-eu, then place inside:.env- stores variables needed for setting the application, database and mumble containers updocker-compose.yml- contains all container settingsgameserver_1.env- stores settings for the first game server (optional)gameserver_2.env- stores settings for the second game server (optional)gameserver_3.env- stores settings for the third game server (optional)maps/folder - it should contain all maps available for the game servers,.bspextension (optional),sourcetv1,sourcetv2,sourcetv3folders - they will contain SourceTV demos from the pickup game servers (optional),welcome_text.txt- stores Message of the Day shown after joining Pickup Mumble server.
Files gameserver_{1,2,3}.env are useful if you want to host game servers on the same host as the website. There is no gameserver_3.env example, but in fact the file syntax is the same, so you can basically edit values and just uncomment the part of the configuration in the docker-compose.yml file. In the same way, if you want to host 1 game server, just comment parts of the second game server and if you want to run game servers separately, just comment all parts of it in the aforementioned file.
The same rule goes for the Mumble server - if you want to run it outside Docker, aka use a local system installation, just don't provide needed configs for it and comment the part of the docker-compose.yml file for it.
root@tf2pickup:~# ls /home/tf2pickup/tf2pickup-eu/maps/ -al
total 1259216
drwxr-xr-x 2 tf2pickup tf2pickup      4096 Jun  8 22:35 .
drwxrwxr-x 4 tf2pickup tf2pickup      4096 Jun  9 21:09 ..
-rw-r--r-- 1 tf2pickup tf2pickup  25981141 Nov 16  2017 cp_badlands.bsp
-rw-r--r-- 1 tf2pickup tf2pickup  48651296 Mar 16  2017 cp_granary_pro_rc8.bsp
-rw-r--r-- 1 tf2pickup tf2pickup  18710602 Mar 16  2017 cp_granary_pro_rc8.bsp.bz2
-rw-r--r-- 1 tf2pickup tf2pickup  38912080 Feb  4 12:51 cp_gullywash_f3.bsp
-rw-r--r-- 1 tf2pickup tf2pickup  17992573 Feb  4 12:51 cp_gullywash_f3.bsp.bz2
-rw-r--r-- 1 tf2pickup tf2pickup  24500234 Jan 11  2019 cp_gullywash_final1.bsp
-rw-r--r-- 1 tf2pickup tf2pickup  24061268 Jan 11  2019 cp_gullywash_final1.bsp.bz2
-rw-r--r-- 1 tf2pickup tf2pickup  28731812 May 22  2020 cp_logjam_rc12f.bsp
-rw-r--r-- 1 tf2pickup tf2pickup  12693814 May 22  2020 cp_logjam_rc12f.bsp.bz2
-rw-r--r-- 1 tf2pickup tf2pickup  29100584 Jan 14  2019 cp_logjam_rc9.bsp
-rw-r--r-- 1 tf2pickup tf2pickup  12987328 Jan 14  2019 cp_logjam_rc9.bsp.bz2
-rw-r--r-- 1 tf2pickup tf2pickup  18970621 Dec  8  2019 cp_metalworks.bsp
-rw-r--r-- 1 tf2pickup tf2pickup  18687571 Dec  8  2019 cp_metalworks.bsp.bz2
-rw-r--r-- 1 tf2pickup tf2pickup  18312502 Nov 29  2020 cp_process_f7.bsp
-rw-r--r-- 1 tf2pickup tf2pickup  18024376 Nov 29  2020 cp_process_f7.bsp.bz2
-rw-r--r-- 1 tf2pickup tf2pickup  49282532 Apr 15  2017 cp_process_final.bsp
-rw-r--r-- 1 tf2pickup tf2pickup  21364357 Apr 15  2017 cp_process_final.bsp.bz2
-rw-r--r-- 1 tf2pickup tf2pickup  77921396 Jul 22  2018 cp_prolands_b6.bsp
-rw-r--r-- 1 tf2pickup tf2pickup  23282904 Jul 22  2018 cp_prolands_b6.bsp.bz2
-rw-r--r-- 1 tf2pickup tf2pickup  72041100 Jan  3  2019 cp_prolands_rc2p.bsp
-rw-r--r-- 1 tf2pickup tf2pickup  31122834 Jan  3  2019 cp_prolands_rc2p.bsp.bz2
-rw-r--r-- 1 tf2pickup tf2pickup  32477488 Apr 25  2020 cp_reckoner_rc6.bsp
-rw-r--r-- 1 tf2pickup tf2pickup  32243941 Apr 25  2020 cp_reckoner_rc6.bsp.bz2
-rw-r--r-- 1 tf2pickup tf2pickup  20378888 Jan 31  2019 cp_snakewater_final1.bsp
-rw-r--r-- 1 tf2pickup tf2pickup  20126408 Jan 31  2019 cp_snakewater_final1.bsp.bz2
-rw-r--r-- 1 tf2pickup tf2pickup  30319857 Dec  8  2019 cp_sunshine.bsp
-rw-r--r-- 1 tf2pickup tf2pickup  29938052 Dec  8  2019 cp_sunshine.bsp.bz2
-rw-r--r-- 1 tf2pickup tf2pickup  19277592 Feb  7 17:44 koth_clearcut_b15d.bsp
-rw-r--r-- 1 tf2pickup tf2pickup   9010068 Feb  7 17:44 koth_clearcut_b15d.bsp.bz2
-rw-r--r-- 1 tf2pickup tf2pickup  17218901 May 11  2019 koth_product_rcx.bsp
-rw-r--r-- 1 tf2pickup tf2pickup  17056131 May 11  2019 koth_product_rcx.bsp.bz2
Then, these are the templates for the aforementioned files:
.env
# Timezone of the server
# https://en.wikipedia.org/wiki/List_of_tz_database_time_zones
TZ=Europe/Warsaw

NODE_ENV=production

# Logging level
# Possible values: fatal, error, warn, info, debug, trace
LOG_LEVEL=info

# An URL to where this instance will be accessed
WEBSITE_URL=https://tf2pickup.eu

# The name of the website
WEBSITE_NAME=tf2pickup.eu

# MongoDB connect string
MONGODB_URI=mongodb://tf2pickup:yoursuperfunnypassword@mongo/tf2pickup

# logs.tf API key
# Obtain yours here: https://logs.tf/uploader
LOGS_TF_API_KEY=your_logs_tf_api_key

# Used to authenticate and add servers to the serverlist.
GAME_SERVER_SECRET=yoursuperfunnygameserversecret

# Steam API key
# Get your key at https://steamcommunity.com/dev/apikey
STEAM_API_KEY=1234567890ABCDEF1234567890ABCDEF

# A passphrase that is used to encrypt private keys that sign JWT tokens.
# NOTE: For production, get a random password (i.e. from https://passwordsgenerator.net/)
# and do not change it afterwards.
KEY_STORE_PASSPHRASE=XDXDXDXDXDXDXDXDXD

# SteamID of the super-user
# NOTE: Use the SteamID64 format.
SUPER_USER=76561198011558250

# Which gamemode to run; possible values: 6v6, 9v9, bball, ultiduo
QUEUE_CONFIG=6v6

# Log relay
# The log relay uses one UDP port to receive logs from the TF2 game servers. These are used
# to determine when the match starts, ends, when users connect, etc.
# It should be the public address of the server, including the port.
LOG_RELAY_ADDRESS=tf2pickup.eu:3000
LOG_RELAY_PORT=9871

# Discord (optional)
# You will find a bot token at https://discord.com/developers/applications
DISCORD_BOT_TOKEN=XDXDXDXDXDXDXDXDXDXDXDXDXDXDXDXDXDXDXDXDXDXDXDXDXDXDXDXDXDX

# twitch.tv integration (optional)
# https://dev.twitch.tv/console, while setting up a new app,
# use OAuth Redirect URL: https://tf2pickup.eu/twitch/auth/return
TWITCH_CLIENT_ID=XDXDXDXDXDXDXDXDXDXDXDXDXDXDXD
TWITCH_CLIENT_SECRET=XDXDXDXDXDXDXDXDXDXDXDXDXDXDXD

# serveme.tf integration (optional)
# valid endpoints are:
# serveme.tf
# na.serveme.tf
# sea.serveme.tf
SERVEME_TF_API_ENDPOINT=serveme.tf
# Grab your serveme.tf key here: https://serveme.tf/settings
SERVEME_TF_API_KEY=your_serveme_tf_api_key

# tf2-quick-server integration (optional)
# Contact the tf2-quick-server team to obtain credentials.
# TF2_QUICK_SERVER_CLIENT_ID=your_client_id
# TF2_QUICK_SERVER_CLIENT_SECRET=your_client_secret

# atlas integration (optional)
# Registers this instance on the atlas dashboard (https://atlas.tf2pickup.org).
# Heartbeats are sent only when ATLAS_SECRET is set.
# ATLAS_URL=https://atlas.tf2pickup.org
# ATLAS_SECRET=your_atlas_secret

### Mumble Server Configuration
# SuperUser account password
MUMBLE_SUPERUSER_PASSWORD=XDXDXDXDXDXDXDXDXDXDXDXDXDXDXDXDXDXDXDXDXDXDXDXDXD
# Regular expression used to validate user names.
# (Note that you have to escape backslashes with \ )
MUMBLE_CONFIG_USERNAME=[-=\\w\\[\\]\\{\\}\\(\\)\\@\\|\\.]+
# Regular expression used to validate channel names.
# (Note that you have to escape backslashes with \ )
MUMBLE_CONFIG_CHANNELNAME=[ \\-=\\w\\#\\[\\]\\{\\}\\(\\)\\@\\|]+
# This setting is the DNS hostname where your server can be reached.
# It only needs to be set if you want your server to be addressed in the server list by its hostname instead of by IP,
# but if it's set it must resolve on the internet or registration will fail.
MUMBLE_CONFIG_REGISTER_HOSTNAME=tf2pickup.eu
# Specifies the "name" of your server in the public server list and specifies the name of the root channel.
MUMBLE_CONFIG_REGISTER_NAME=tf2pickup.eu
# Welcome message sent to clients when they connect.
MUMBLE_CONFIG_WELCOMETEXTFILE=/welcome_text.txt
# Location for custom SSL certificate/key. If your certificate and key is in one file, specify MUMBLE_CONFIG_SSL_KEY only.
# If you use certbot for getting certificates, you might need to give your service user permissions to the folder with certificates:
# setfacl -R -m u:tf2pickup:rx,d:tf2pickup:rx /etc/letsencrypt/live
# setfacl -R -m u:tf2pickup:rx,d:tf2pickup:rx /etc/letsencrypt/archive
# IMPORTANT: this will give your service user access to ALL folders containing certificates, so if you have other certificates there you do not want to be access by the tf2pickup user
# consider using acme.sh for obtaining SSL certificates instead
MUMBLE_CONFIG_SSL_CERT=/certs/fullchain.pem
MUMBLE_CONFIG_SSL_KEY=/certs/privkey.pem
# allows you to specify a PEM-encoded file with Diffie-Hellman parameters,
# which will be used as the default Diffie-Hellman parameters for all virtual servers.
# If a file is not specified, each Murmur virtual server will auto-generate its own unique set of 2048-bit Diffie-Hellman parameters on first launch.
MUMBLE_CONFIG_SSLDHPARAMS=@ffdhe4096
# Specifies a percentage of users on the server supporting the Opus codec before the entire server mandates Opus is used.
# It defaults to 100, so that any non-Opus supporting client connecting will cause the entire server to fall back to CELT.
MUMBLE_CONFIG_OPUSTHRESHOLD=0
# Maximum bandwidth (in bits per second) clients are allowed
# to send speech at.
MUMBLE_CONFIG_BANDWIDTH=1300000
# Maximum number of concurrent clients allowed.
MUMBLE_CONFIG_USERS=420
# Disable text message size limit
MUMBLE_CONFIG_TEXTMESSAGELENGTH=0
# Disable image size limit
MUMBLE_CONFIG_IMAGEMESSAGELENGTH=0
Setting up Steam API key
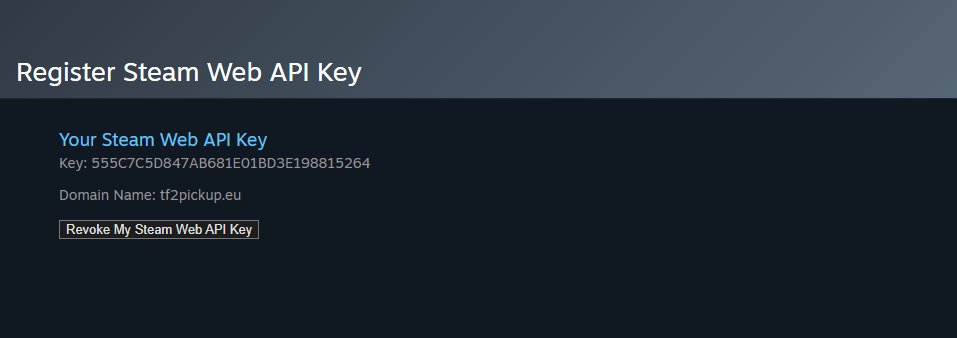
This is probably the easiest API key to get from all tasks here - open Steam Web API Key site, enter tf2pickup.eu in the Domain Name field, agree for Steam Web API Terms of Use and click Register.
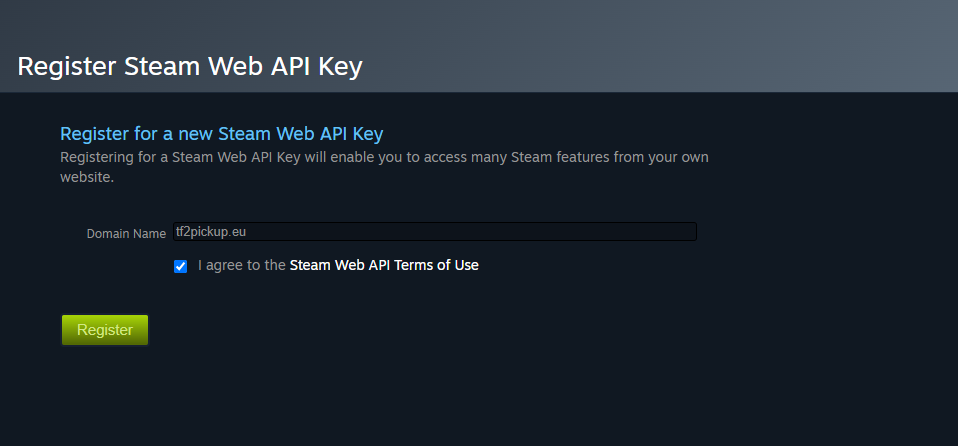
Then, copy and pass Key value to a STEAM_API_KEY variable.
Setting up Discord bot with channels
This step is optional. Follow these steps only if you own a Discord which is directed for the pickup community.
Discord integration enables:
- pickup gather up notification on a public channel,
- substitute notifications when they are needed during a game,
- administration notifications, such as:
- player bans,
- player unbans,
- skill changes,
- player role changes,
- player nickname changes,
- new player registrations,
- game force-ends,
- tf2pickup server starts.
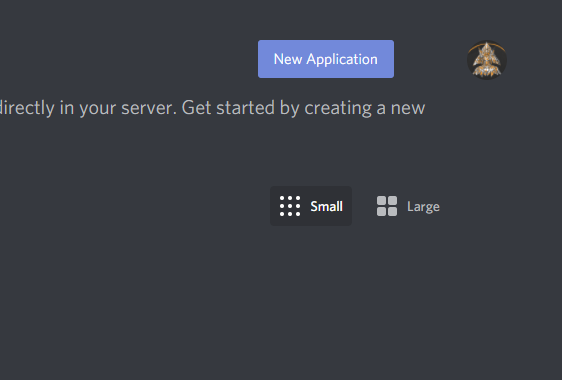
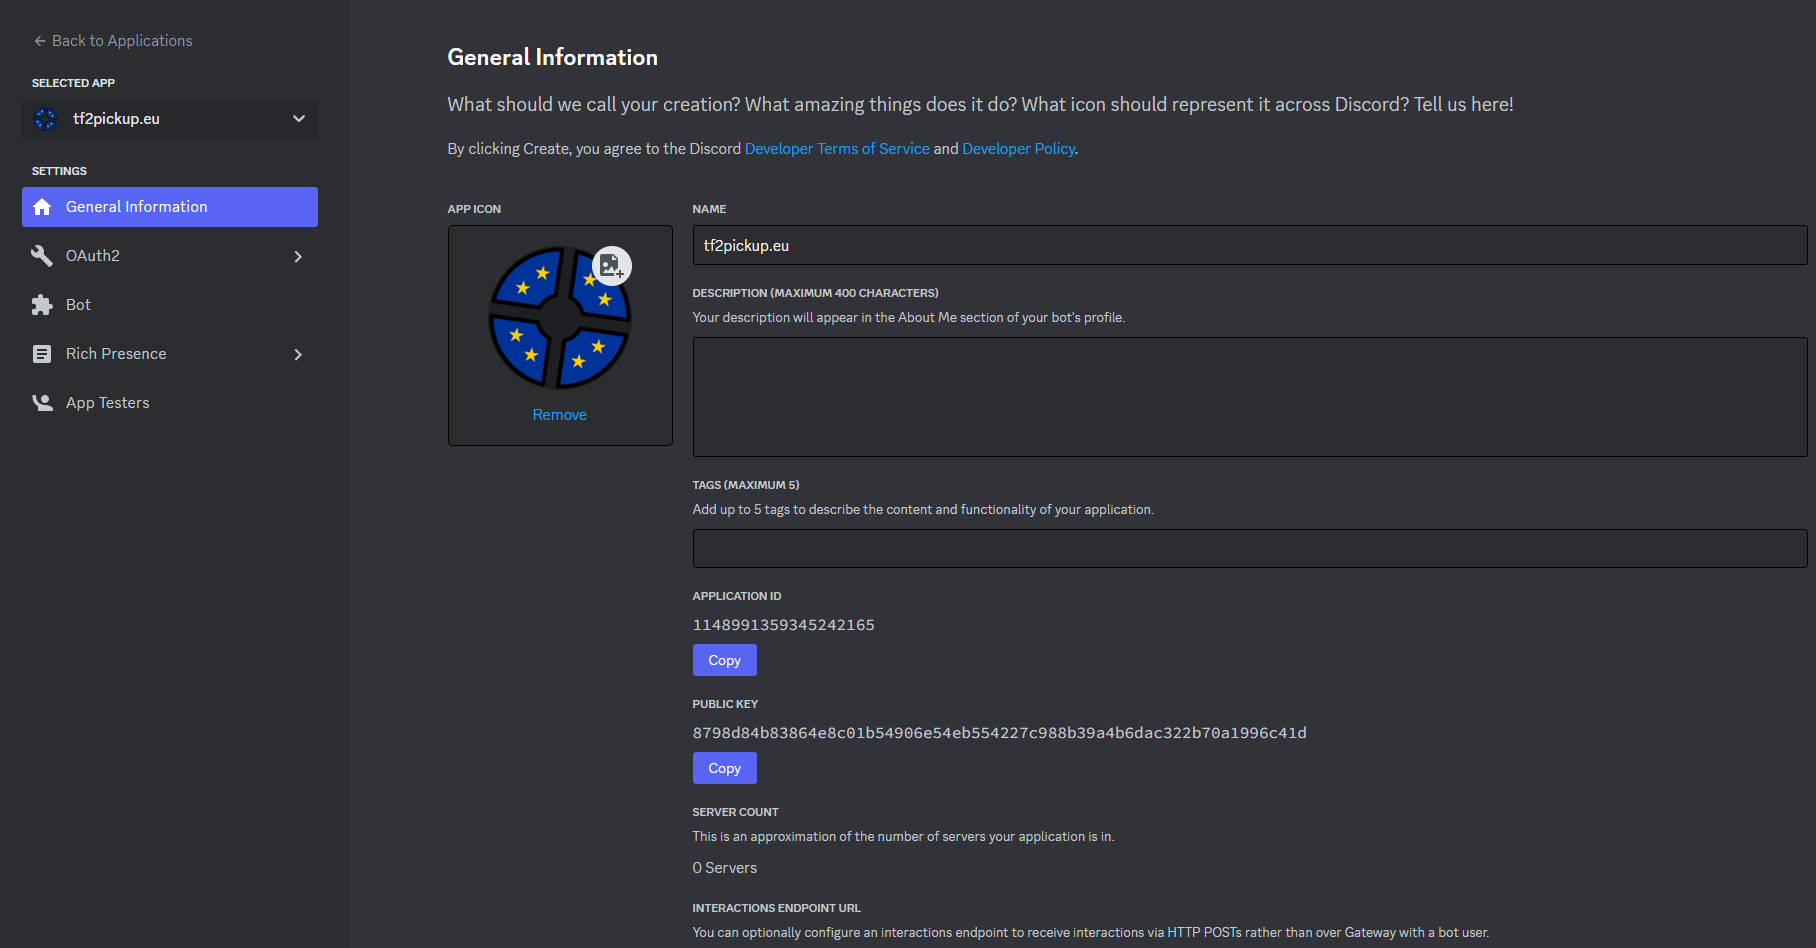
In order to create a bot, you have to enter the Discord Developer Portal in the Applications section. Then, click New Application.
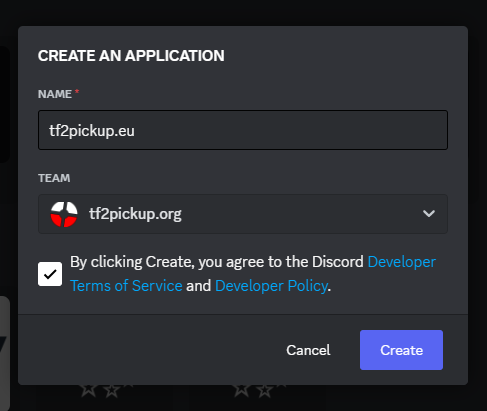
Add a name for the bot and click Create.
After that set the avatar for the application:
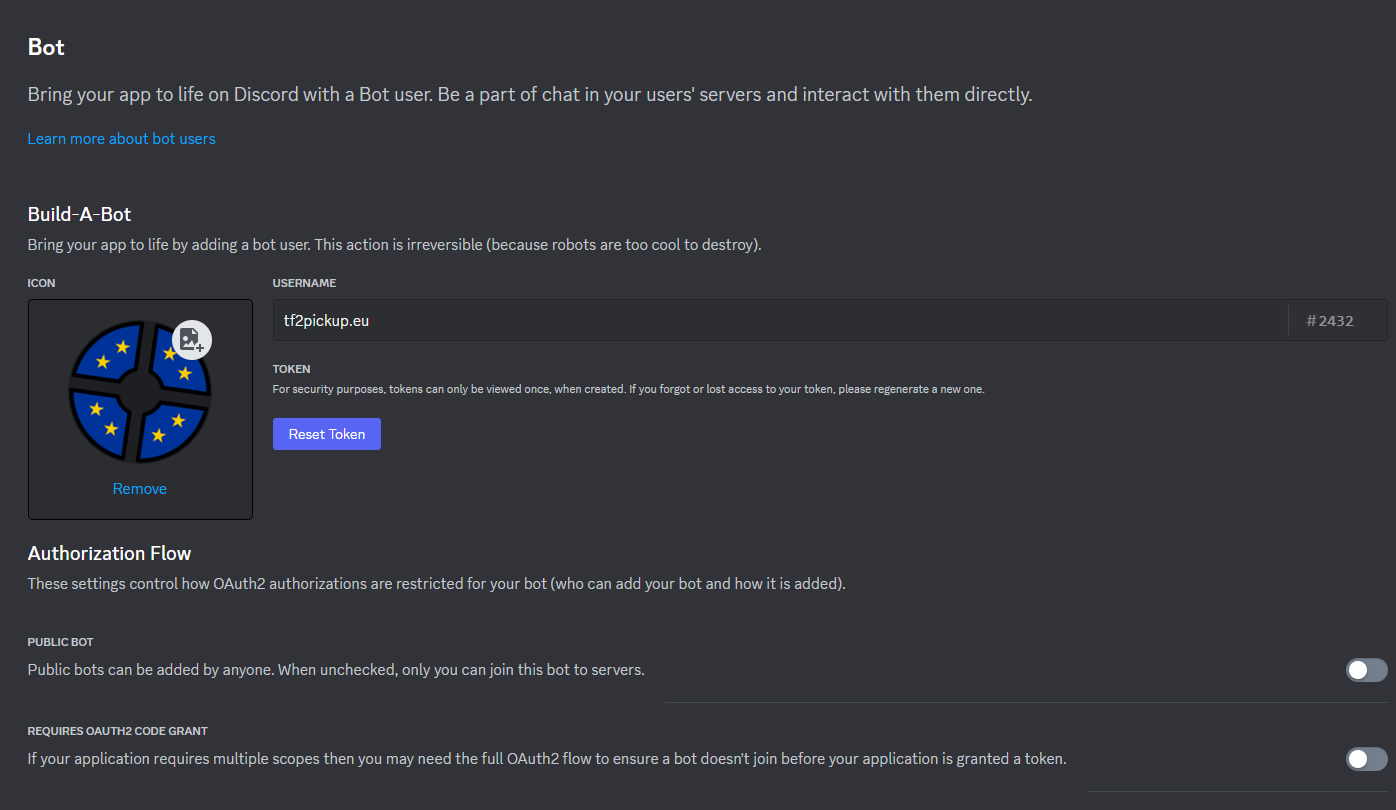
Then go to the bot section. In the menu you can find a token, which you have to pass in the DISCORD_BOT_TOKEN variable. Click Reset Token, enter your 2FA token and click Yes, do it! and note the token in your .env file.
You should untick the Public Bot option, since you don't really want to let anybody invite this bot anywhere else than your Discord server(s) (even though it would be useless, as the bot sends connects to the specified discord server only).
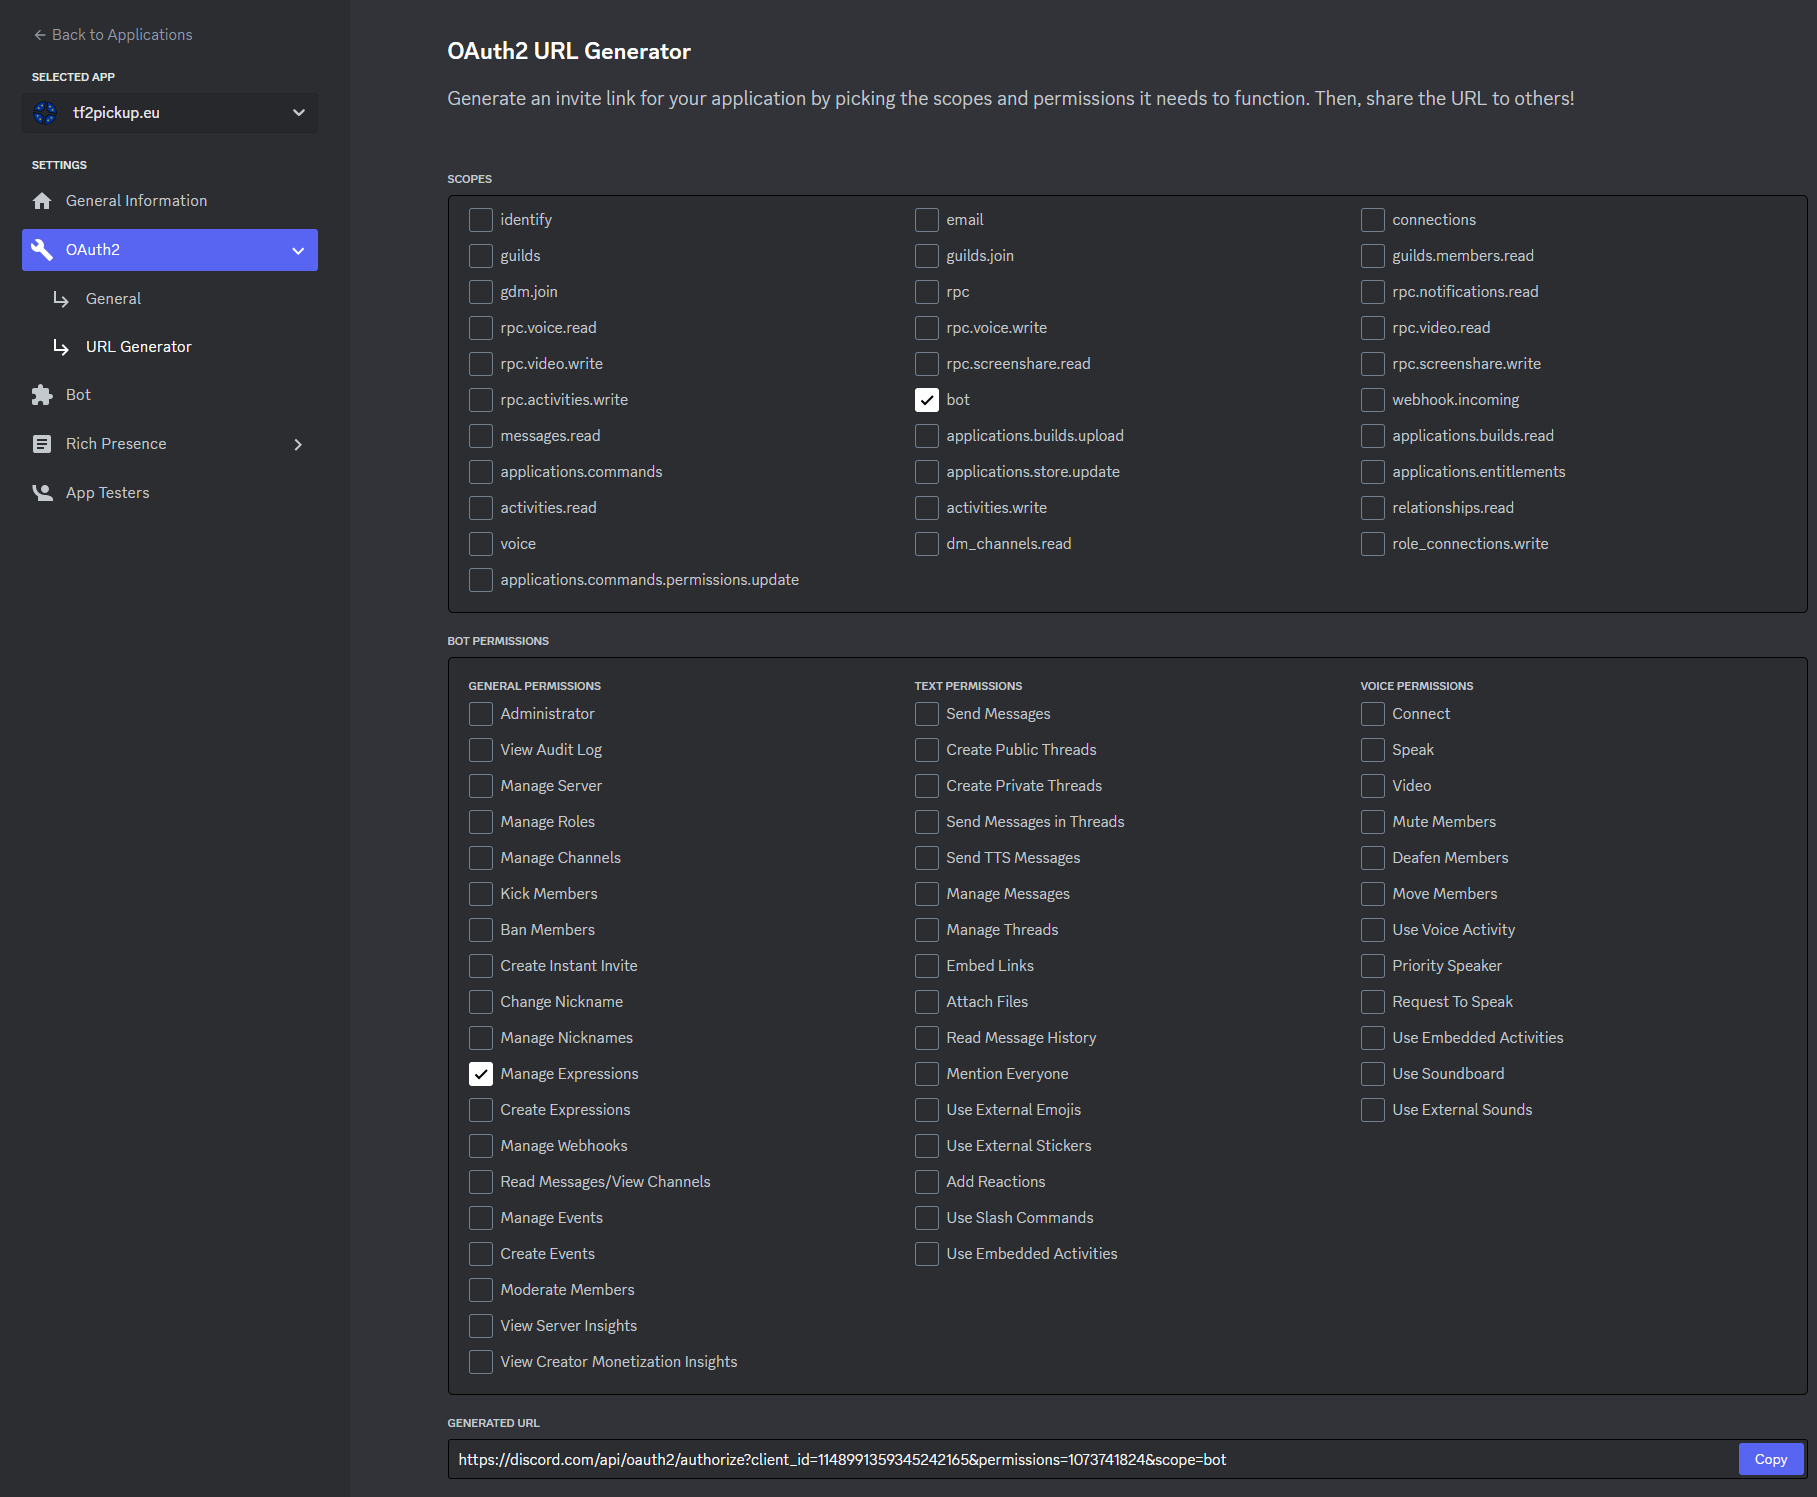
Now you should head over to the OAuth2 section and create a URL allowing you to invite the bot on a server. In the OAuth2 URL Generator section under Scopes tick bot option, then tick Manage Expressions under bot permissions options. That should create a link below. Copy and open it.
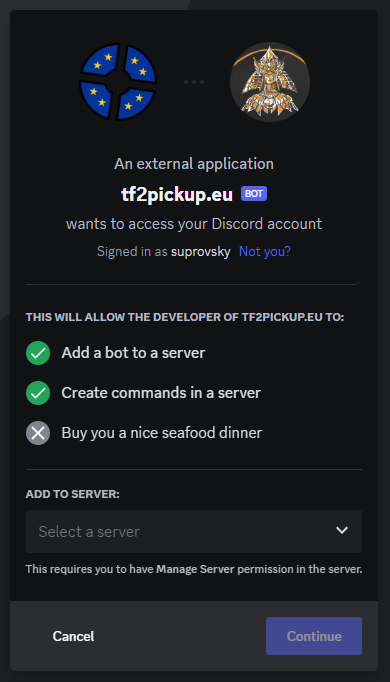
There you should choose the server on which your community is. You have to have Manage Server permissions in order to add the bot on it. Choose the server you want from the dropdown list and click Authorize.
After adding the bot you should configure the channels for it. Administration notifications should be sent on a channel available only for the site staff. We suggest to set permissions in a way where the staff have View Channel and Read Message History permissions and the bot has the following ones:
View Channel,Send Messages,Embed Links,Attach Files,Read Message History.
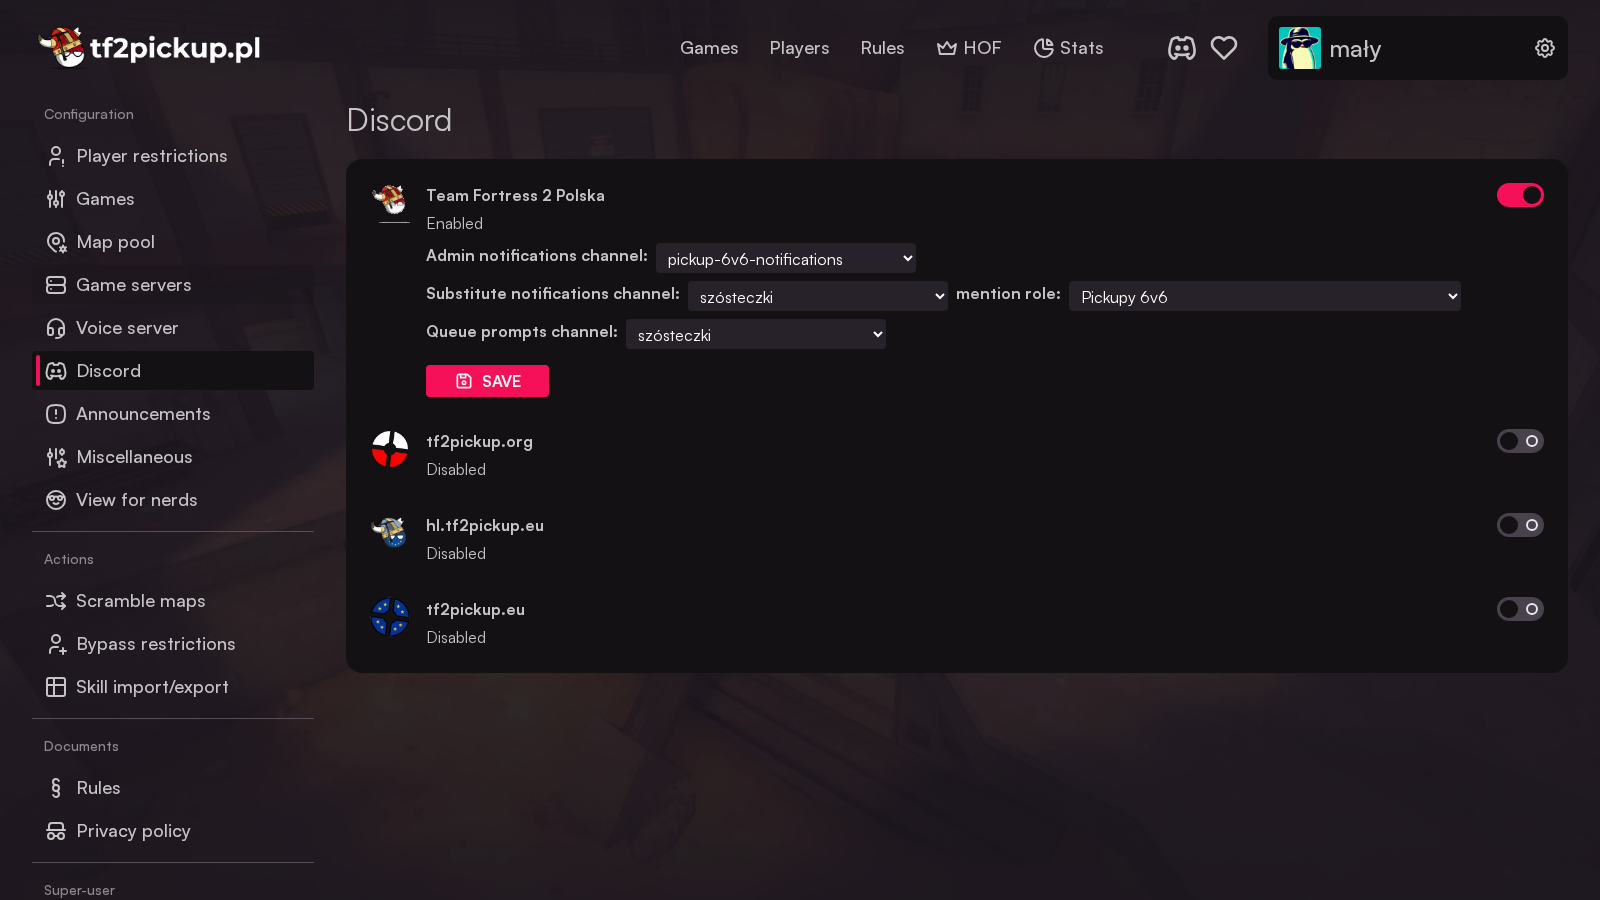
The bot should have the same permissions on a channel supposed to be a place for the pickup gather up and substitute notifications. After that, you should define the rest of the Discord Bot related variables. You should look at the following things:
The Discord server name is tf2pickup.eu and the pickup public notifications channel is #pickup-notifications.
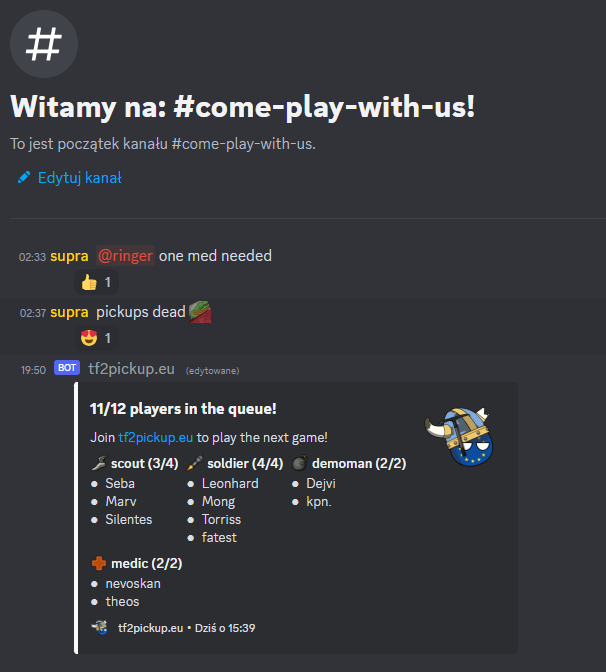
You should also create a role for pinging players when the substitute is needed. In this example this role is called ringer.

The admin notifications channel is called #pickup-notifications.

Therefore, you should define the rest of Discord Bot settings in the panel just like shown below:
Setting up Twitch stream integration
This step is optional. Follow these steps only if you want to let people show up their streams on the main page of the pickup site.
Setting it enables site users to integrate their tf2pickup accounts with Twitch, letting access their Twitch profiles through a Twitch link in an icon.
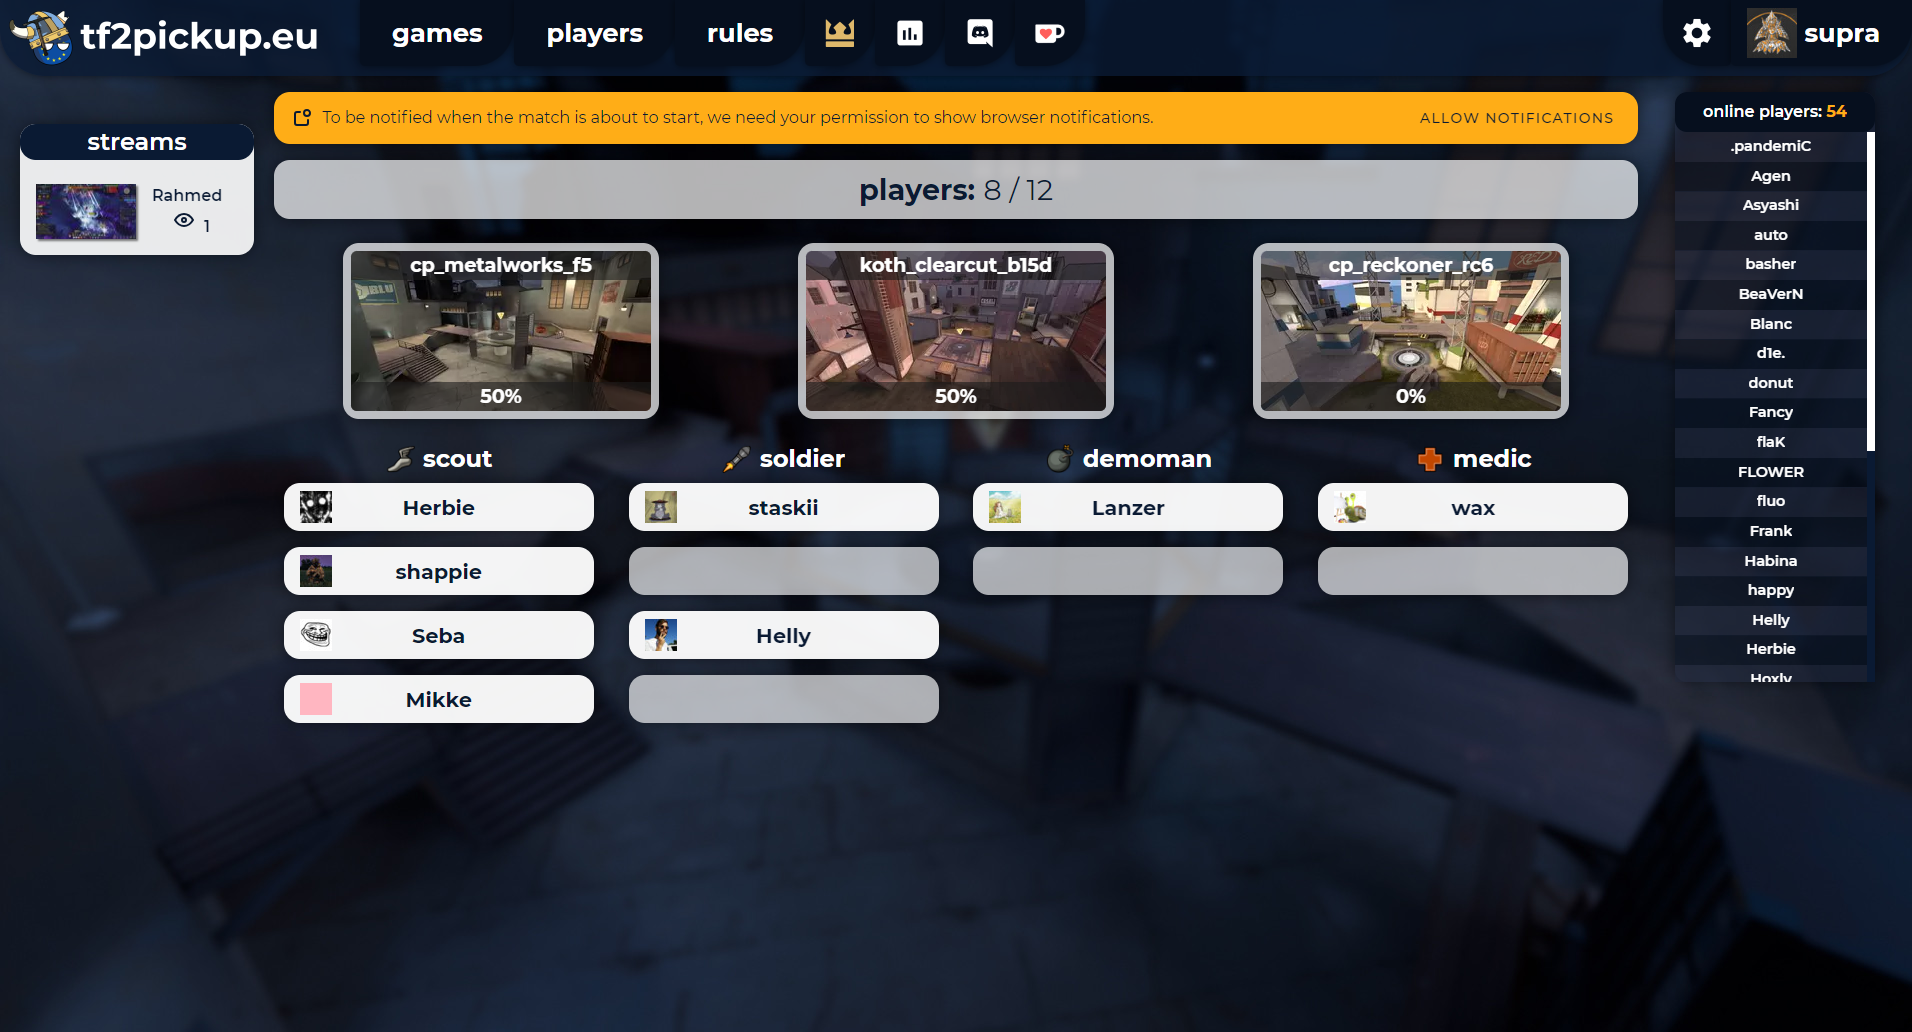
Moreover, it will show up all Twitch streams on a left site of the main page.
Go to the Twitch Developers console and register your new application by clicking Register Your Application:
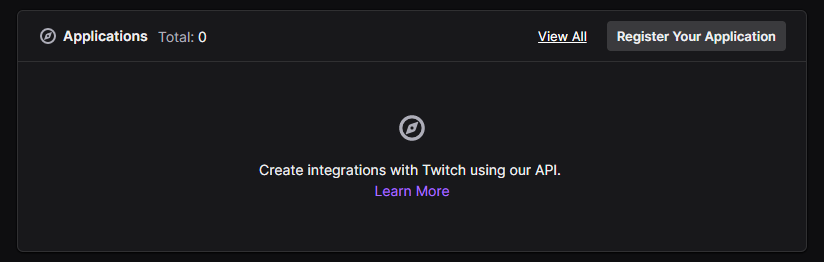
Define application name as tf2pickup.eu with OAuth Redirect URLs as https://tf2pickup.eu/twitch/auth/return. Choose any category - the best one for that purpose would be Website Integration. After defining that verify that you are not a bot and save.
Then, you will see the application list. Find tf2pickup.eu and select Manage. You will be able to see the Client ID, the value used in TWITCH_CLIENT_ID variable. The Client Secret will be hidden, press New Secret and confirm it in the popup. The Client Secret will show up like on the screenshot below:
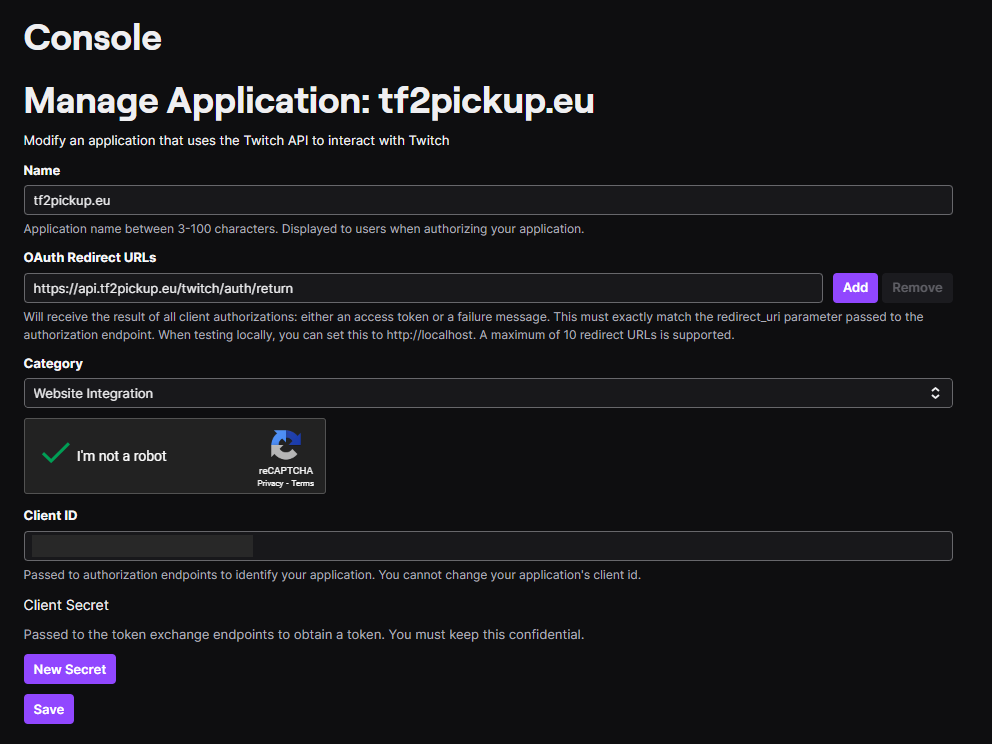
Pass this secret value to the TWITCH_CLIENT_SECRET variable.
Registering on the atlas dashboard
This step is optional. Follow it only if you want your instance to appear on the public atlas.tf2pickup.org dashboard.
atlas.tf2pickup.org is a dashboard that lists all online tf2pickup.org instances. Each registered instance is shown together with its name, address, application version, queue configuration, queue occupancy and the number of players currently online. A link to the dashboard is also available in the footer of every tf2pickup.org instance.
To register your instance, set the ATLAS_SECRET environment variable in your .env file. Once it is set, the instance sends an authenticated heartbeat to atlas at boot, every 3 minutes, and whenever the queue changes. If a heartbeat is not received for 12 hours, the instance is dropped from the dashboard.
# atlas integration (optional)
# Registers this instance on the atlas dashboard (https://atlas.tf2pickup.org).
# Heartbeats are sent only when ATLAS_SECRET is set.
# ATLAS_URL=https://atlas.tf2pickup.org
ATLAS_SECRET=your_atlas_secret
ATLAS_URL defaults to https://atlas.tf2pickup.org and only needs to be set if you run your own atlas instance. The feature is fully optional — when ATLAS_SECRET is unset (the default), nothing is registered, and if atlas is unreachable the instance keeps working normally and only logs a warning.
Mumble server setup
The tf2pickup.org server comes with an integrated bot that manages channels on your Mumble server. It creates a dedicated channel for every game and cleans them up when they are left empty for some time.
In order for the bot to work, you need to give him proper rights to do create, edit and remove channels. The way to do that on Mumble servers is via so-called ACLs (Access Control Lists).
First, set up your Mumble server connection details using the admin panel. After you save the settings, the bot will login and join the selected channel.

To grant him proper privileges, first you need to register the bot. Having done that, edit channel, then select tab named ACL, click Add and type bot's username in the lower field. Next make sure both Applies to sub-channels and Applies to this channel checkboxes are selected and on the right-hand side of the window click Allow checkbox next to the Write ACL label. The channel edit window should look like this:
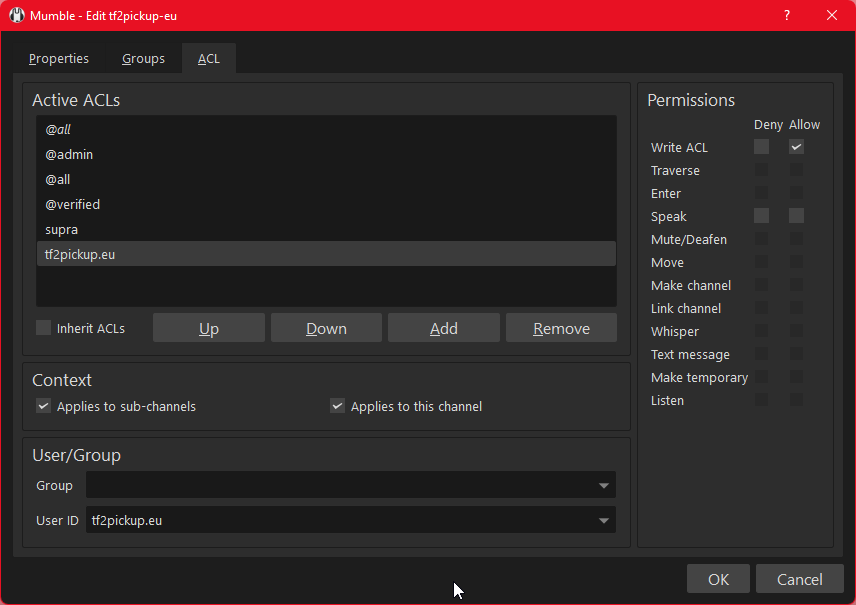
Press OK to save the changes. The bot is supposed to create channels automatically when a game starts on the website. It will create BLU/RED subchannels in it as well. At the end of the game it will link BLU and RED channels, so both teams can communicate. The bot removes leftover channels after a game ends, provided they are empty of users.
gameserver_1.env
# TF2 Game server Configuration

PORT=27015
CLIENT_PORT=27016
STEAM_PORT=27018
STV_PORT=27020

RCON_PASSWORD=funny_rcon_password
SERVER_HOSTNAME="tf2pickup.eu #1"
SERVER_PASSWORD=some_random_password
STV_NAME=tf2pickup.eu TV
STV_TITLE=tf2pickup.eu Source TV

# Website address, must match WEBSITE_URL from .env file
# Can be set in a server.cfg manually by a variable sm_tf2pickuporg_api_address
TF2PICKUPORG_API_ADDRESS=https://tf2pickup.eu

# Secret value used in order to connect to the API, must match GAME_SERVER_SECRET from .env file
# Can be set in a server.cfg manually by a variable sm_tf2pickuporg_secret
TF2PICKUPORG_SECRET=yoursuperfunnygameserversecret

# Optional variable, sets server priority for the server, the default value is 1
# higher value = higher priority
# Can be set in a server.cfg manually by a variable sm_tf2pickuporg_priority
TF2PICKUPORG_PRIORITY=1

# Optional variable, used when the tf2pickup.org server is behind a proxy
# the value is an IP address of the game server, for example 177.54.144.126
# Can be set in a server.cfg manually by a variable sm_tf2pickuporg_override_internal_address
TF2PICKUPORG_OVERRIDE_INTERNAL_ADDRESS=

# Optional variable, used when the tf2pickup.org server has more than one WAN connection which could
# potentially lead to showing a different public IP address of the server than the one all players connect to.
# Can be set in a server.cfg manually by a variable sm_tf2pickuporg_override_public_address
TF2PICKUPORG_OVERRIDE_PUBLIC_ADDRESS=

# Get your demos.tf API key from https://demos.tf/upload
DEMOS_TF_APIKEY=XDXDXDXDXDXDXDXDXDXDXD..XD.XDXDXDXDXDXDXDXDXDXDXDXDXDXDXDXDXDXDXD
gameserver_2.env
# TF2 Gameserver Configuration

PORT=27025
CLIENT_PORT=27026
STEAM_PORT=27028
STV_PORT=27030

RCON_PASSWORD=funny_rcon_password
SERVER_HOSTNAME="tf2pickup.eu #2"
SERVER_PASSWORD=some_random_password
STV_NAME=tf2pickup.eu TV
STV_TITLE=tf2pickup.eu Source TV

# Website address, must match WEBSITE_URL from .env file
# can be set in a server.cfg manually by a variable sm_tf2pickuporg_api_address
TF2PICKUPORG_API_ADDRESS=https://tf2pickup.eu

# Secret value used in order to connect to the API, must match GAME_SERVER_SECRET from .env file
# can be set in a server.cfg manually by a variable sm_tf2pickuporg_secret
TF2PICKUPORG_SECRET=yoursuperfunnygameserversecret

# Optional variable, sets server priority for the server, the default value is 1
# higher value = higher priority
# can be set in a server.cfg manually by a variable sm_tf2pickuporg_priority
TF2PICKUPORG_PRIORITY=1

# Optional variable, used when the tf2pickup.org server is behind a proxy
# the value is an IP address of the game server, for example 177.54.144.126
# can be set in a server.cfg manually by a variable sm_tf2pickuporg_override_internal_address
TF2PICKUPORG_OVERRIDE_INTERNAL_ADDRESS=

# Get your demos.tf API key from https://demos.tf/upload
DEMOS_TF_APIKEY=XDXDXDXDXDXDXDXDXDXDXD..XD.XDXDXDXDXDXDXDXDXDXDXDXDXDXDXDXDXDXDXD
gameserver_3.env
# TF2 Gameserver Configuration

PORT=27035
CLIENT_PORT=27036
STEAM_PORT=27038
STV_PORT=27040

RCON_PASSWORD=funny_rcon_password
SERVER_HOSTNAME="tf2pickup.eu #3"
SERVER_PASSWORD=some_random_password
STV_NAME=tf2pickup.eu TV
STV_TITLE=tf2pickup.eu Source TV

# Website address, must match WEBSITE_URL from .env file
# can be set in a server.cfg manually by a variable sm_tf2pickuporg_api_address
TF2PICKUPORG_API_ADDRESS=https://tf2pickup.eu

# Secret value used in order to connect to the API, must match GAME_SERVER_SECRET from .env file
# can be set in a server.cfg manually by a variable sm_tf2pickuporg_secret
TF2PICKUPORG_SECRET=yoursuperfunnygameserversecret

# Optional variable, sets server priority for the server, the default value is 1
# higher value = higher priority
# can be set in a server.cfg manually by a variable sm_tf2pickuporg_priority
TF2PICKUPORG_PRIORITY=1

# Optional variable, used when the tf2pickup.org server is behind a proxy
# the value is an IP address of the game server, for example 177.54.144.126
# can be set in a server.cfg manually by a variable sm_tf2pickuporg_override_internal_address
TF2PICKUPORG_OVERRIDE_INTERNAL_ADDRESS=

# Get your demos.tf API key from https://demos.tf/upload
DEMOS_TF_APIKEY=XDXDXDXDXDXDXDXDXDXDXD..XD.XDXDXDXDXDXDXDXDXDXDXDXDXDXDXDXDXDXDXD
docker-compose.yml for all in one setup (website + gameservers + mumble)
If you don't want to use Mumble, feel free to remove the 'mumble-server' part of the file.
Examples below use bitnami/mongodb image, which is a hardened non-root image. Using it is optional - you are also fine with the official image for this container, however environment variables are named differently.
services:
  tf2pickup:
    depends_on:
      - mongodb
    image: ghcr.io/tf2pickup-org/tf2pickup:latest
    restart: always
    ports:
    - '3000:3000'
    - '9871:9871/udp'
    env_file:
    - ./.env

  mumble-server:
    image: mumblevoip/mumble-server:latest
    ports:
      - '64738:64738/tcp'
      - '64738:64738/udp'
    restart: always
    volumes:
      - mumble-data:/data
      - /etc/localtime:/etc/localtime:ro
      - /etc/letsencrypt/live/tf2pickup.eu/fullchain.pem:/certs/fullchain.pem:ro
      - /etc/letsencrypt/live/tf2pickup.eu/privkey.pem:/certs/privkey.pem:ro
      - ./welcome_text.txt:/welcome_text.txt:ro
    env_file:
      - ./.env

  mongodb:
    image: bitnami/mongodb:4.4
    # you can set the tag to the 'latest', '5.0' or '6.0', however it requires your host CPU to have AVX instructions available
    # which is not a case for all hostings, for example Hetzner's VPS support it but Netcup.de's VPS not
    restart: always
    volumes:
    - database-data:/bitnami/mongodb
    env_file:
      - ./.env

  gameserver1:
    image: ghcr.io/tf2pickup-org/tf2-gameserver:latest
    network_mode: host
    restart: always
    volumes:
     - ./maps:/home/tf2/server/tf/maps:rw
     - ./sourcetv1:/home/tf2/server/tf/demos
     - ./smlogs1:/home/tf2/server/tf/addons/sourcemod/logs
     - ./logs1:/home/tf2/server/tf2/logs
    env_file:
     - ./gameserver_1.env

  gameserver2:
    image: ghcr.io/tf2pickup-org/tf2-gameserver:latest
    network_mode: host
    restart: always
    volumes:
     - ./maps:/home/tf2/server/tf/maps:rw
     - ./sourcetv2:/home/tf2/server/tf/demos
     - ./smlogs2:/home/tf2/server/tf/addons/sourcemod/logs
     - ./logs2:/home/tf2/server/tf2/logs
    env_file:
     - ./gameserver_2.env

  gameserver3:
    image: ghcr.io/tf2pickup-org/tf2-gameserver:latest
    network_mode: host
    restart: always
    volumes:
     - ./maps:/home/tf2/server/tf/maps:rw
     - ./sourcetv3:/home/tf2/server/tf/demos
     - ./smlogs3:/home/tf2/server/tf/addons/sourcemod/logs
     - ./logs3:/home/tf2/server/tf2/logs
    env_file:
     - ./gameserver_3.env

volumes:
  database-data:
  mumble-data:
welcome_text.txt
<html>
<h2>Welcome to <b><a href="https://tf2pickup.eu">tf2pickup.eu</a></b> Mumble server.</h2>
In order to be able to join and speak public channels, you must be verified by the tf2pickup.eu Staff.</br>
You can contact them on the <b><a href="https://discord.tf2pickup.eu">tf2pickup.eu Discord</a></b> in case you need any help.
</html>
docker-compose.yml for the website only
services:
  tf2pickup:
    depends_on:
      - mongodb
    image: ghcr.io/tf2pickup-org/tf2pickup:latest
    restart: always
    ports:
    - '3000:3000'
    - '9871:9871/udp'
    env_file:
    - ./.env

  mongodb:
    image: bitnami/mongodb:4.4
    # you can set the tag to the 'latest', '5.0' or '6.0', however it requires your host CPU to have AVX instructions available
    # which is not a case for all hostings, for example Hetzner's VPS support it but Netcup.de's VPS not
    restart: always
    volumes:
    - database-data:/bitnami/mongodb
    env_file:
      - ./.env

volumes:
  database-data:
docker-compose.yml for gameservers only
Feel free to remove redundant gameservers from the file if there are more than you actually need.
services:
  gameserver1:
    image: ghcr.io/tf2pickup-org/tf2-gameserver:latest
    network_mode: host
    restart: always
    volumes:
    - ./maps:/home/tf2/server/tf/maps:rw
    - ./sourcetv1:/home/tf2/server/tf/demos
    - ./smlogs1:/home/tf2/server/tf/addons/sourcemod/logs
    - ./logs1:/home/tf2/server/tf2/logs
    env_file:
    - ./gameserver_1.env

  gameserver2:
    image: ghcr.io/tf2pickup-org/tf2-gameserver:latest
    network_mode: host
    restart: always
    volumes:
    - ./maps:/home/tf2/server/tf/maps:rw
    - ./sourcetv2:/home/tf2/server/tf/demos
    - ./smlogs2:/home/tf2/server/tf/addons/sourcemod/logs
    - ./logs2:/home/tf2/server/tf2/logs
    env_file:
    - ./gameserver_2.env

  gameserver3:
    image: ghcr.io/tf2pickup-org/tf2-gameserver:latest
    network_mode: host
    restart: always
    volumes:
    - ./maps:/home/tf2/server/tf/maps:rw
    - ./sourcetv3:/home/tf2/server/tf/demos
    - ./smlogs3:/home/tf2/server/tf/addons/sourcemod/logs
    - ./logs3:/home/tf2/server/tf2/logs
    env_file:
    - ./gameserver_3.env
Giving tf2pickup user access to Docker commands
This step is optional. By default, the only user allowed to utilize Docker commands is root.
This one is simple, all you have to do is to add tf2pickup user to the group called docker:
# gpasswd -a tf2pickup docker
Refreshing Mumble SSL certificates
Since Mumble is utilizing certificates being renewed by Certbot, it must refresh certificates after renewal. In that case a SIGUSR1 signal can be sent to the server, so it will not shut down completely, by adding this line to your root's crontab file:
0 1 20 * * docker kill --signal="SIGUSR1" tf2pickup-eu-mumble-server-1
First site start
If you use the Bitnami MongoDB image, it does not use the root user (UID 0) to control the service within the container. The service is supposed to run as a user with UID 1001 (you can overwrite the ID in docker-compose.yml), so in order to let the service work you must set the right permissions for its data folder.
When you have all the configuration files mentioned above ready to go, change docker-compose.yml in the following way:
  mongodb:
    command: sleep infinity
    image: bitnami/mongodb:4.4
    restart: always
    volumes:
    - database-data:/bitnami/mongodb
    env_file:
      - ./.env
The difference is within a parameter command. After that, start it with docker compose up -d mongodb. Then change the permissions:
docker exec -i -u 0 tf2pickup-eu-mongodb-1 chown -R 1001:1001 /bitnami/mongodb
When it's done, remove the command parameter line from docker-compose.yml and run docker compose up -d in order to start the entire stack. Each time you would like to stop the application stack, you are supposed to execute command docker compose stop and docker compose start -d when you start the stack. Containers have a restart always policy meaning the containers will always restart on fail, so it will also always start on a system boot as long as docker.service service is also starting on system boot.